GitHub
Step-by-Step Guide: Airgap Installation of Walrus for Streamlined Software Delivery


In the recent release of Walrus 0.4.1, a brand new application model has been introduced. This model allows operations teams to configure applications once, enabling them to run polymorphically. Essentially, DevOps engineers can now deploy a comprehensive range of applications, along with their associated resources, across diverse infrastructures and environments without the need for reconfiguration.
Using Walrus significantly reduces the workload of DevOps engineers and shields developers from the underlying infrastructure's complexity.
However, some users may be unable to directly download the Walrus installation image due to network restrictions. This article provides instructions for installing and deploying Walrus in an intranet environment.
Prerequisites
Before airgap installation, please prepare:
Provide an intranet container registry, e.g. Harbor;
Provide an intranet Git-based code repository, e.g. GitLab;
Allow access from the Walrus server to the container registry and the code repository.
Preparing offline images
Retrieve the walrus-images.txt, walrus-save-images.sh and walrus-load-images.sh files from Walrus Releases for downloading offline images and pushing them to the container registry.
1. Use walrus-save-images.sh to download offline images on a Docker host with internet access:
sh walrus-save-images.sh --image-list walrus-images.txt
2. Upload the saved offline image package walrus-images.tar.gz and walrus-load-images.sh to a Docker host that has access to the container registry. Use walrus-load-images.sh to upload the offline images. Taking Harbor as an example for the container registry (if not, ensure to create a sealio project in the container registry beforehand).
  docker login registry.example.com --username admin --password Harbor12345
  sh walrus-load-images.sh --registry registry.example.com --harbor-user admin --harbor-password Harbor12345
Preparing offline catalog
Fork or import all repositories from the Built-in catalog into the code repository.
You can refer to the following script to clone all repositories from walrus-catalog in batches and upload them to the code repository. Each repository needs to correspond to a specific internal repository, such as a GitLab Project.
  #!/bin/bash

  # Walrus catalog org
  ORG_NAME="walrus-catalog"

  # Get all repos in the Walrus catalog org
  REPOS=$(curl -s "https://api.github.com/orgs/$ORG_NAME/repos" | jq -r '.[].name')

  for REPO_NAME in $REPOS; do
    # Clone repo
    git clone "https://github.com/$ORG_NAME/$REPO_NAME"
  done

  echo "All done!"
Install Walrus
Standalone Installation
Update the image in Standalone Installation according to the intranet contianer registry. Additionally, add the environment variables SERVER_SETTING_IMAGE_REGISTRY and SERVER_SETTING_DEPLOYER_IMAGE, pointing to the intranet container registry and the offline Deployer image.
  sudo docker run -d --privileged --restart=always --name walrus \
    -p 80:80 -p 443:443 \
    -e SERVER_SETTING_IMAGE_REGISTRY='registry.example.com' \
    -e SERVER_SETTING_DEPLOYER_IMAGE='registry.example.com/sealio/terraform-deployer:v0.1.4-airgap'  \
    registry.example.com/sealio/walrus:v0.4.1
If your container registry is a private registry that requiring authentication to pull images, additional configuration is needed. The steps are as follows.
For Standalone Installation of Walrus, the built-in K3s is used as the underlying runtime environment. If there is a need to configure K3s to pull images from a private registry, you should mount the registries.yaml into the Walrus server.
1. On the host where the Walrus server will run, create the registries.yaml:
  mkdir -p /etc/walrus/k3s
  vim /etc/walrus/k3s/registries.yaml
Fill in the following YAML content, replacing it with your container registry, username and password. If the private registry uses an untrusted TLS certificate, use the insecure_skip_verify parameter to skip certificate verification. If not needed, simply remove it:
  mirrors:
    docker.io:
      endpoint:
        - "https://registry.example.com"
   registry.example.com:
     endpoint:
        - "https://registry.example.com"
  configs:
   "registry.example.com":
     auth:
        username: xxxxxx # This is the registry username
        password: xxxxxx # This is the registry password
      tls:
       insecure_skip_verify: true
2. When running the Walrus, mount the registries.yaml into the Walrus server:
  sudo docker run -d --privileged --restart=always --name walrus \
    -p 80:80 -p 443:443 \
    -e SERVER_SETTING_IMAGE_REGISTRY='registry.example.com' \
    -e SERVER_SETTING_DEPLOYER_IMAGE='registry.example.com/sealio/terraform-deployer:v0.1.4-airgap'  \
    -v /etc/walrus/k3s/registries.yaml:/etc/rancher/k3s/registries.yaml \
    registry.example.com/sealio/walrus:v0.4.1
3. After the Walrus server is running, enter the Walrus container to verify if the private registry configuration is effective:
  docker exec -it walrus bash
  cat /var/lib/k3s/agent/etc/containerd/config.toml
For more details, refer to the official K3s documentation K3s Private Registry Configuration.
4. Access the Walrus UI, and after the initial login, navigate to https://
High Availability Installation
Update the image in High Availability Installation according to the intranet contianer registry. Additionally, add the SERVER_SETTING_IMAGE_REGISTRY and SERVER_SETTING_DEPLOYER_IMAGE environment variables to the Walrus deployment, pointing to the intranet container registry and the offline Deployer image.
vim walrus.yaml
  apiVersion: apps/v1
  kind: Deployment
  metadata:
    name: walrus
    namespace: walrus-system
  spec:
    ...
    template:
      ...
      spec:
        containers:
          - name: walrus-server
            image: sealio/walrus:v0.4.1
            ...
            env:
              - name: SERVER_SETTING_IMAGE_REGISTRY
                value: registry.example.com
              - name: SERVER_SETTING_DEPLOYER_IMAGE
                value: registry.example.com/sealio/terraform-deployer:v0.1.4-airgap
  ...
kubectl apply -f walrus.yaml
If your container registry is a private registry that requiring authentication to pull images, additional configuration is needed. The steps are as follows.
1. To pull images from a private registry, Kubernetes requires credentials. First, create a credential secret:
  kubectl create secret docker-registry registry-credential \
    --docker-server=\
    --docker-username=\
    --docker-password=\
    --docker-email=
Modify the YAML in High Availability Installation, add the imagePullSecrets to several Deployments,and then deploy Walrus following the steps for High Availability Installation. This ensures that kubelet can pull images from the private registry when creating Pods.
vim walrus.yaml
  apiVersion: apps/v1
  kind: Deployment
  ...
  spec:
   ...
   template:
     ...
     spec:
       containers:
       ...
        imagePullSecrets:
        - name: registry-credential
  ...
kubectl apply -f walrus.yaml
3. Access the Walrus UI, and after the initial login, navigate to https://
Using intranet catalog
1. Disable the built-in catalog:
Navigate to System Settings -> Server Management, edit Template Catalog Settings, disable Use built-in catalog and save.
2. If the intranet catalog uses an untrusted TLS certificate, you can disable Walrus's certificate verification for catalogs (optional):
Navigate to System Settings -> Server Management, edit Certificate Settings, enable Skip certificate authentication and save.
3. Remove the built-in catalog and add the intranet catalog:
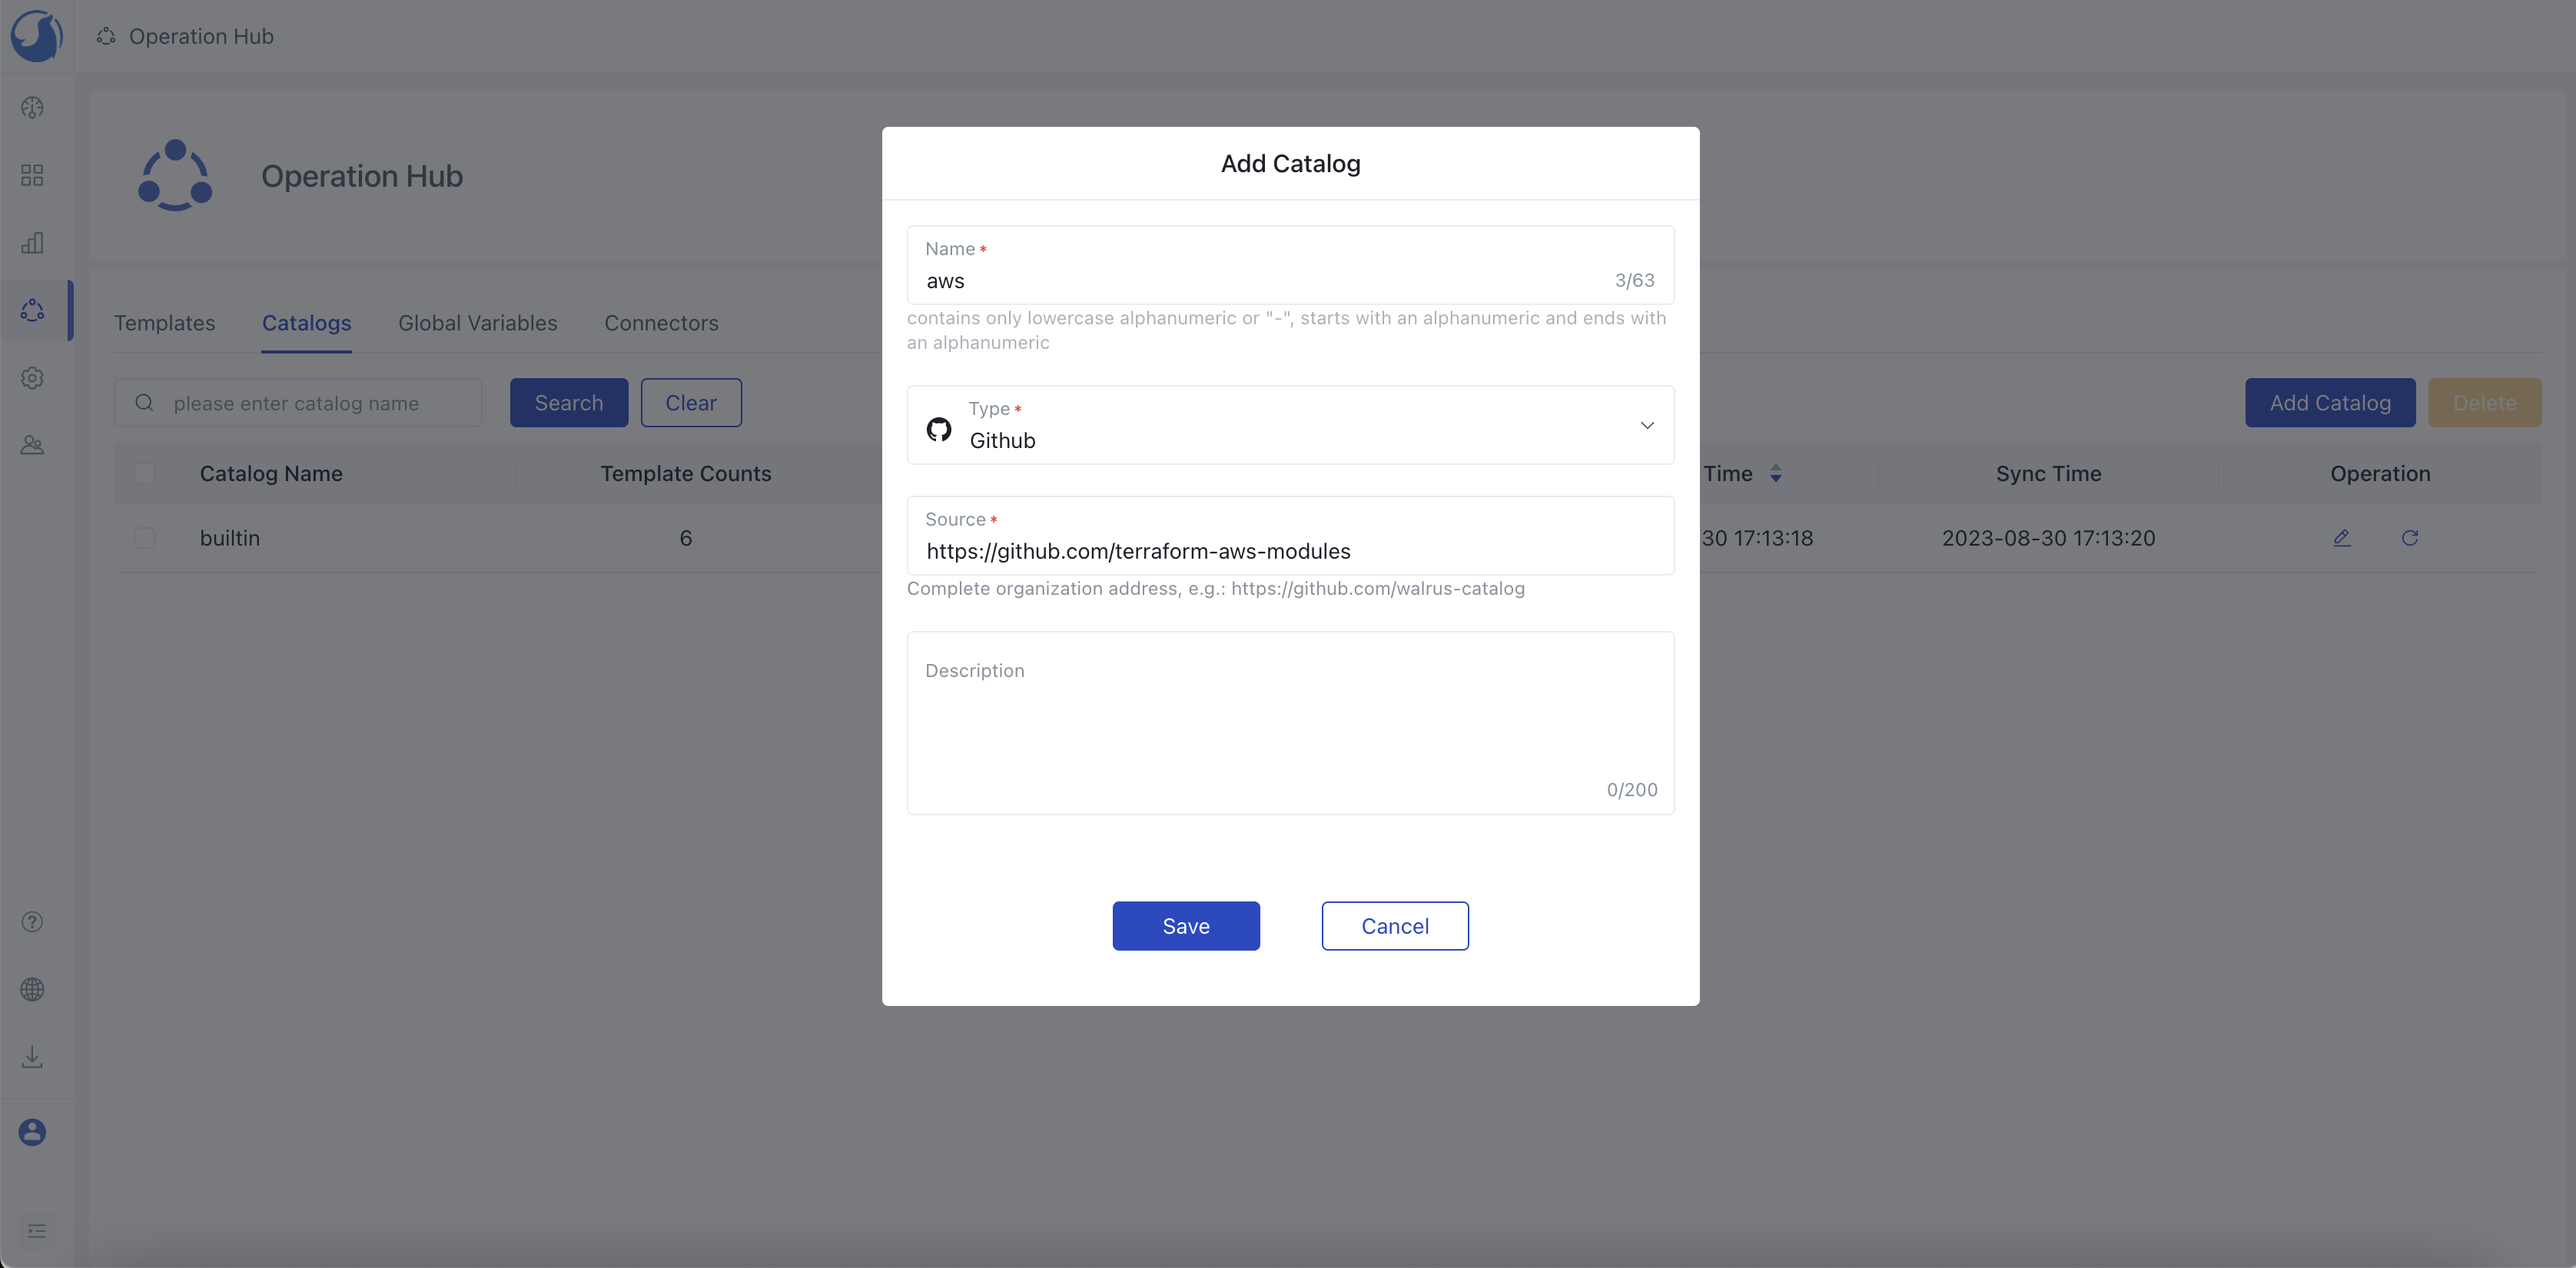
Navigate to Operation Hub -> Catalogs, check the builtin catalog, and choose to delete it.
And then choose Add Catalog, enter the catalog's name, description, source and choose type. For the source address, provide the complete git organization/group URL of the intranet catalog, such as https://github.com/walrus-catalog. Confirm and save.
Confirm that the intranet catalog is refreshing correctly. Navigate to Operation Hub -> Templates and verify that the templates load successfully.
Note:
OpenAI-related features (AI Draft Template) are not available in offline environments.
If custom connectors are required, i.e., custom Terraform Providers, it's necessary to configure the mirror for the custom provider. Refer to https://developer.hashicorp.com/terraform/cli/commands/providers/mirror for guidance.
Now that you have successfully installed Walrus in an offline environment, you can begin to enjoy the clean and simple deployment and delivery of your application!
Welcome to the community!
Discord: https://discord.gg/fXZUKK2baF
Twitter: https://twitter.com/Seal_io
LinkedIn: https://www.linkedin.com/company/seal-io