GitHub
How to Deploy Llama2 on AWS with Walrus in minutes


In the realm of artificial intelligence, the advent of large language models has been nothing short of a revolution. Models like GPT-4, and more recently, Llama2, have ushered in a new era of natural language understanding and generation. However, while the development and training of these models mark significant milestones, their true value is unlocked only when they are effectively deployed and integrated into practical use cases.
In this blog, we will explore how to deploy Llama2 on AWS with Walrus. Walrus is an open-source application management platform that simplifies application deployment and management on any infrastructure. It helps platform engineers build golden paths for developers and empowers developers with self-service capabilities.
Prerequisites
To follow this tutorial, you will need:
An AWS account with associated credentials, and sufficient permissions to create EC2 instances.
Note: While using CPU is cheaper than GPU, it still incurs costs corresponding to the EC2 instance.
The Simple Way
With Walrus, you can have a running llama-2 instance on AWS with a user-friendly web UI in about a minute. Just follow these steps:
Add the llama-2 Service Template
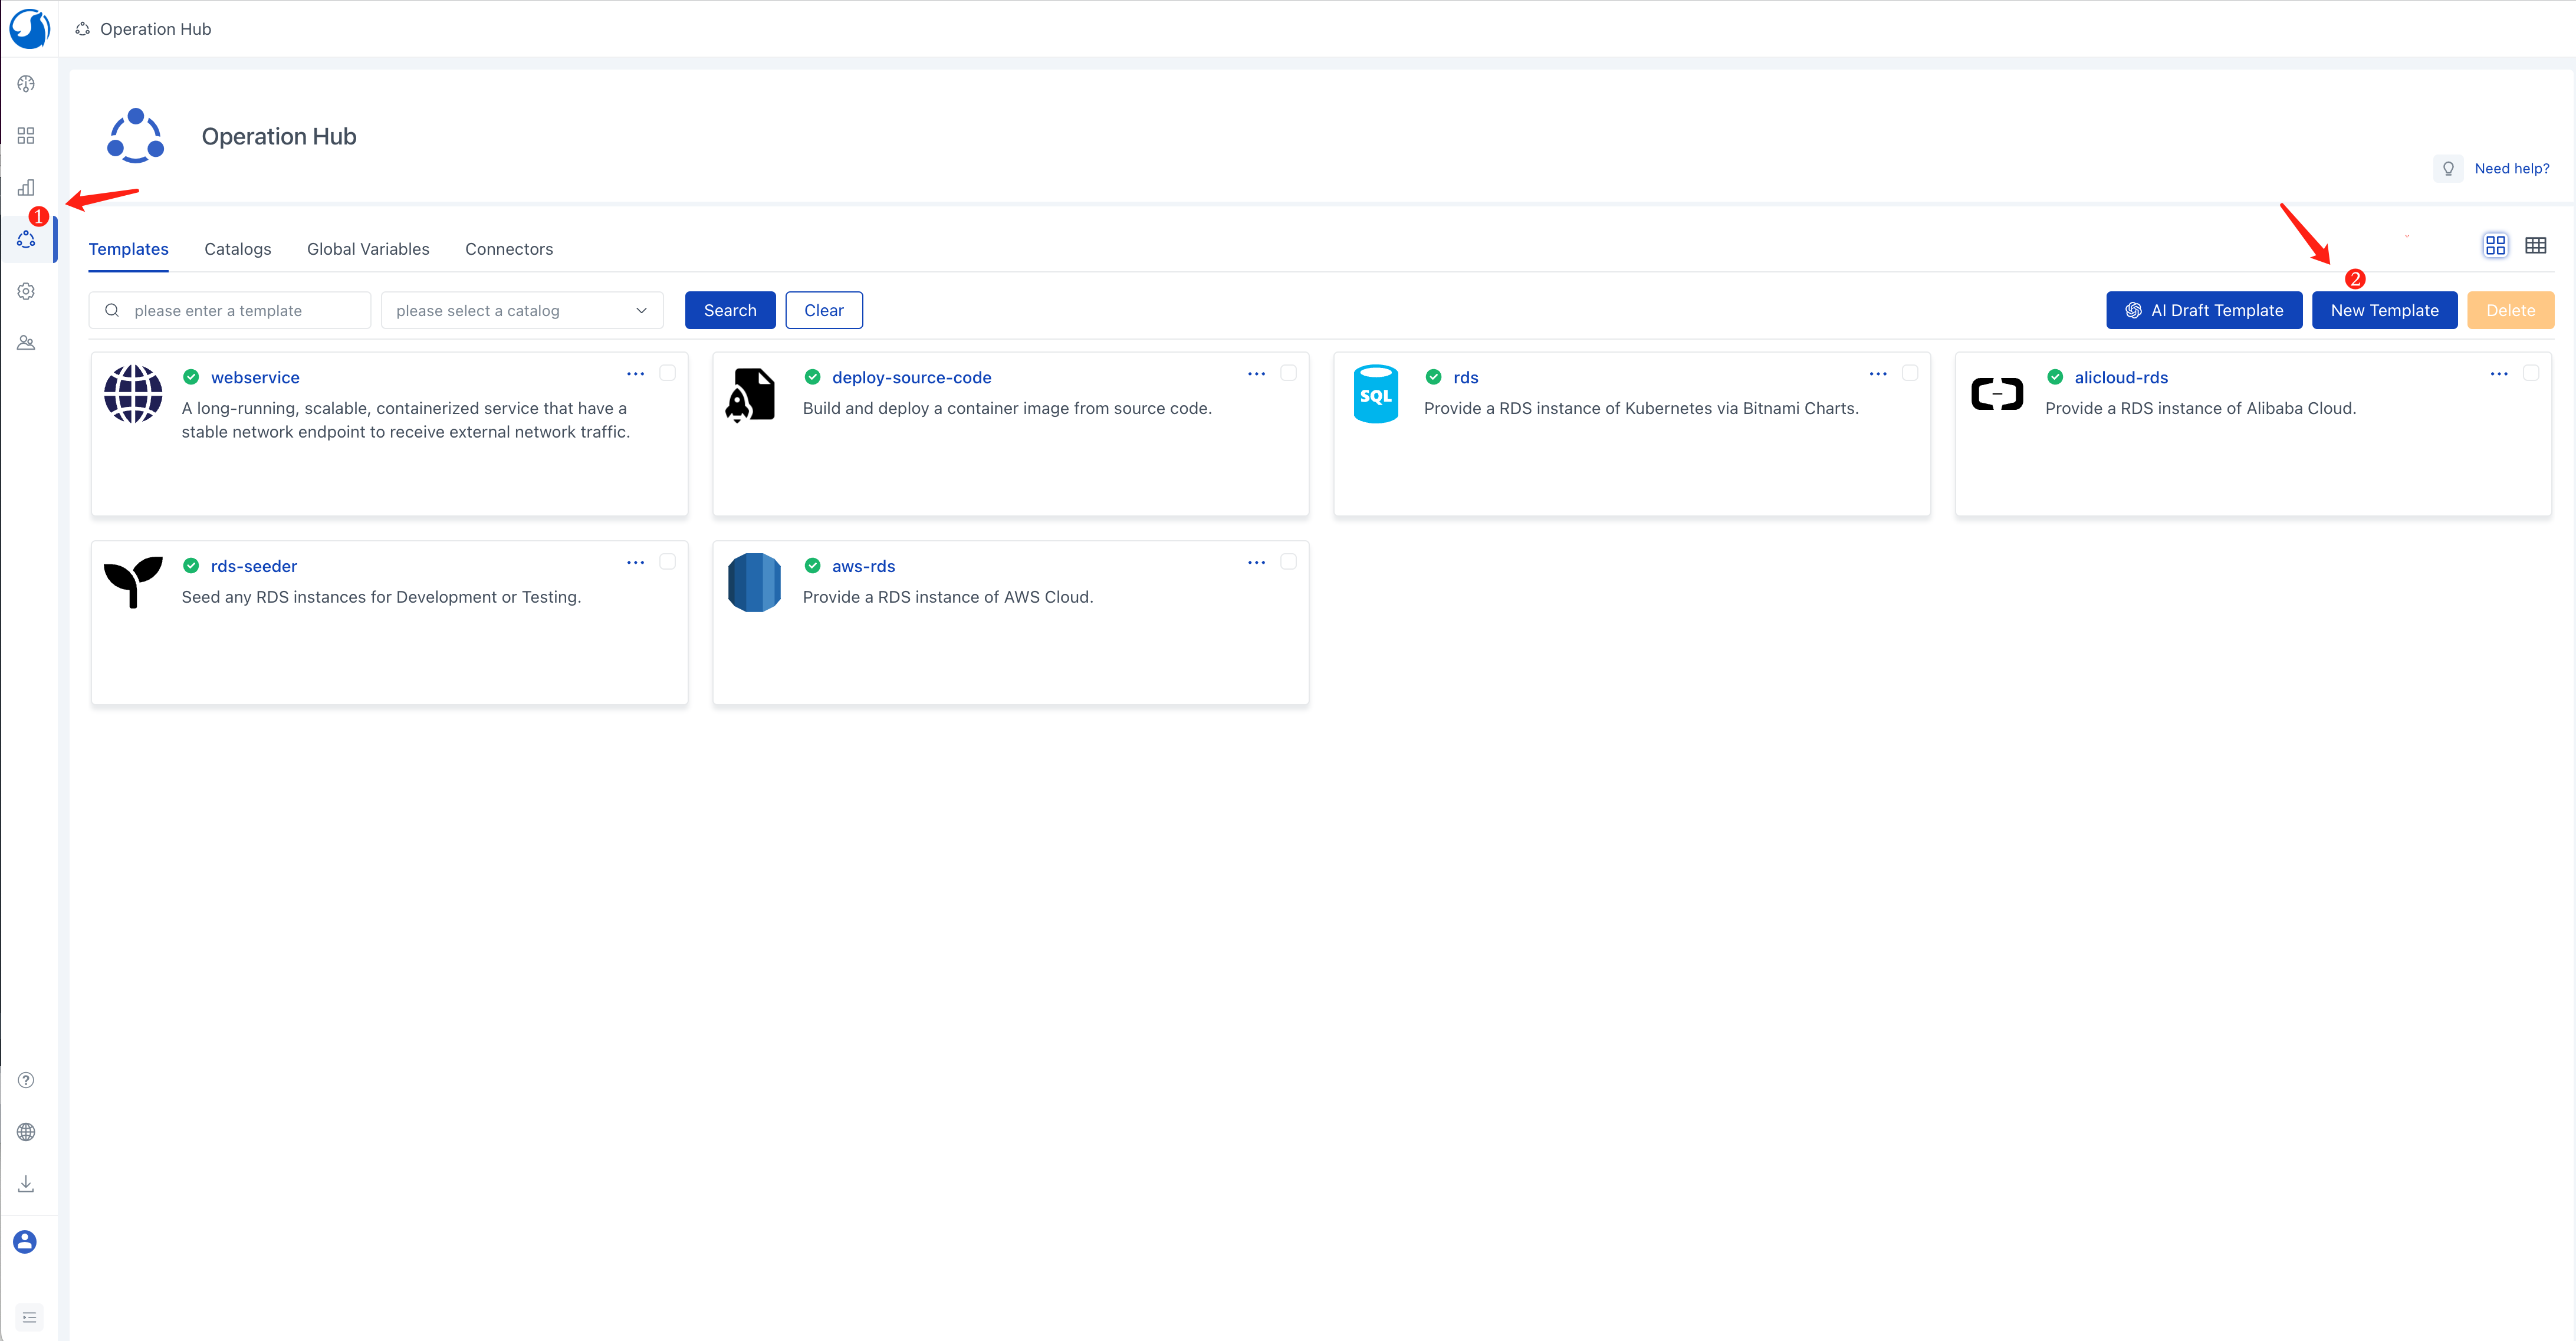
Log in to Walrus, click on Operations Center in the left navigation, go to the Templates tab, and click the New Template button.
Enter a template name, e.g., llama-2
In the source field, enter https://github.com/walrus-tutorials/llama2-on-aws.
Click Save
Configure Environment and AWS Credentials
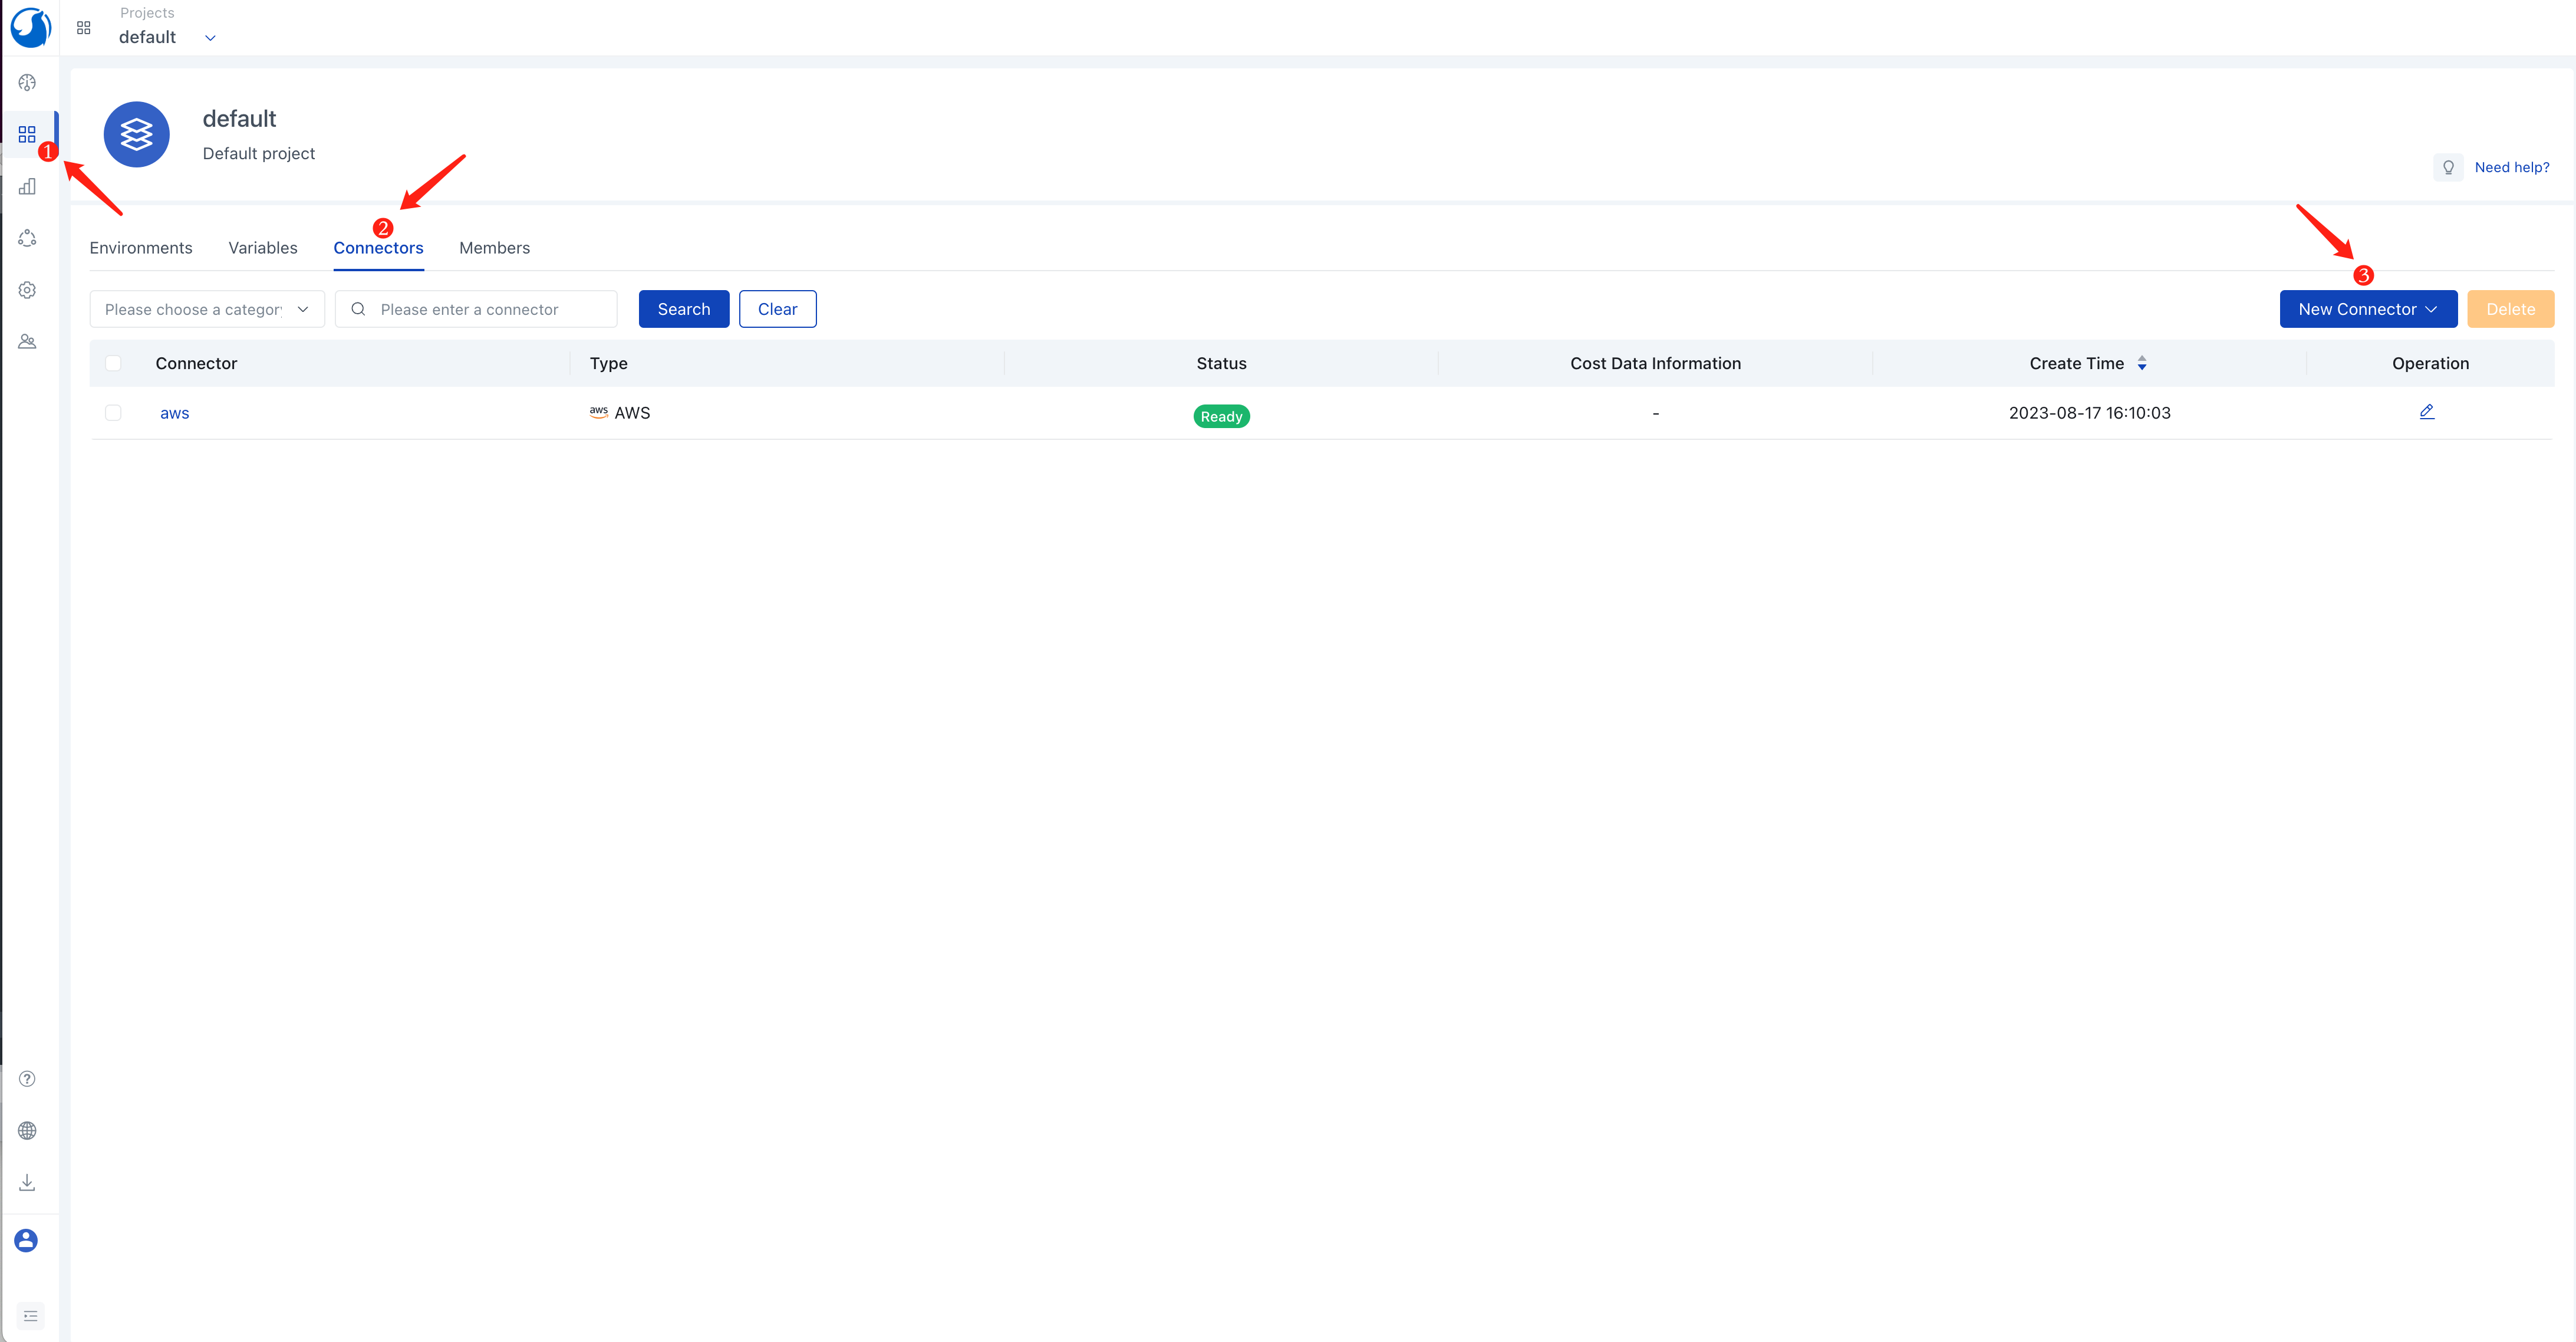
In the left navigation, click on Application Management, go to the default project view, and click the Connectors tab.
Click the New Connector button and select the Cloud Provider type.
Enter a connector name, e.g., aws.
Choose AWS for the Type option.
Select Tokyo (ap-northeast-1) for the Region option.
Click Save
Note: The specified region is used here because the subsequent steps involve using an AMI from that region. If you want to use a different region, you can export the AMI to your region or refer to the following sections on how to build the llama-2 image from scratch.
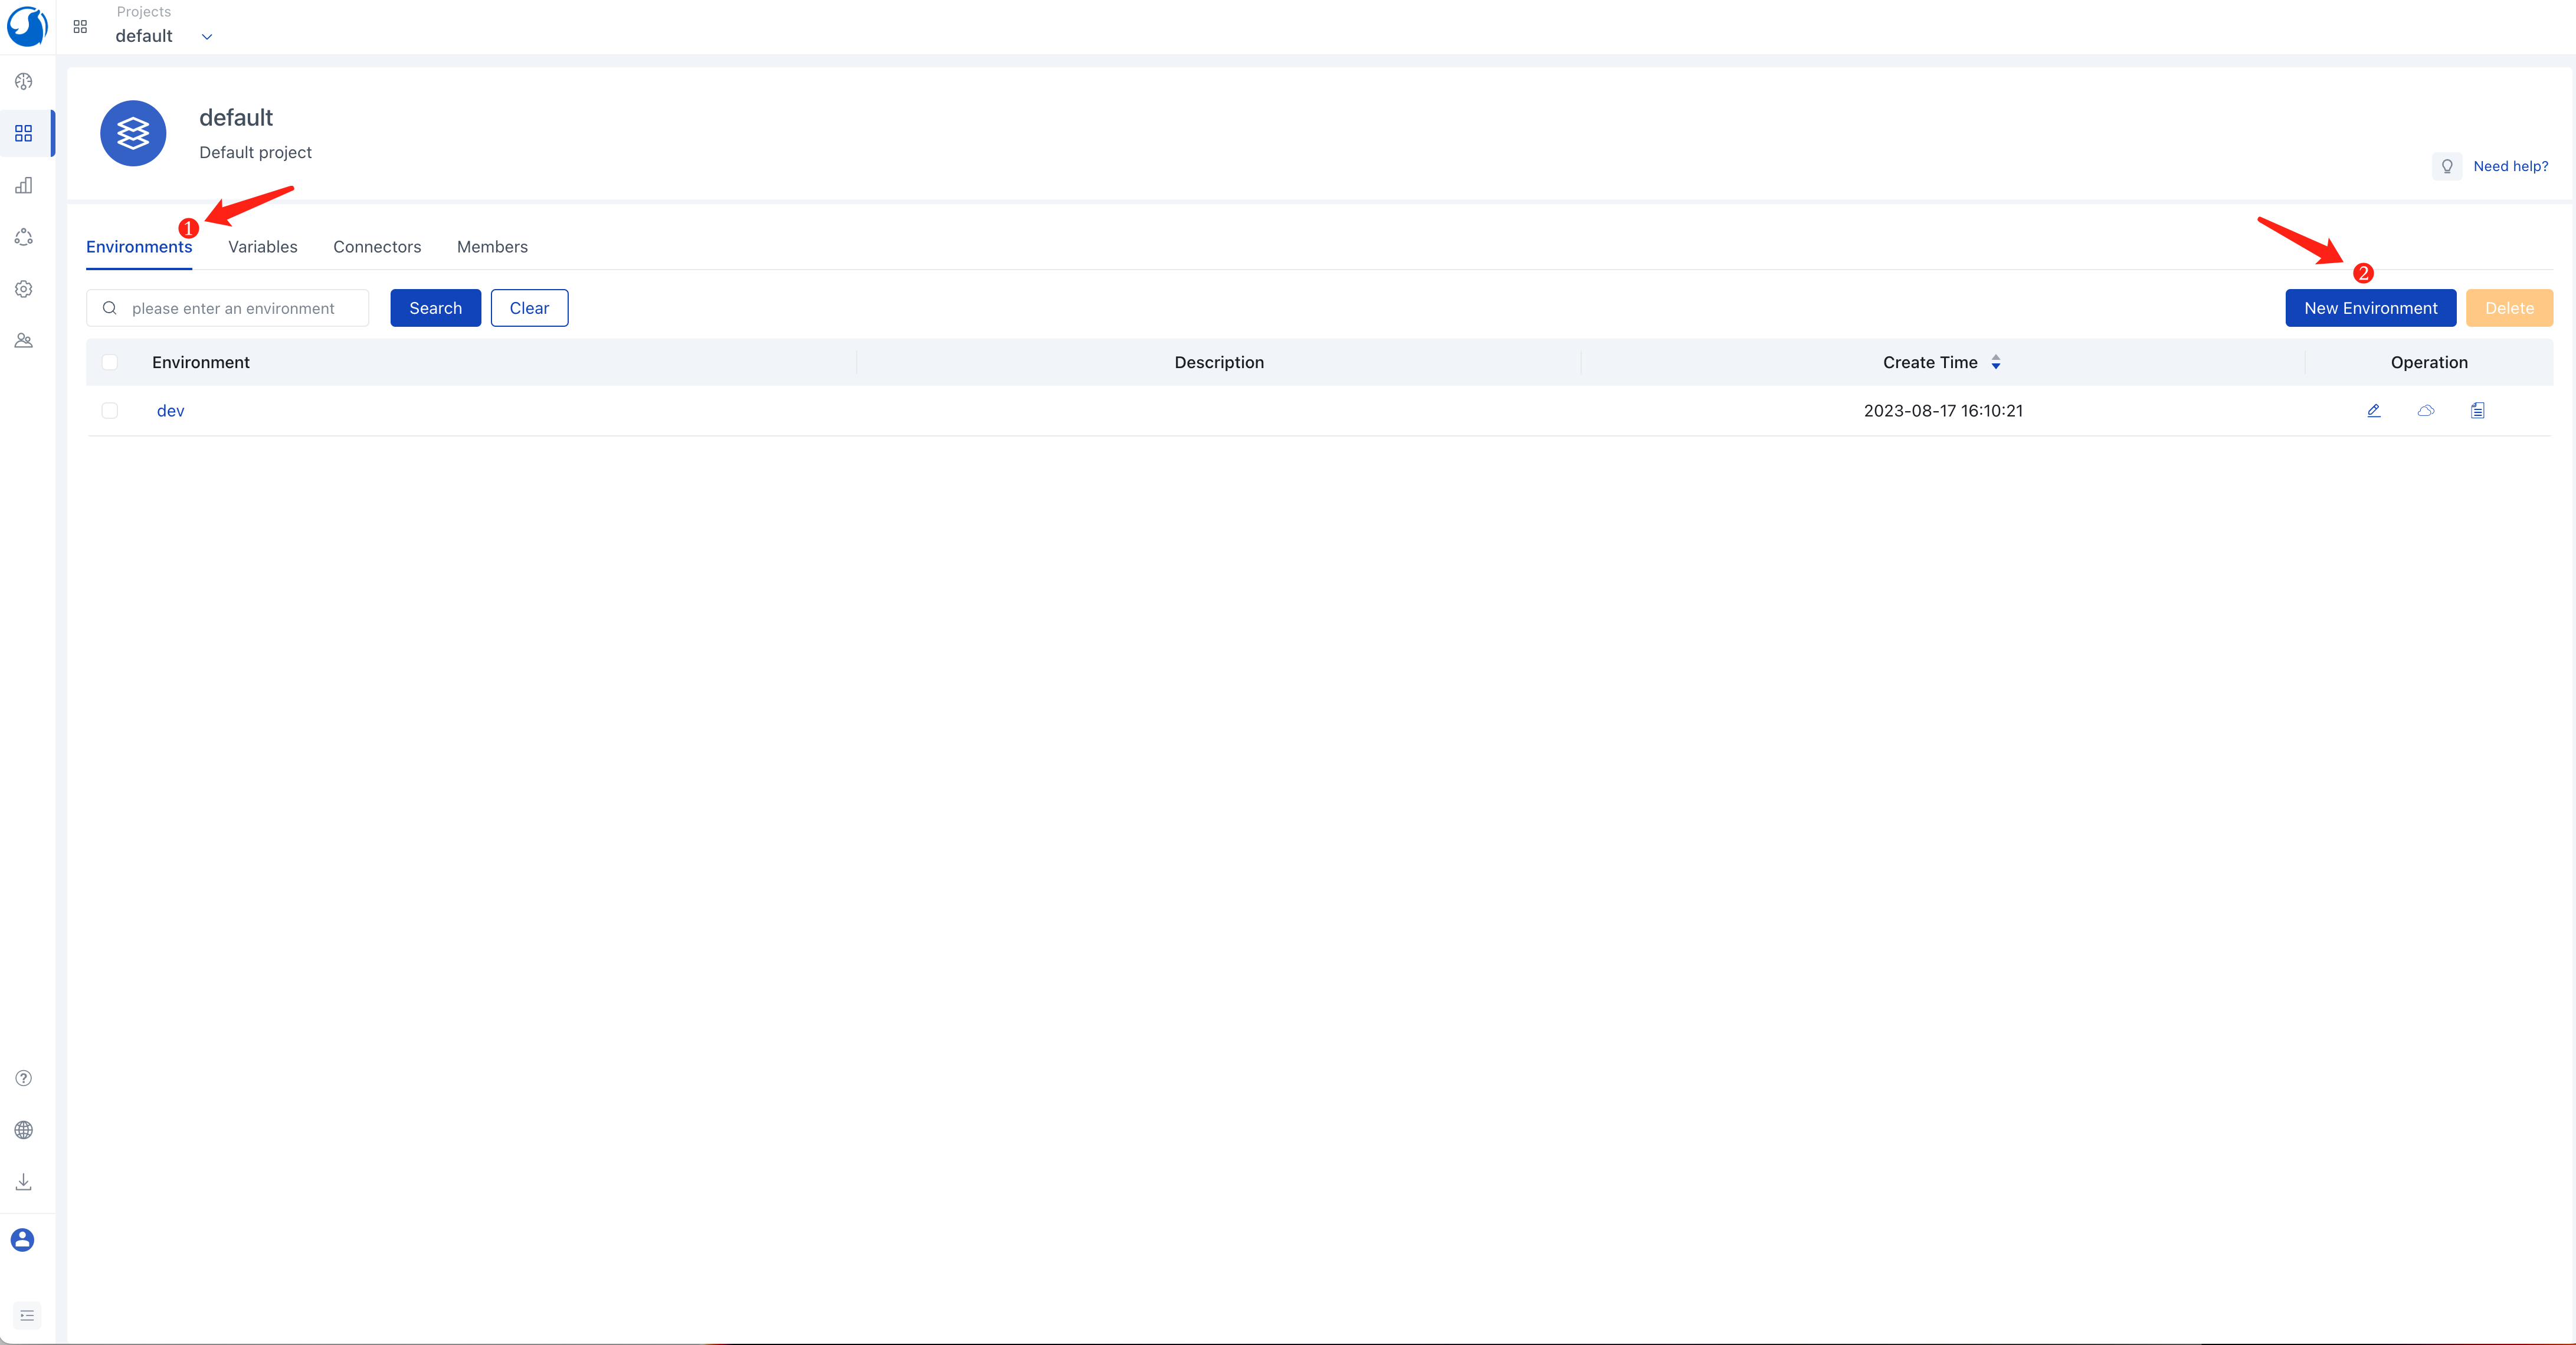
Click the Environments tab, click the New Environment button.
Enter an environment name, e.g., dev.
Click the Add Connector button and select the aws connector created in the previous step.
Click Save
Create the llama-2 Service
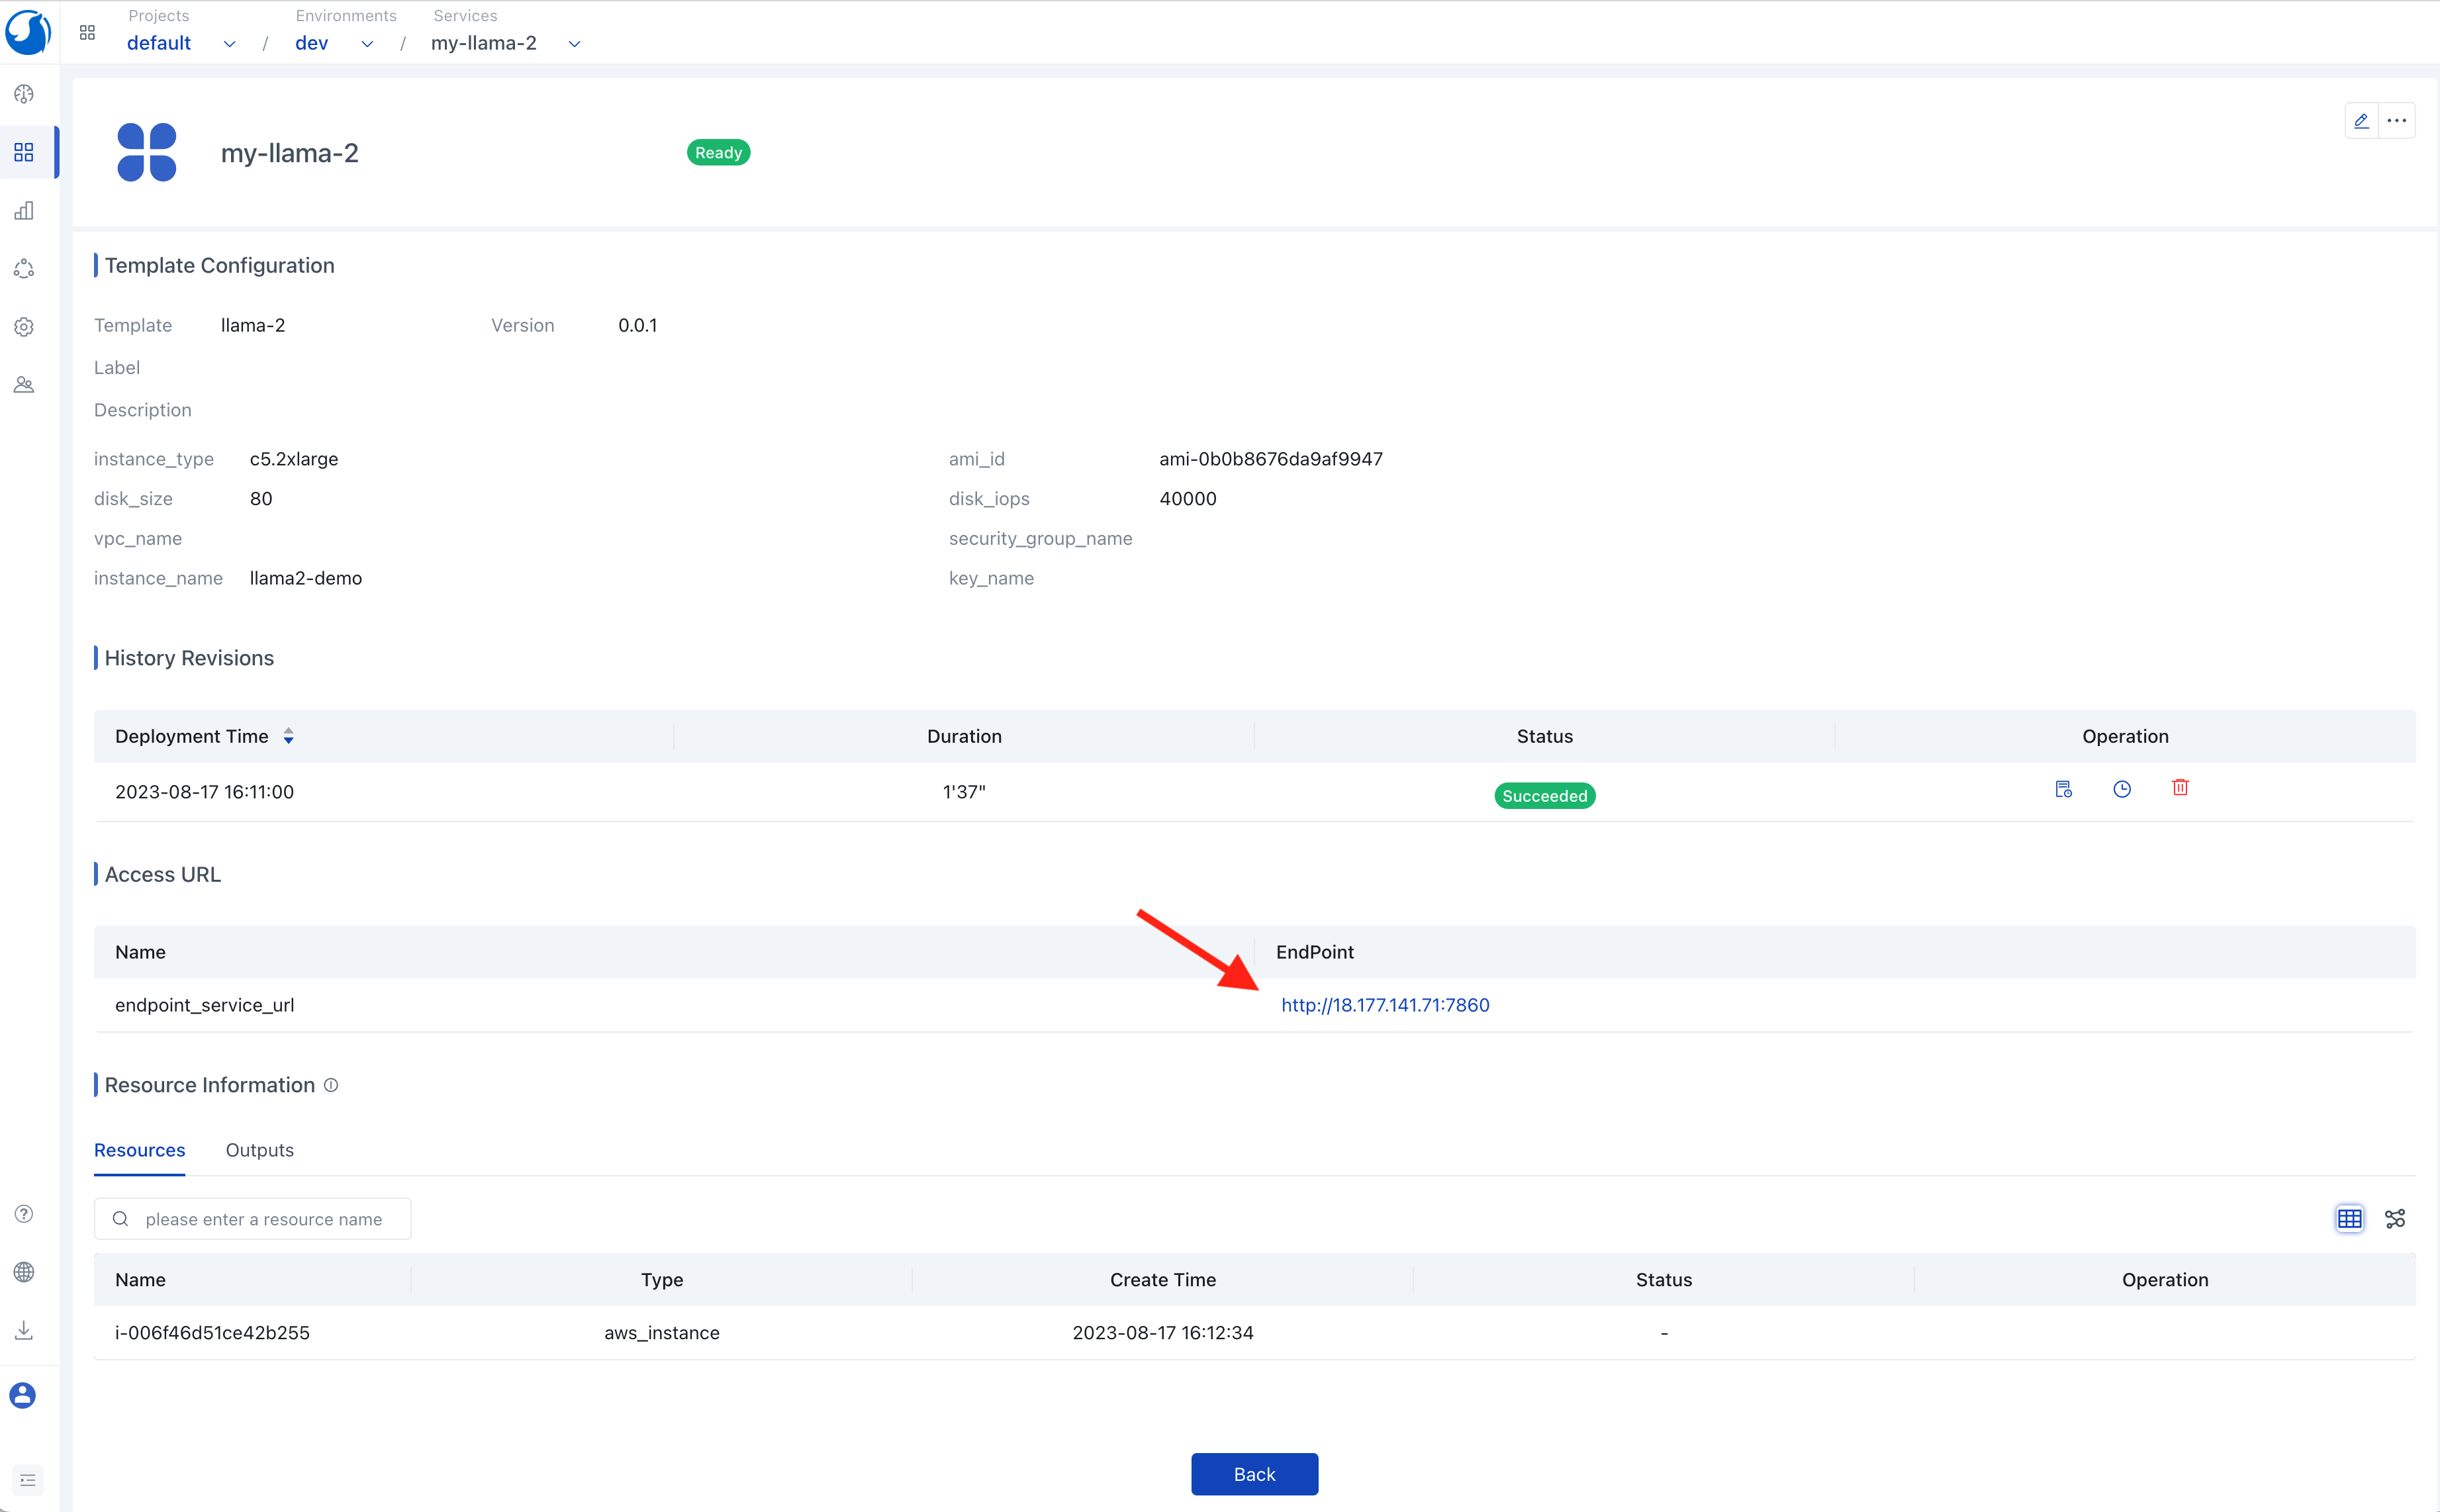
In the Environments tab, click on the name of the dev environment to enter its view.
Click the New Service button.
Enter a service name, e.g., my-llama-2.
Choose llama-2 in the Template option.
Click Save
Note: The default service configuration assumes your AWS account has a default VPC in the corresponding region. If you don't have a default VPC, create a new VPC, associate a subnet and a security group with it in the AWS VPC console. The security group needs to open port 7860 TCP (for accessing the llama-2 web UI). You can set your VPC name and security group name in the service configuration.
Accessing the llama-2 Web UI
You can see the deployment and running status of the llama-2 service on its details page. Once the llama-2 service deployment is complete, you can access its web UI by clicking the access link of the service in the Walrus UI.
Deep Dive: Building the llama-2 Image from Scratch
The above instructions utilized a pre-built llama-2 image. This approach saves time as you don't need to download the large language model (often with a significant file size) or build the inference service when creating a new llama-2 instance. This section explains how such a llama-2 image is built.
You can find the complete build process here.
Key steps include:
# get text-generation-webui
git clone https://github.com/oobabooga/text-generation-webui && cd text-generation-webui
# configure text-generation-webui
ln -s docker/{Dockerfile,docker-compose.yml,.dockerignore} .
cp docker/.env.example .env
sed -i '/^CLI_ARGS=/s/.*/CLI_ARGS=--model llama-2-7b-chat.ggmlv3.q4_K_M.bin --wbits 4 --listen --auto-devices/' .env
sed -i '/^\s*deploy:/,$d' docker/docker-compose.yml
# get quantized llama-2
curl -L https://huggingface.co/TheBloke/Llama-2-7B-Chat-GGML/resolve/main/llama-2-7b-chat.ggmlv3.q4_K_M.bin --output ./models/llama-2-7b-chat.ggmlv3.q4_K_M.bin
# build and run
docker compose up --build
In essence, this process downloads the quantized llama-2-7b-chat model, then builds and utilizes text-generation-webui to launch the llama-2 service.
Congratulations! You have successfully deployed Llama-2 on AWS using Walrus. If you have any other questions about Walrus, feel free to join our community and communicate directly with our developers.