GitHub
Integrate Walrus CLI with CI/CD Tools to Deploy the 2048 Game


Walrus, an open-source application management platform, simplifies the deployment process and seamlessly integrates with your existing CI/CD pipelines. In this tutorial, we will guide you on integrating the Walrus CLI with your CI/CD tools to deploy the 2048 Game.
Prerequisites
Before you begin, ensure you have the following:
A GitHub repository where you can fork our Demo project.
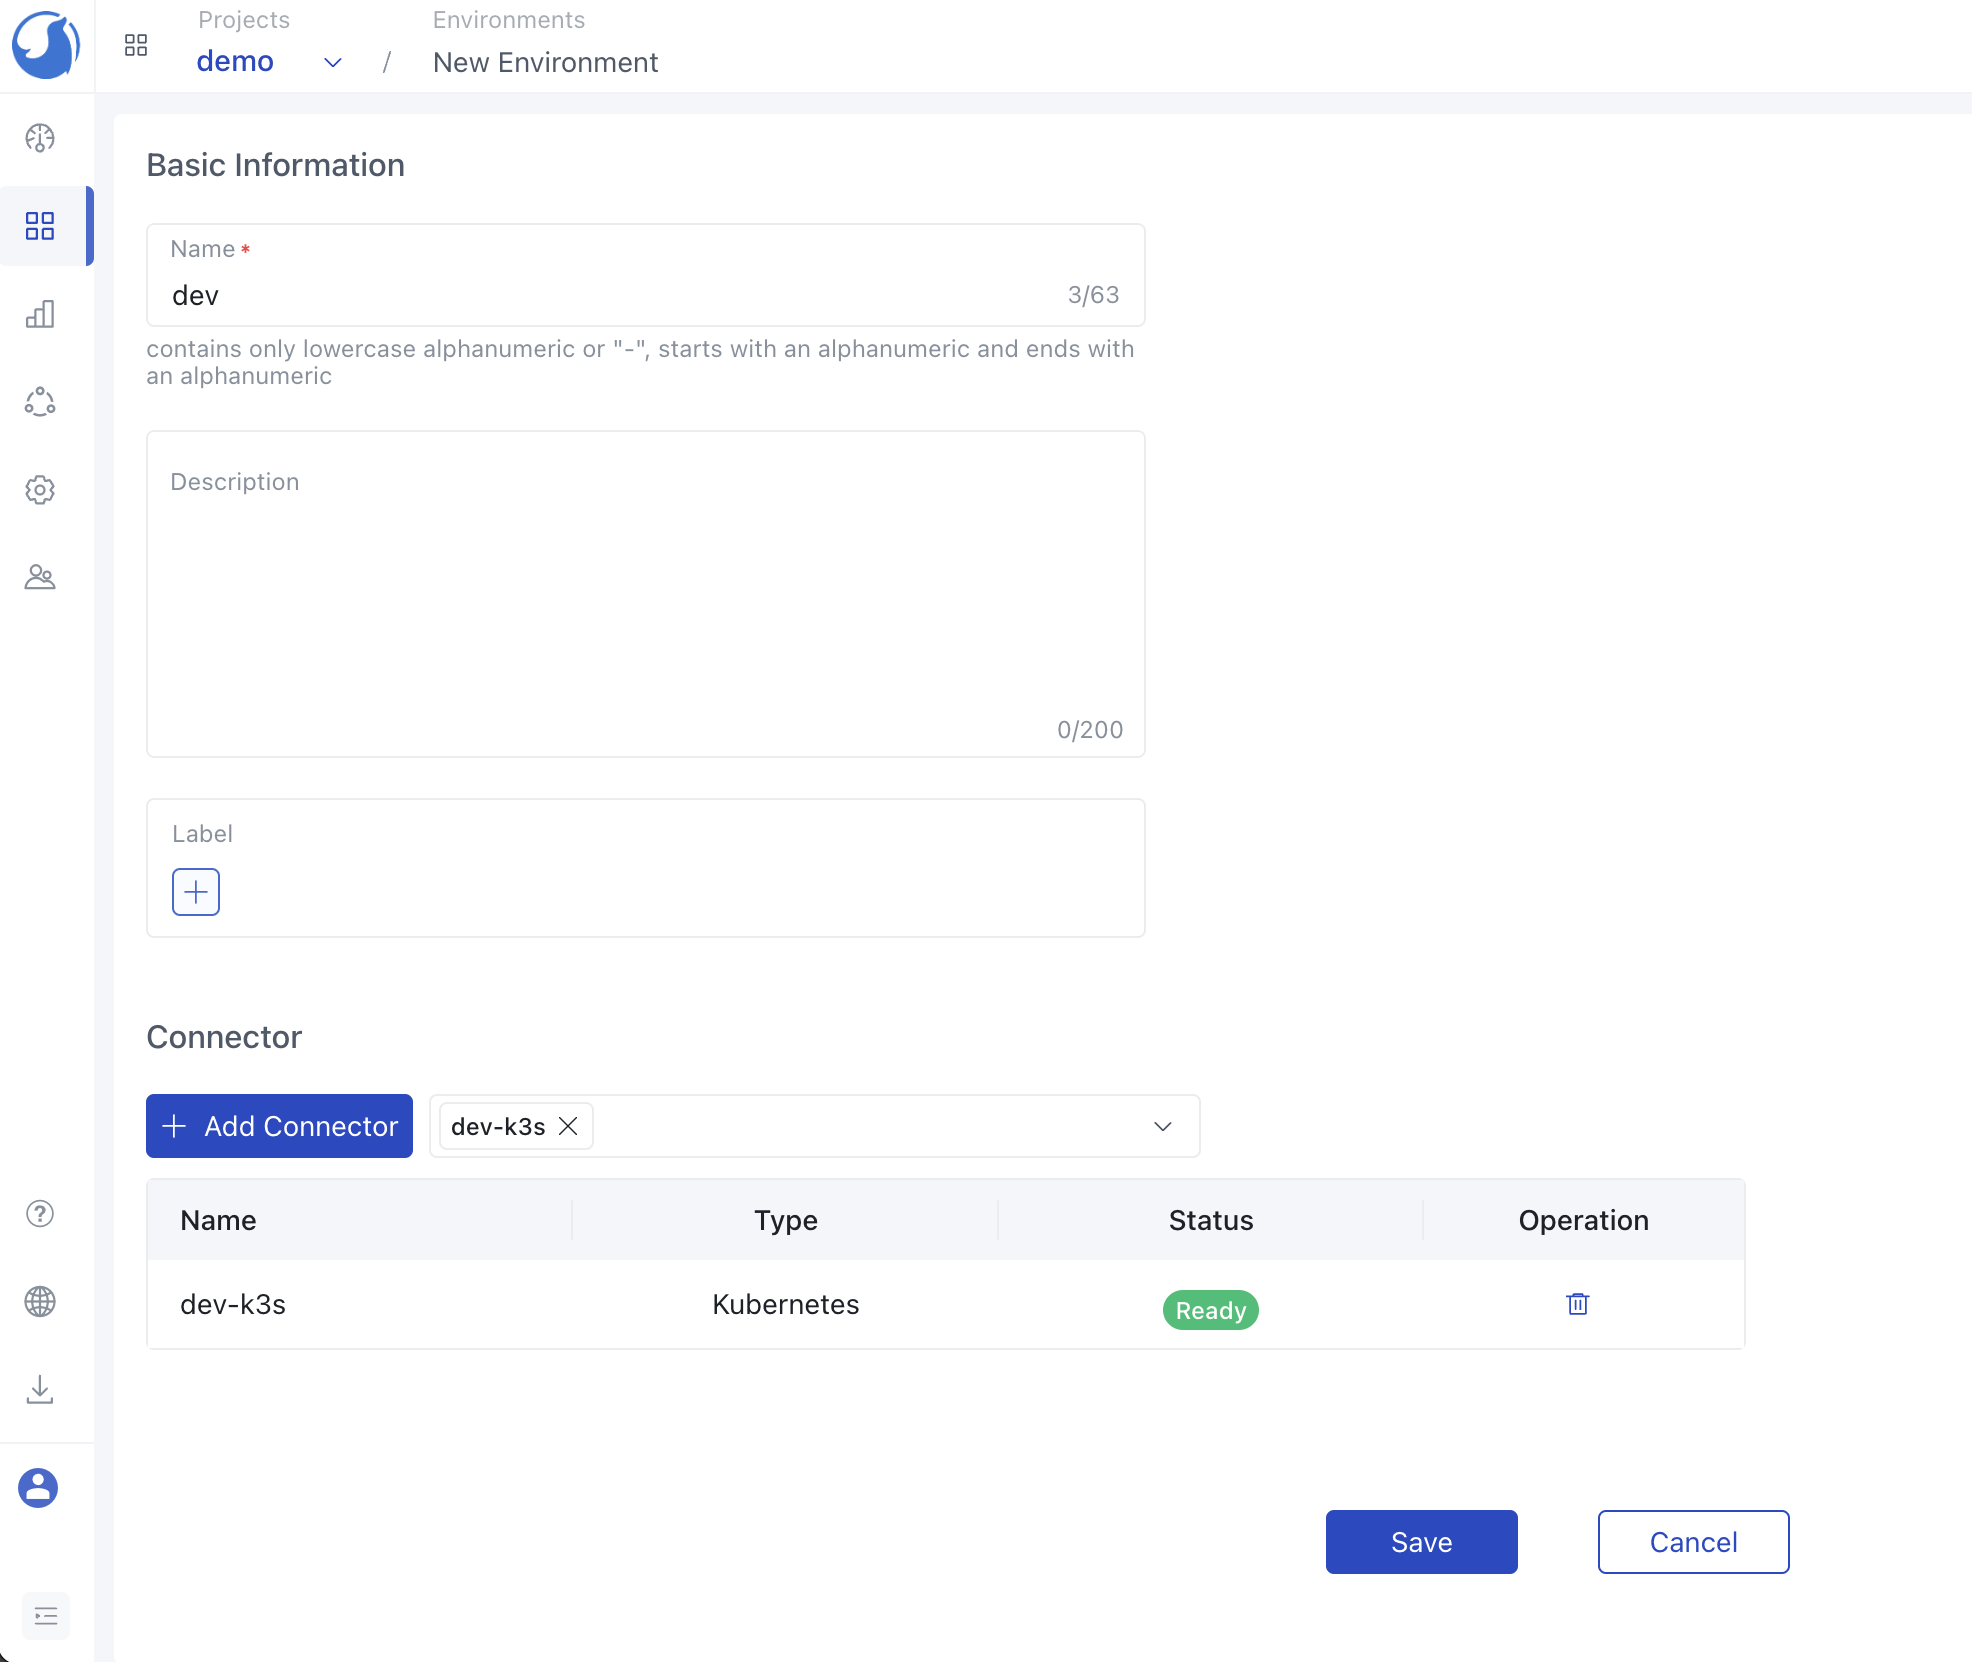
A project set up in Walrus.
Creation of a K8s connector within the project.
An environment established, and the K8s connector added to it.
Let's get started with the integration process!
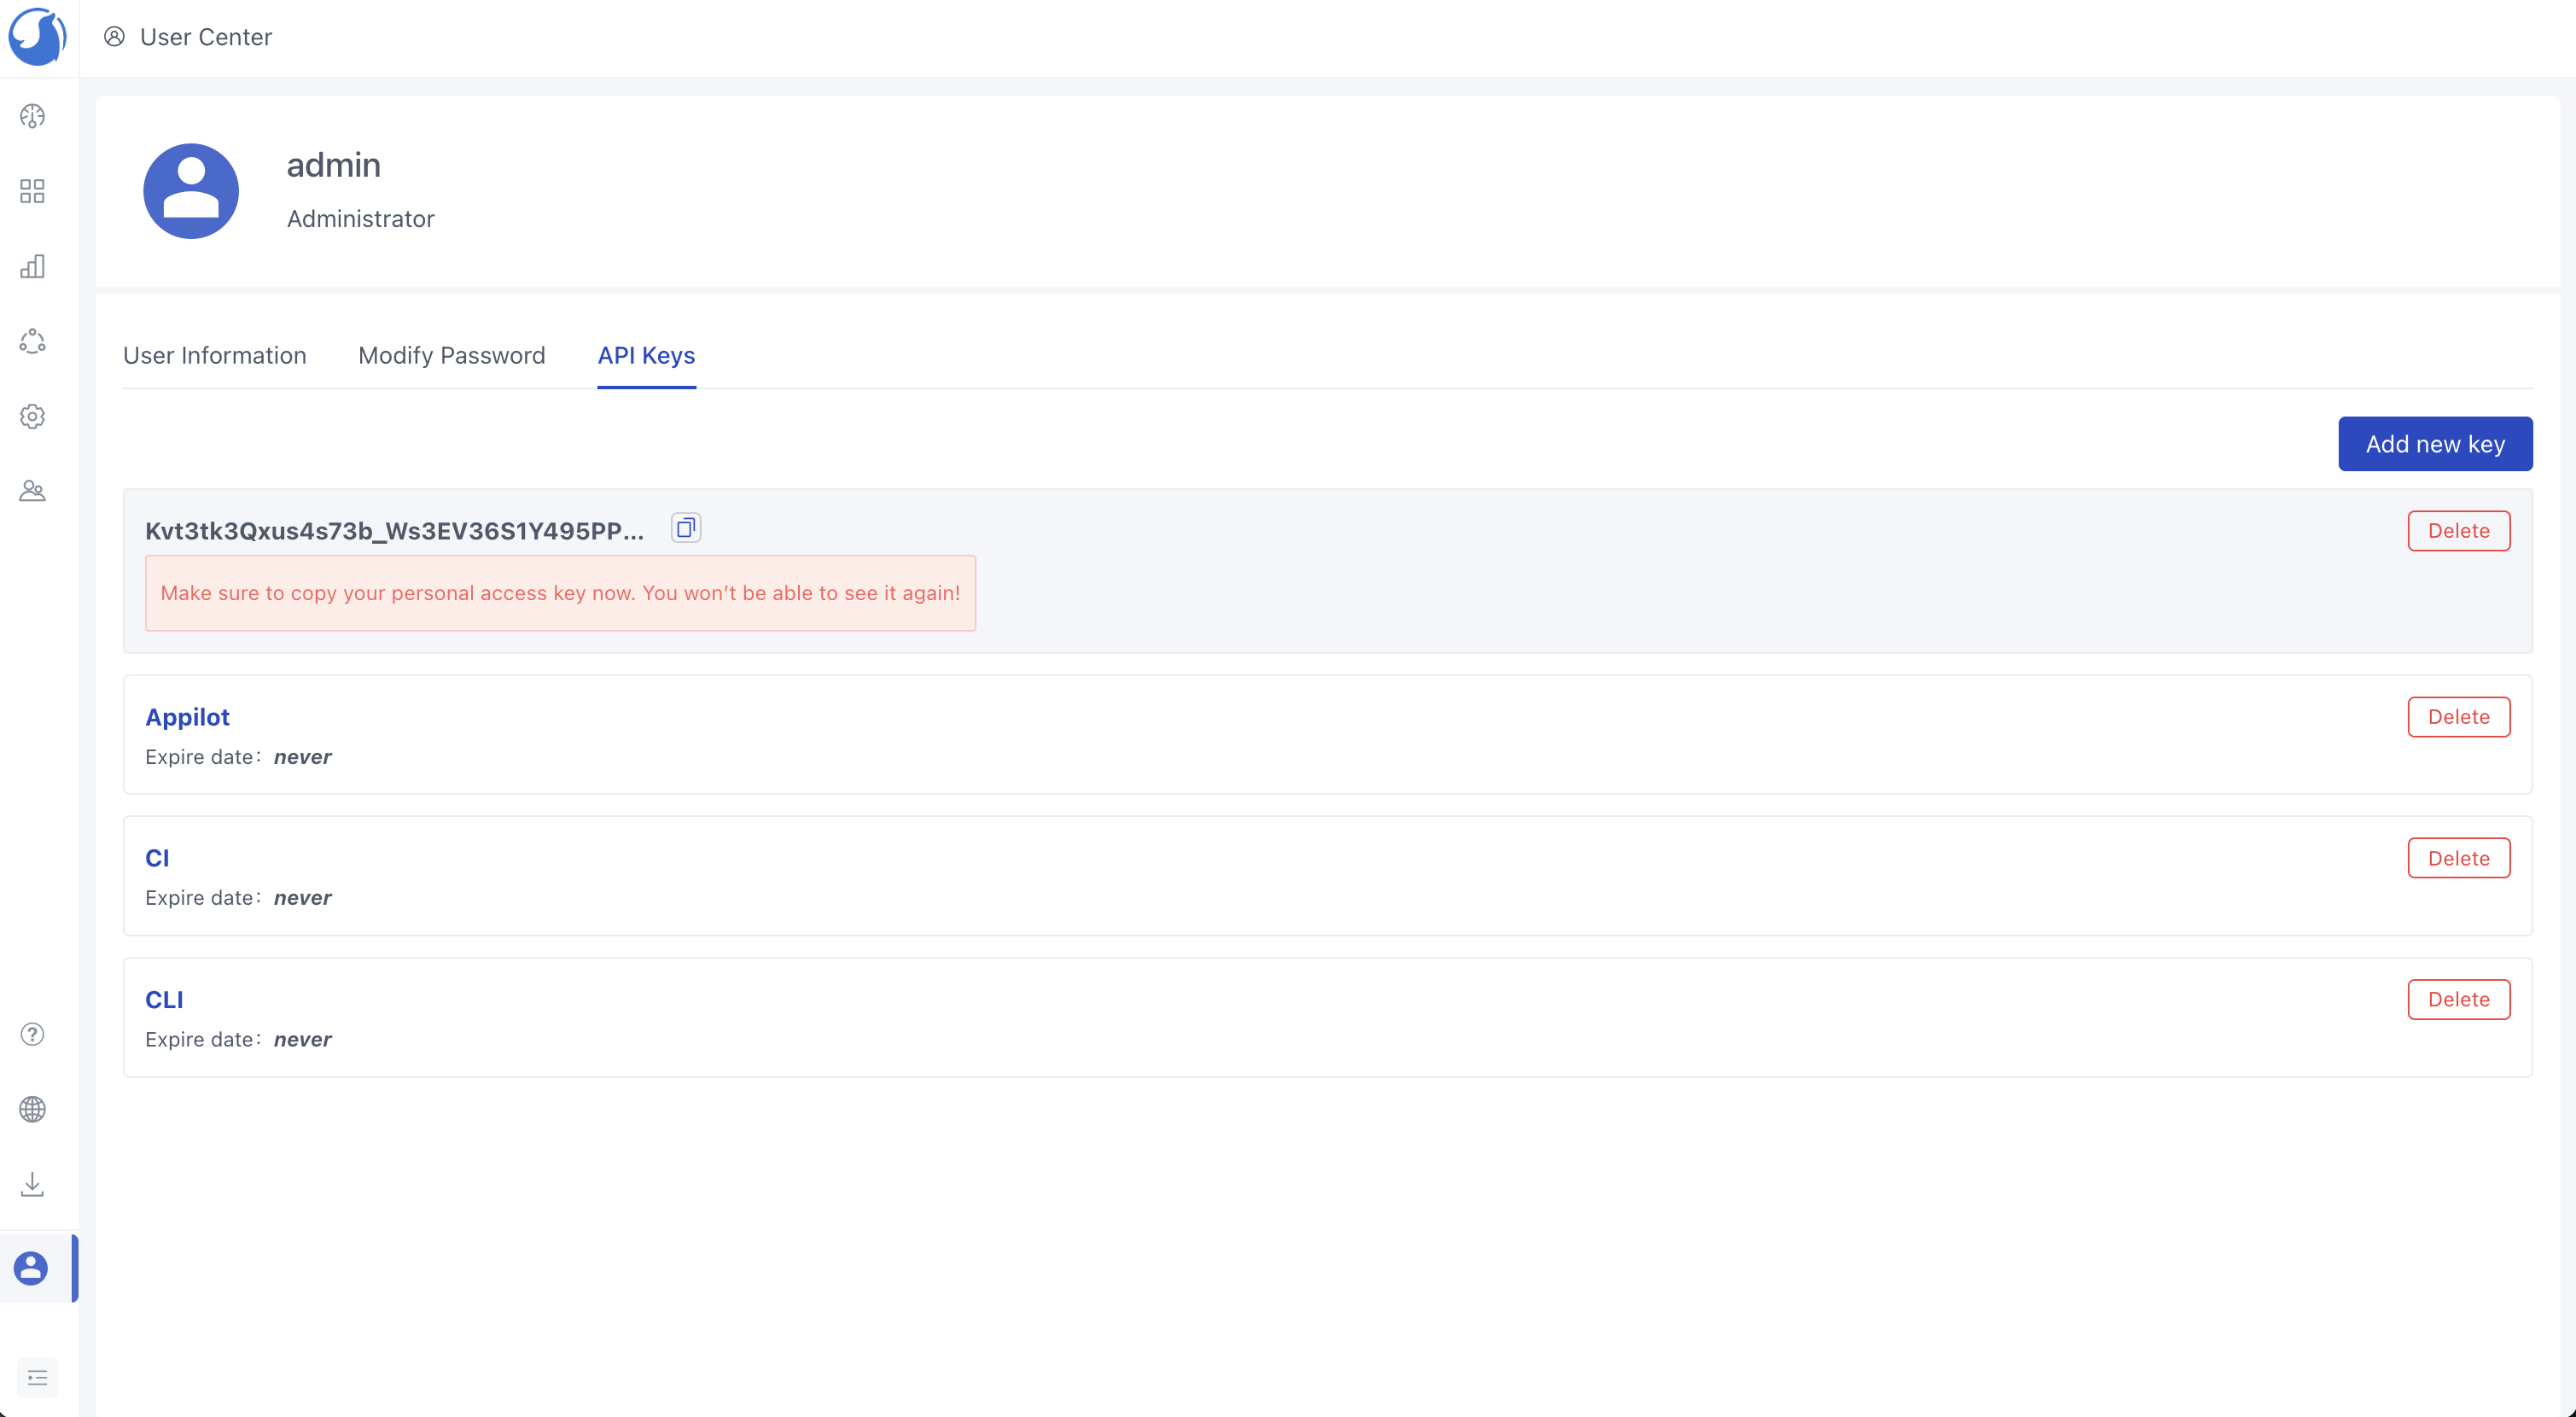
Generating an API Key
To enable communication between the Walrus CLI and the Walrus server, you'll need to create an API key. Here's how you can do it:
Navigate to your User information and select API Keys
Click on Add new key, then provide a name for your key and set an expiration time.
Once you've configured the key, make sure to copy the generated key for future use. This key will facilitate the CLI's interaction with the Walrus server.
Integrating Walrus CLI with GitHub Actions
Here, we'll illustrate the integration of the Walrus CLI with GitHub Actions. Follow these steps:
Head to your GitHub repository and access the Settings menu. Then, navigate to Security > Secrets and Variables > Actions. Configure your repository secrets with the following variables to securely store sensitive information: CI_REGISTRY_USERNAME, CI_REGISTRY_PASSWORD, CD_WALRUS_SERVER, and CD_WALRUS_TOKEN. For CD_WALRUS_SERVER, ensure the format is https://domain:port/. These secrets will enable secure communication between GitHub Actions and Walrus CLI.

Next, in your GitHub repository, create a ci.yaml file under the .github/workflows directory. This file will define your CI/CD workflow.
Here's an example of a ci.yaml file for deploying the 2048 Game. You can copy and customize it according to your specific environment variables and requirements:
name: CICD

on:
  push:
    branches: [ "main" ]
  pull_request:
    branches: [ "main" ]

env:
  CI_REGISTRY: '' # Use Docker Hub when empty
  CI_IMAGE_NAME: sealdemo/game2048
  CD_WALRUS_PROJECT: demo
  CD_WALRUS_PROJECT_ENV: dev
  CD_WALRUS_SERVICE_NAME: game2048

jobs:
  delivery:
    runs-on: ubuntu-latest
    steps:
    - uses: actions/checkout@v3
    - name: Set up JDK 8
      uses: actions/setup-java@v3
      with:
        java-version: '8'
        distribution: 'temurin'
        cache: maven
    - name: Build with Maven
      run: mvn -B clean package --file pom.xml
    - name: Docker Login
      uses: docker/login-action@v3.0.0
      with:
        registry: ${{ env.CI_REGISTRY }}
        username: ${{ secrets.CI_REGISTRY_USERNAME }}
        password: ${{ secrets.CI_REGISTRY_PASSWORD }}
    - name: Build and push Docker image
      run: |
        docker build . --file Dockerfile --tag ${{ env.CI_IMAGE_NAME }}:${{ github.run_id }}
        docker push ${{ env.CI_IMAGE_NAME }}:${{ github.run_id }}
    - name: Download CLI
      run: |
        # Download walrus CLI
        curl -v -k -o walrus -LO "${{ secrets.CD_WALRUS_SERVER }}/cli?arch=amd64&os=linux"
        chmod +x ./walrus
    - name: Deploy
      run: |
        # Setup CLI config
        ./walrus config setup --insecure --server ${{ secrets.CD_WALRUS_SERVER }} --token ${{ secrets.CD_WALRUS_TOKEN }} --project ${{ env.CD_WALRUS_PROJECT }} --environment ${{ env.CD_WALRUS_PROJECT_ENV }}

        # Deploy app
        ./walrus service create --debug --name ${{ env.CD_WALRUS_SERVICE_NAME }} --template '{"name": "webservice", "version": "v0.0.2"}' --attributes '{"image": "${{ env.CI_IMAGE_NAME }}:${{ github.run_id }}", "ports": ["8080"]}'
Now, try triggering the workflow execution and checking the results.
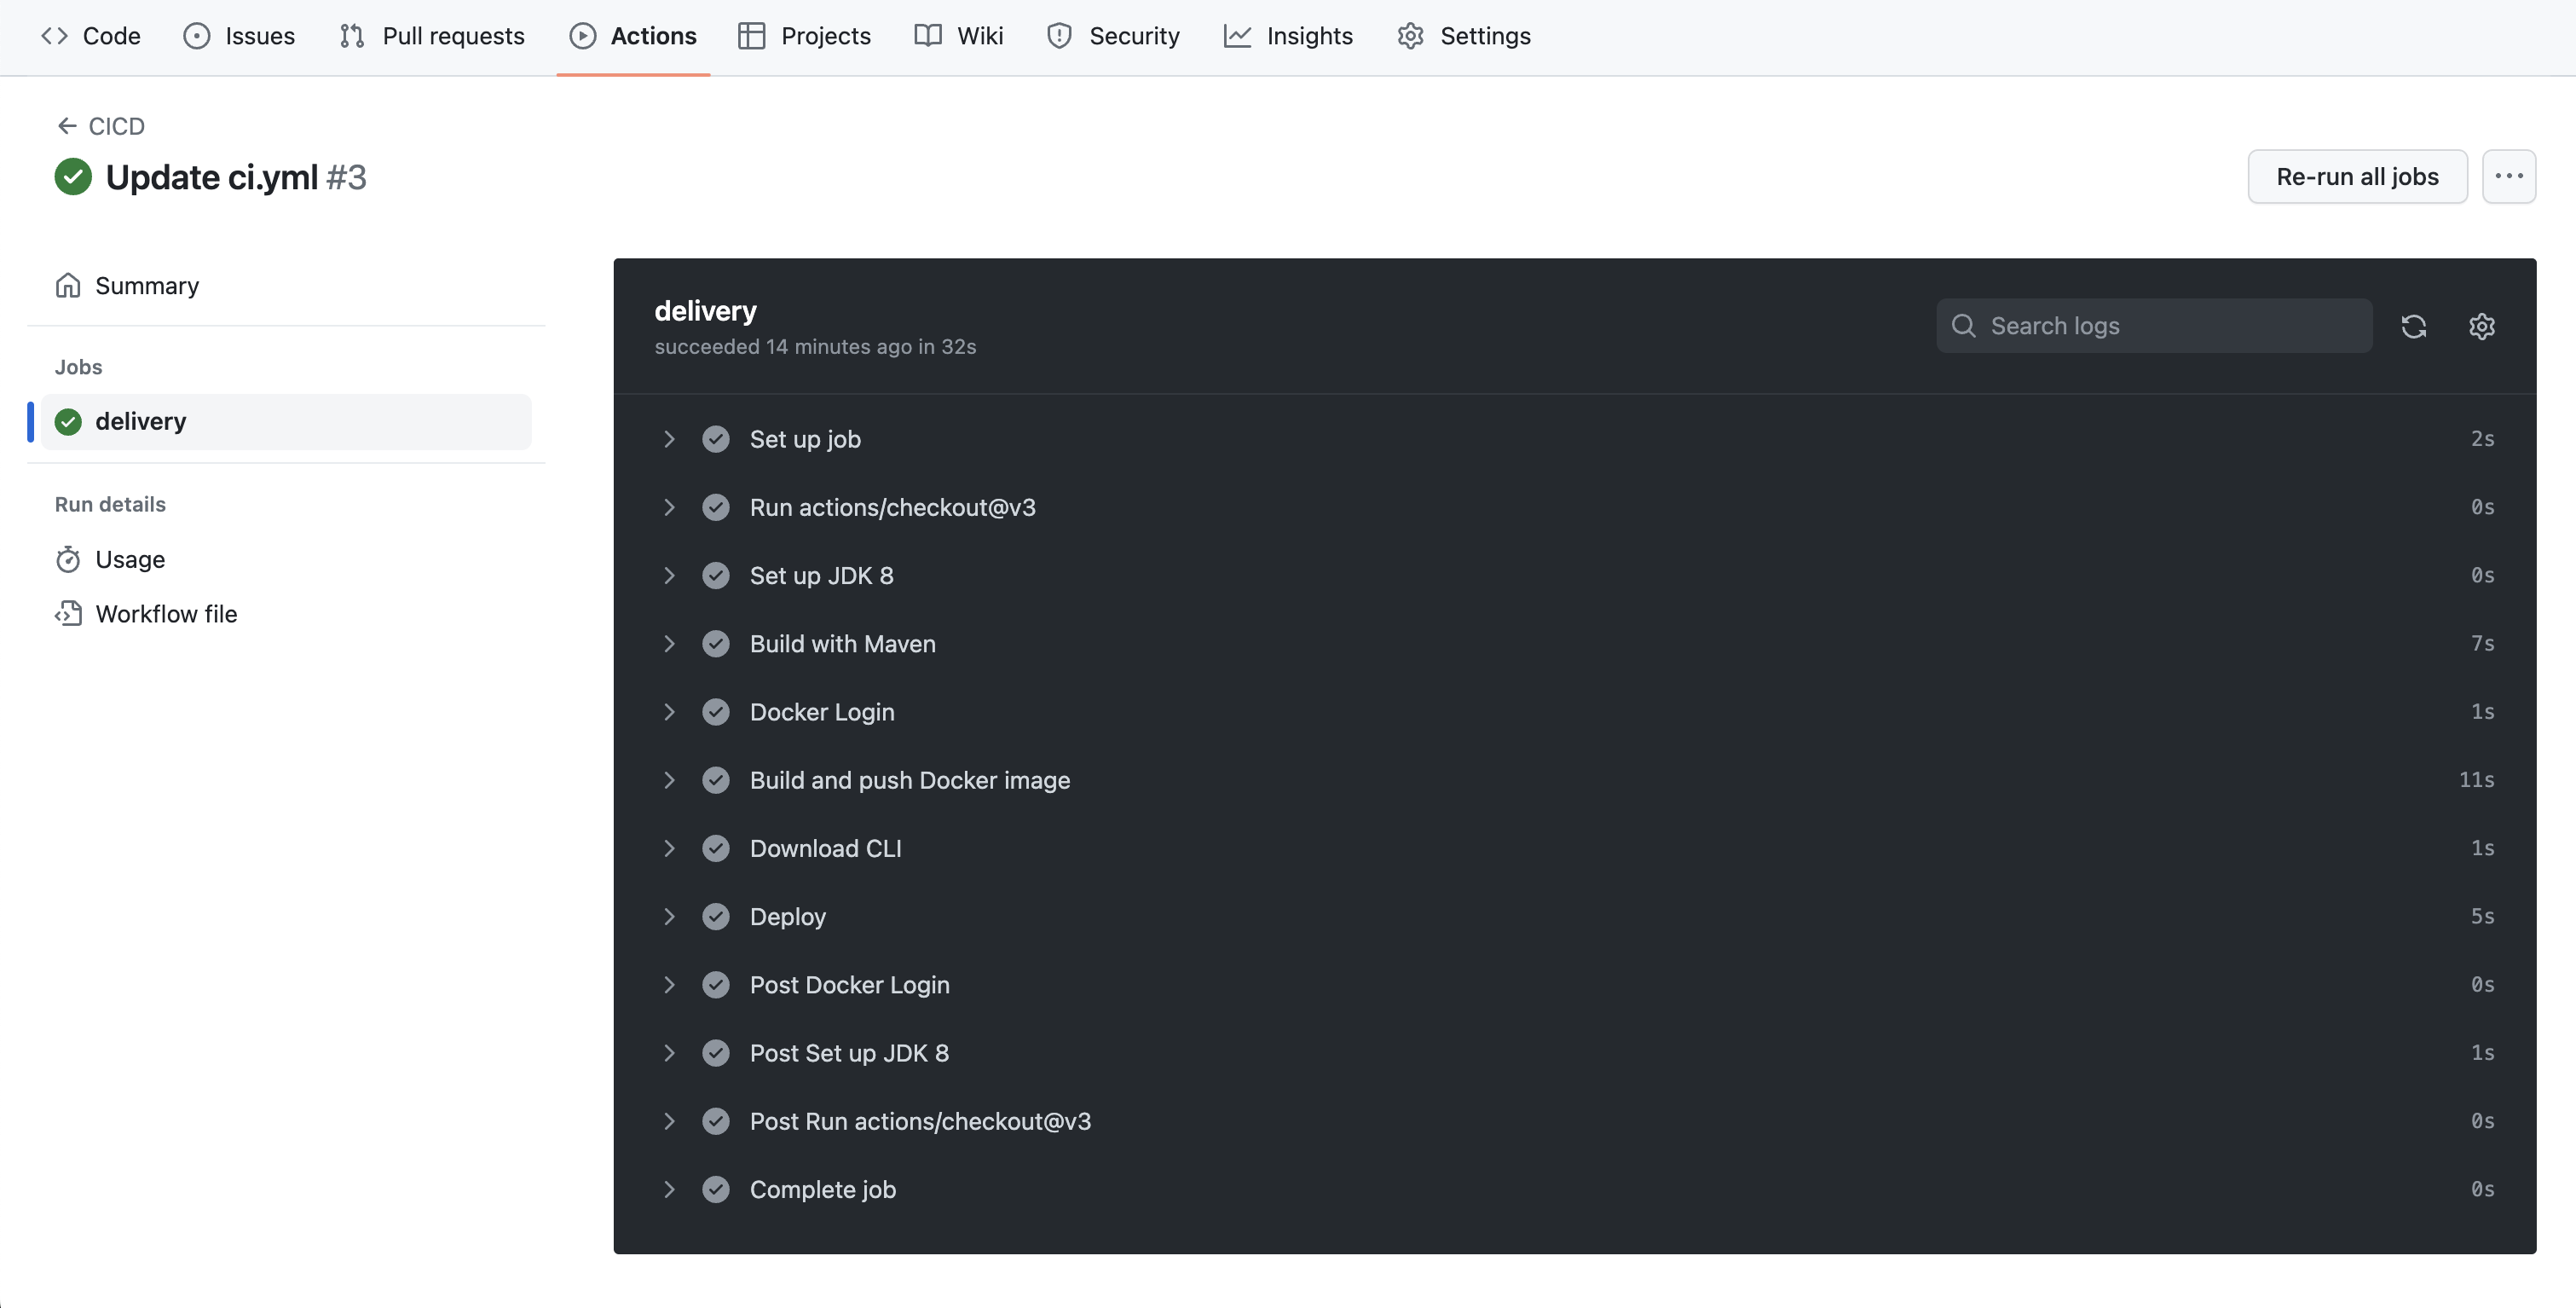
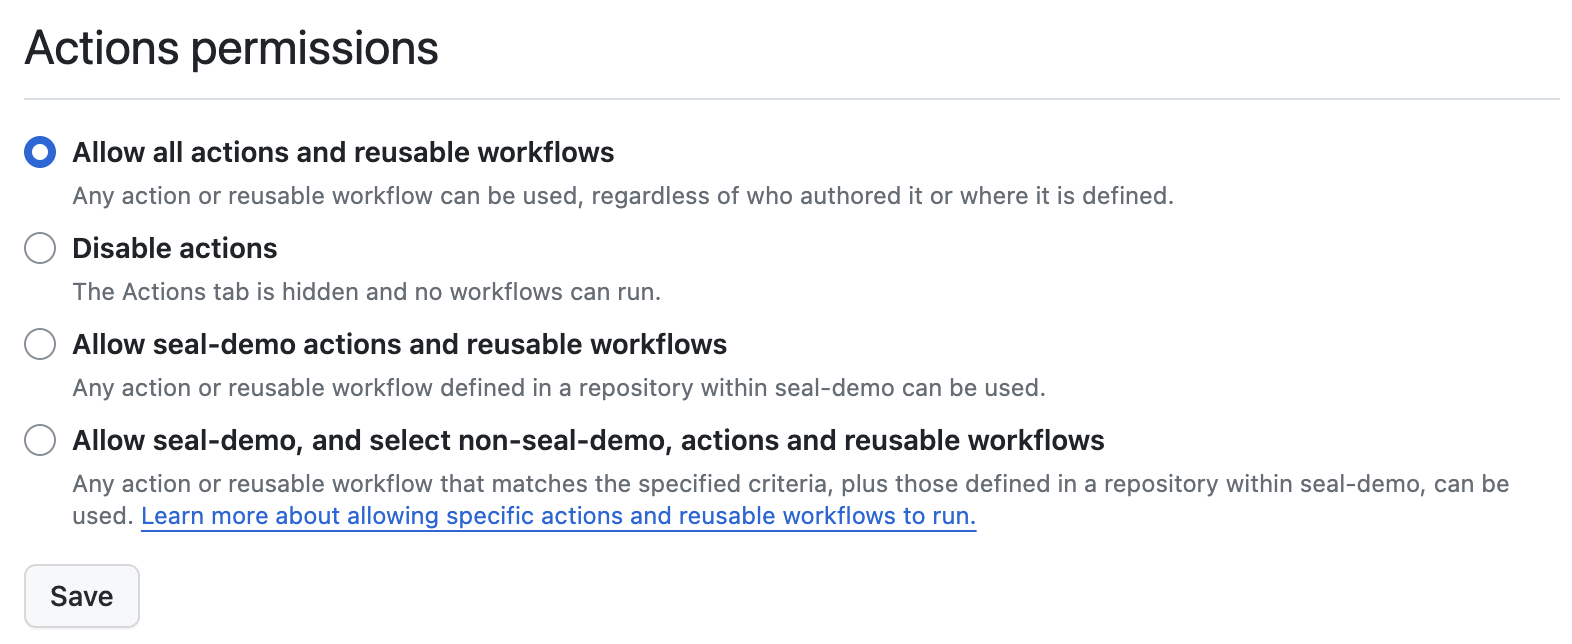
If you encounter any errors during the workflow execution, the first step should be to check your GitHub Actions permissions and configurations to ensure that everything is set up correctly.
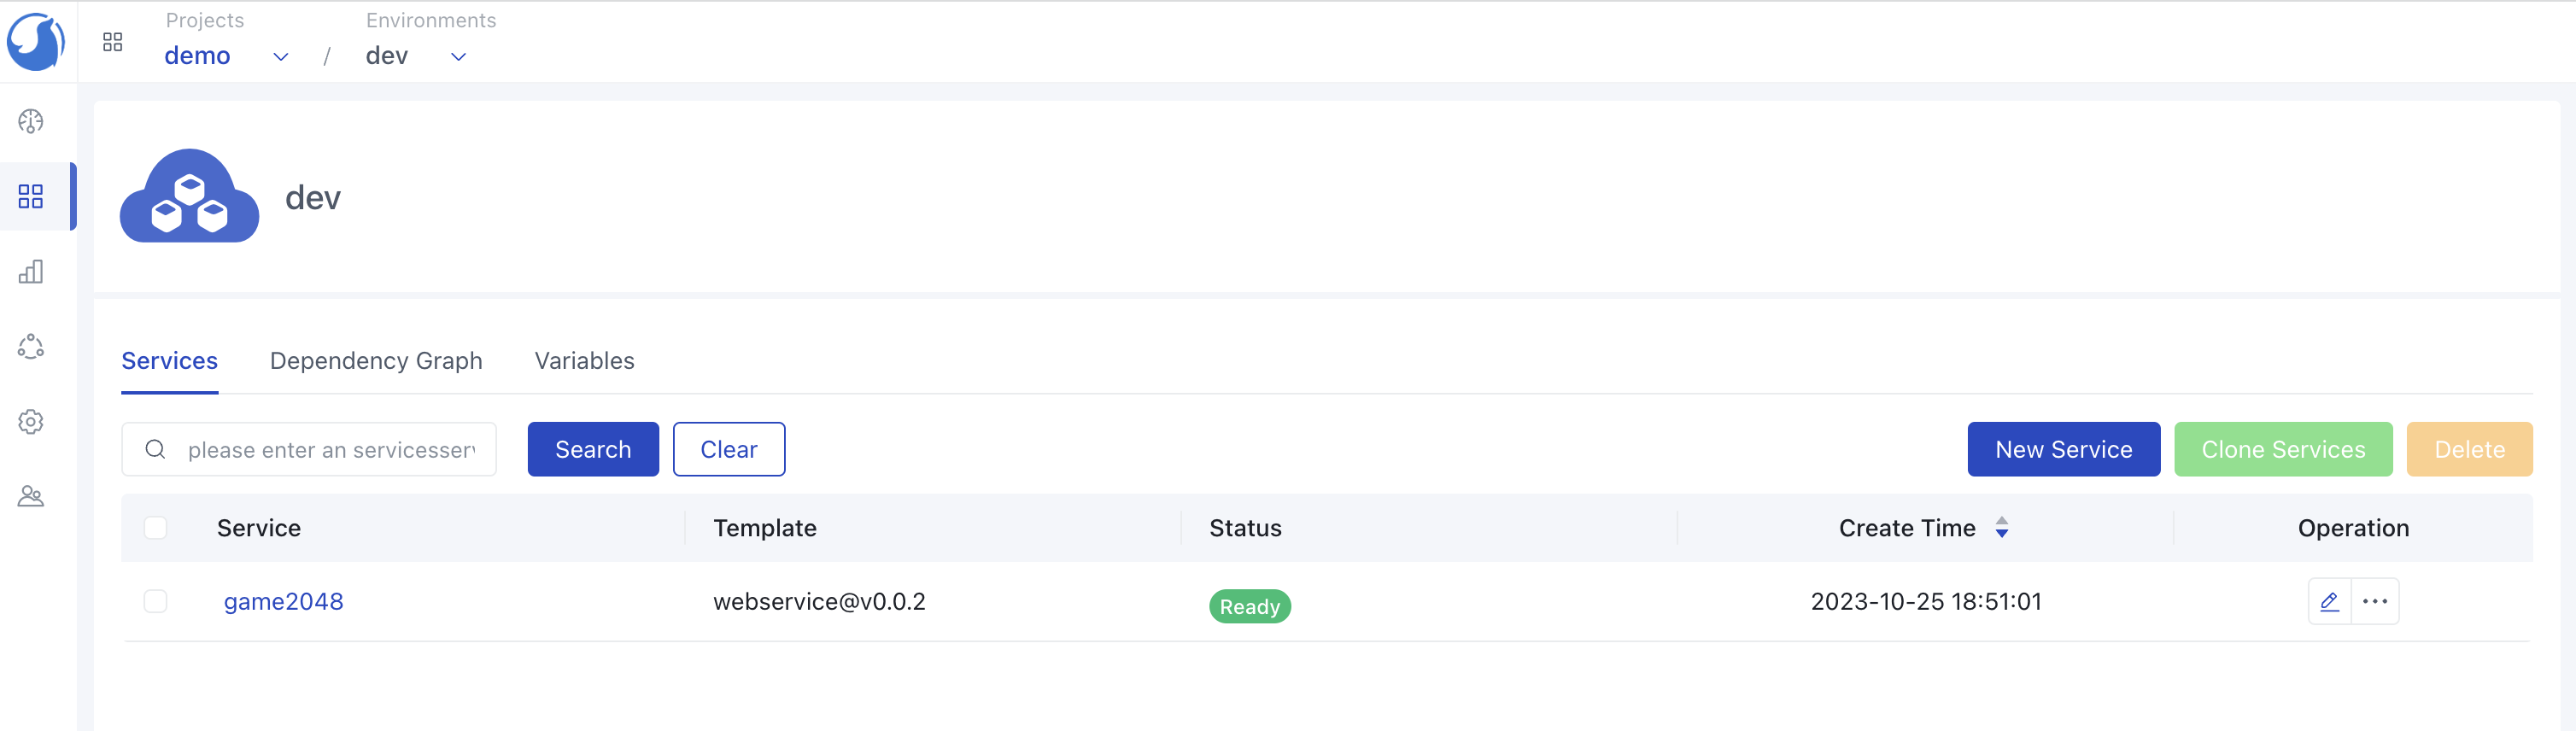
Once the deployment is complete, you can access and view the 2048 Game within Walrus.
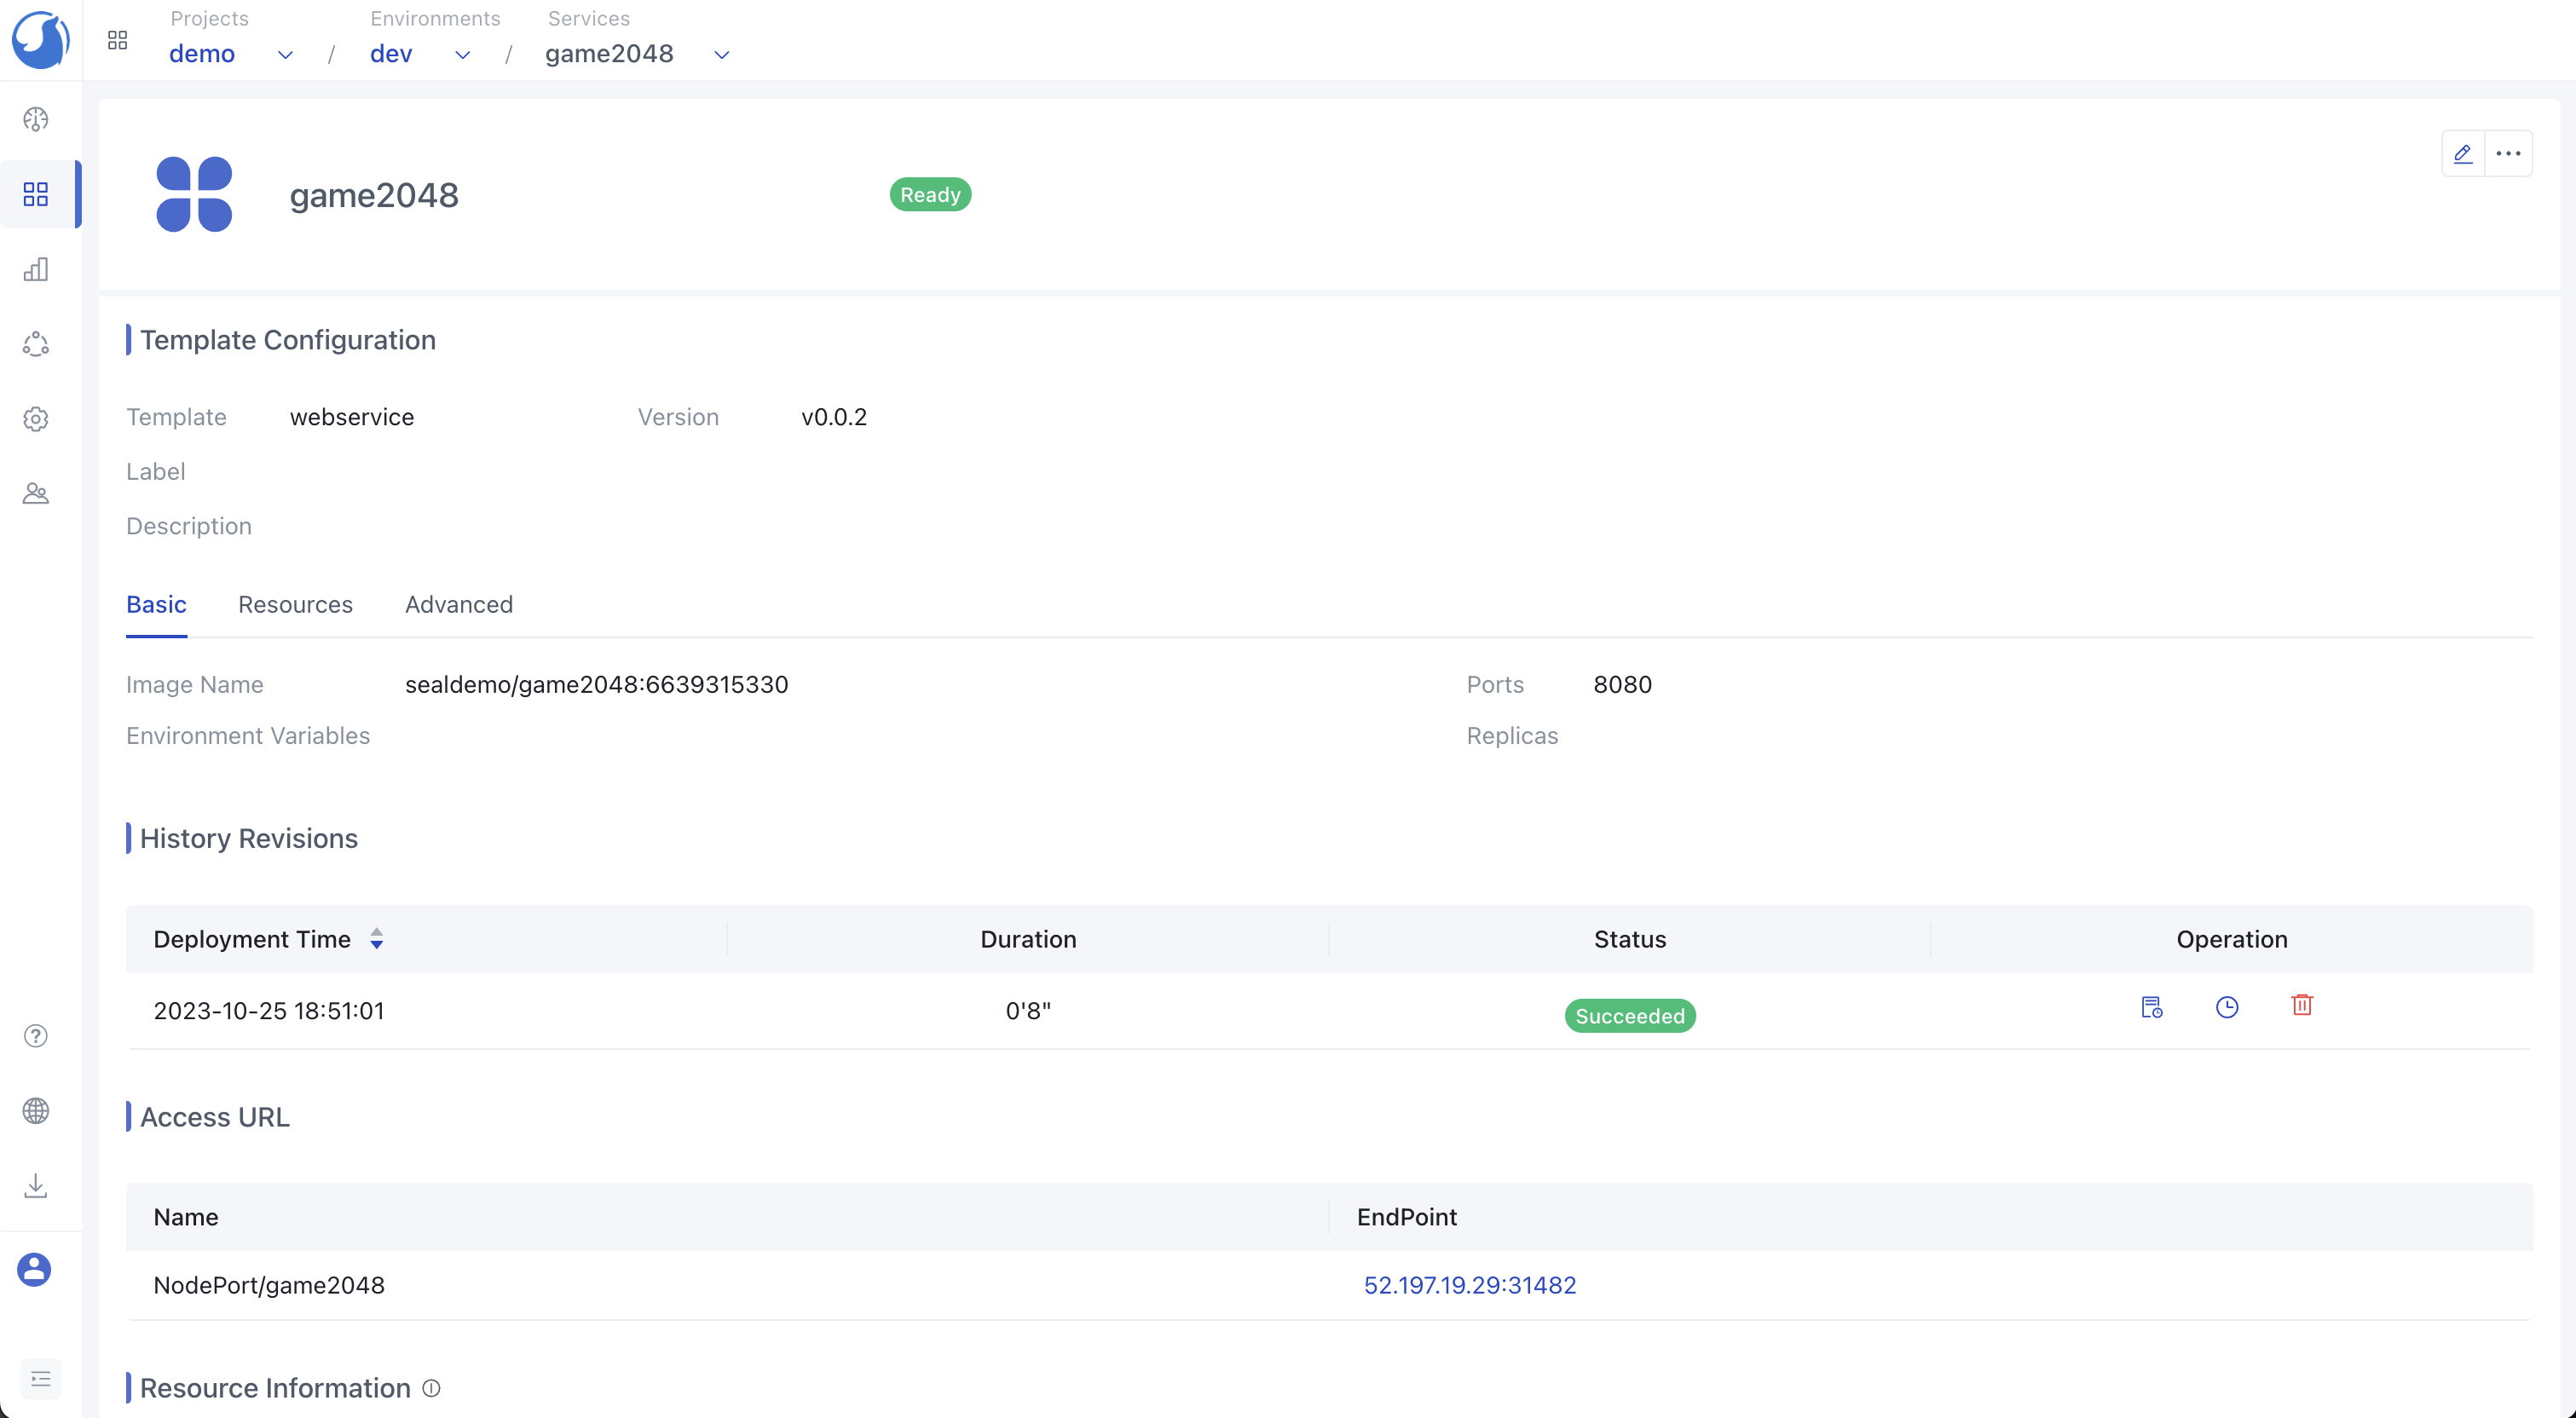
You can access the 2048 Game using the following URL format: http://domain:port/2048/. This confirms that you have successfully integrated the Walrus CLI with your CI/CD tools to deploy the 2048 game.