GitHub
How to Deploy GitLab on AWS EC2 with Walrus


Walrus, the open-source application management platform, equips your team with templates designed to optimize best practices. In this blog, we'll walk you through the process of creating an AWS GitLab template and deploying a GitLab server on an AWS EC2 instance.
Prerequisites
A GitHub or Gitlab Repository for storing the template.
Create a repository on GitHub
Create a new repository on GitHub of your own. Here we use the repository demo.
Clone the repository to your local machine.
git clone git@gitlab.com:seal-eyod/gitlab-on-aws.git
Create Template Files
Go to the cloned repository directory.
cd gitlab-on-aws
Create files in the directory as follows:
  - gitlab-on-aws
    - main.tf
    - outputs.tf
    - variables.tf
    - README.md
The main.tf file defines the resources to be created. Here we define the resource for the template to create an AWS EC2 instance and run a Gitlab server on it.
  data "aws_ami" "ubuntu" {
    most_recent = true

    filter {
      name   = "name"
      values = ["ubuntu/images/hvm-ssd/ubuntu-jammy-22.04-amd64-server-*"]
    }

    filter {
      name   = "virtualization-type"
      values = ["hvm"]
    }

    owners = ["099720109477"] # Canonical
  }


  data "aws_security_group" "selected" {
    name = var.security_group_name
  }

  data "aws_subnets" "selected" {
    filter {
      name   = "vpc-id"
      values = [data.aws_security_group.selected.vpc_id]
    }
  }

  resource "aws_instance" "gitlab" {
    ami           = data.aws_ami.ubuntu.id
    instance_type = var.instance_type
    subnet_id     = data.aws_subnets.selected.ids.0
    vpc_security_group_ids = [data.aws_security_group.selected.id]
    key_name      = var.key_name
    user_data     = <<-EOF
                    #!/bin/bash
                    set -ex;
                    public_ip=$(curl http://169.254.169.254/latest/meta-data/public-ipv4)
                    curl -fsSL https://get.docker.com | bash && sudo usermod -aG docker ubuntu
                    docker run -d --privileged --restart=always -p 80:80 -p 443:443 \
                    -e GITLAB_ROOT_PASSWORD="${var.gitlab_root_password}" \
                    "${var.gitlab_image}"
                    EOF
    tags = {
      "Name" = "${var.gitlab_metadata_application_instance_name}-gitlab"
    }

    root_block_device {
      volume_size = var.disk_size
    }
  }

  resource "null_resource" "gitlab_health_check" {
    depends_on = [
      aws_instance.gitlab,
    ]

    triggers = {
      always_run = timestamp()
    }

    provisioner "local-exec" {
      command     = "for i in `seq 1 100`; do curl -k -s $ENDPOINT >/dev/null && exit 0 || true; sleep 5; done; echo TIMEOUT && exit 1"
      interpreter = ["/bin/sh", "-c"]
      environment = {
        ENDPOINT = "http://${aws_instance.gitlab.public_ip}"
      }
    }
  }
The variables.tf file defines the variables used in the template. Walrus will use the variables to generate the form for users to fill in.
Walrus uses the @label and @group annotations to define the labels and groups of the variables. The optional @options annotation is used to define the dropdown options of the variable, if the @options annotation is not defined, the variable will be displayed as a text box in the form. More details about the annotations.
In this example, we define two groups: Basic and AWS. It will be displayed as two tabs in the form when creating a service using this template.
  # @group "Basic"
variable "gitlab_image" {
  type        = string
  description = "gitlab image"
  default     = "gitlab/gitlab-ce"
}

# @group "Basic"
variable "gitlab_root_password" {
  type        = string
  description = "gitlab root password"
  default     = "seal123456"
  sensitive   = true
}

# @group "AWS"
# @options ["t3.medium", "c5.xlarge"]
variable "instance_type" {
  type        = string
  description = "Instance type"
  default     = "t3.medium"
}

# @group "AWS"
variable "disk_size" {
  type        = number
  description = "Root disk size in GiB"
  default     = 50
}

# @group "AWS"
variable "key_name" {
  type        = string
  description = "AWS key name"
  default     = "xueying"
}

# @group "AWS"
variable "security_group_name" {
  type        = string
  description = "Security group Name"
  default     = "all-open"
}

# @hidden
variable "gitlab_metadata_application_instance_name" {
  type        = string
  description = "gitlab metadata application instance name."
  default     = "bar"
}
The outputs.tf file defines the outputs of the template which will be displayed to the user after the service is created. The outputs of the template of a service could also be referenced by other services. In this example, we define an output gitlab_url which is the URL of the Gitlab instance.
  output "gitlab_url" {
    description = "The URL of the GitLab instance"
    value = "http://${aws_instance.gitlab.public_ip}"
  }
The README.md file is the description of the template. It will be displayed to the user when creating a service using this template.
Here we can use the tool terraform-docs to generate the description of the template. You need to follow the document of the project and install the tool on your laptop, and run the following command to generate README.md file for the template.
terraform-docs markdown . > README.md
The generated README.md file is as follows:
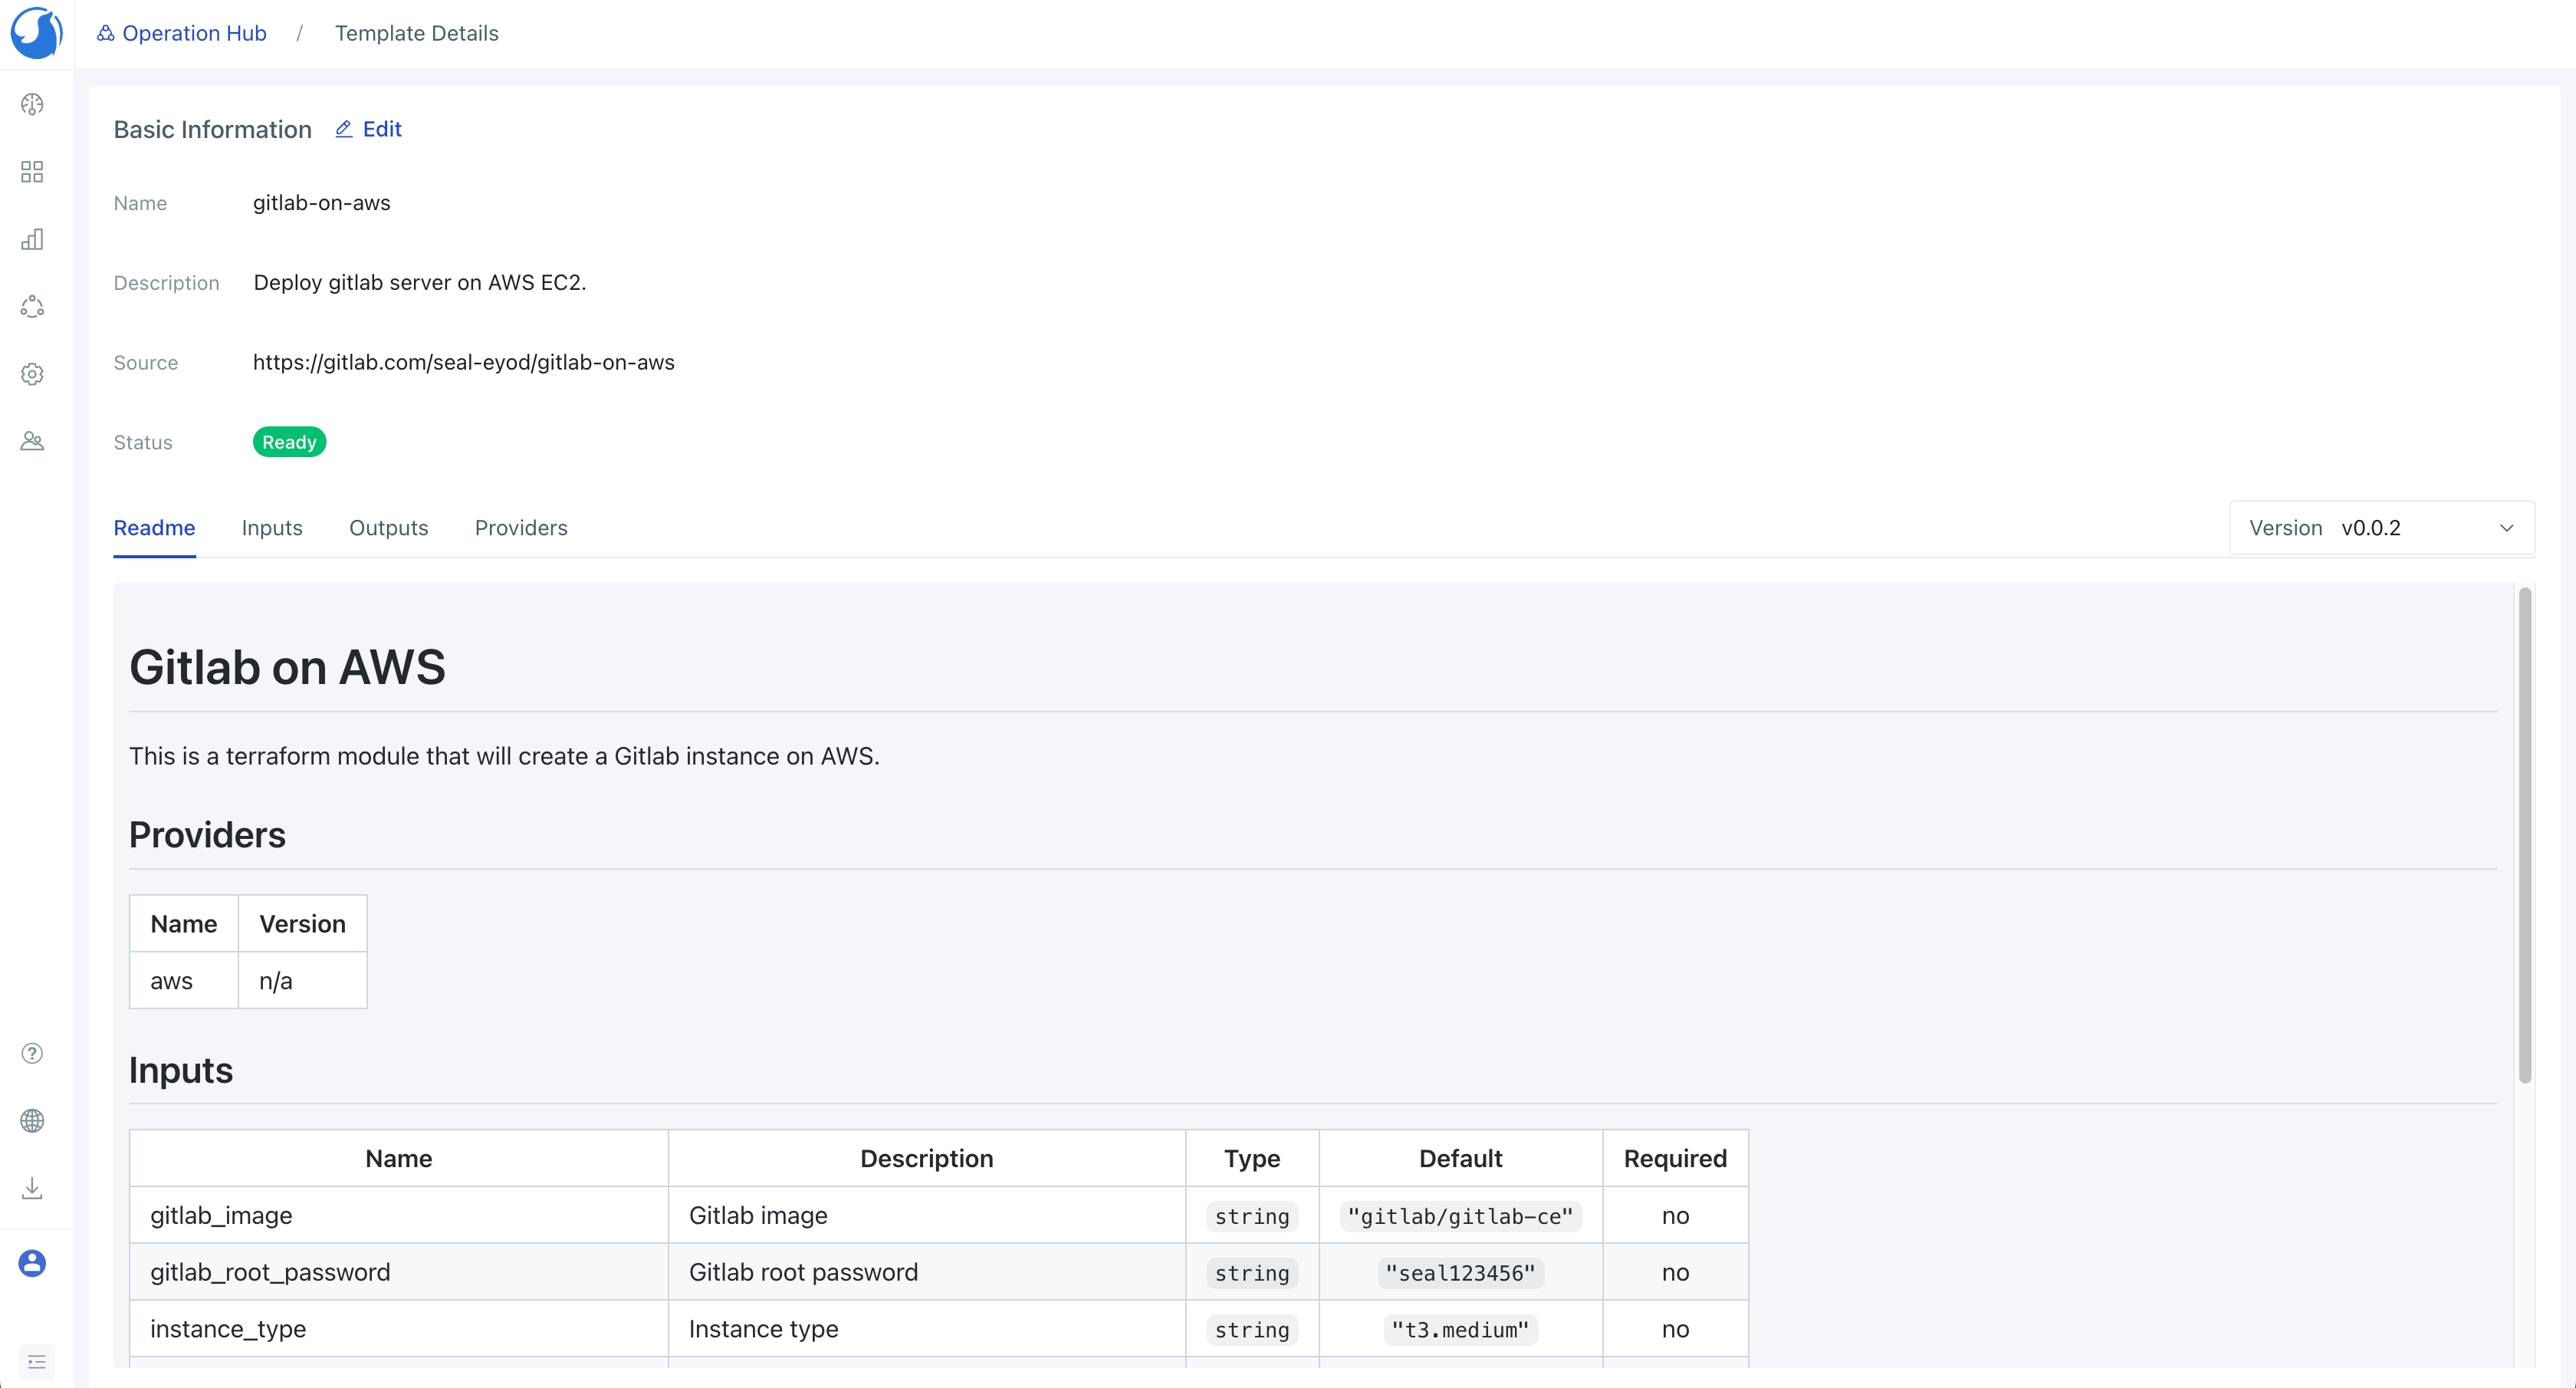
# Gitlab on AWS

This is a terraform module that will create a Gitlab instance on AWS.

## Providers

| Name | Version |
|------|---------|
| aws  | n/a     |

## Inputs

| Name                                      | Description                                |   Type   |       Default        | Required |
|-------------------------------------------|--------------------------------------------|:--------:|:--------------------:|:--------:|
| gitlab_image                              | Gitlab image                               | `string` | `"gitlab/gitlab-ce"` |    no    |
| gitlab_root_password                      | Gitlab root password                       | `string` |    `"seal123456"`    |    no    |
| instance\_type                            | Instance type                              | `string` |    `"t3.medium"`     |    no    |
| disk\_size                                | Root disk size in GiB                      | `number` |         `50`         |    no    |
| security\_group\_name                     | Security group Name                        | `string` |     `"all-open"`     |    no    |
| gitlab_metadata_application_instance_name | gitlab metadata application instance name. | `string` |       `"bar"`        |    no    |

## Outputs

| Name       | Description |
|------------|-------------|
| gitlab_url | Gitlab URL  |
Commit and Tag Version
  git add .
  git commit -m "add template files"
  git push -u origin main
Create a tag for the template version.
  git tag v0.0.1
  git push --tags
Create a Template on Walrus
Open Walrus in your browser and log in.
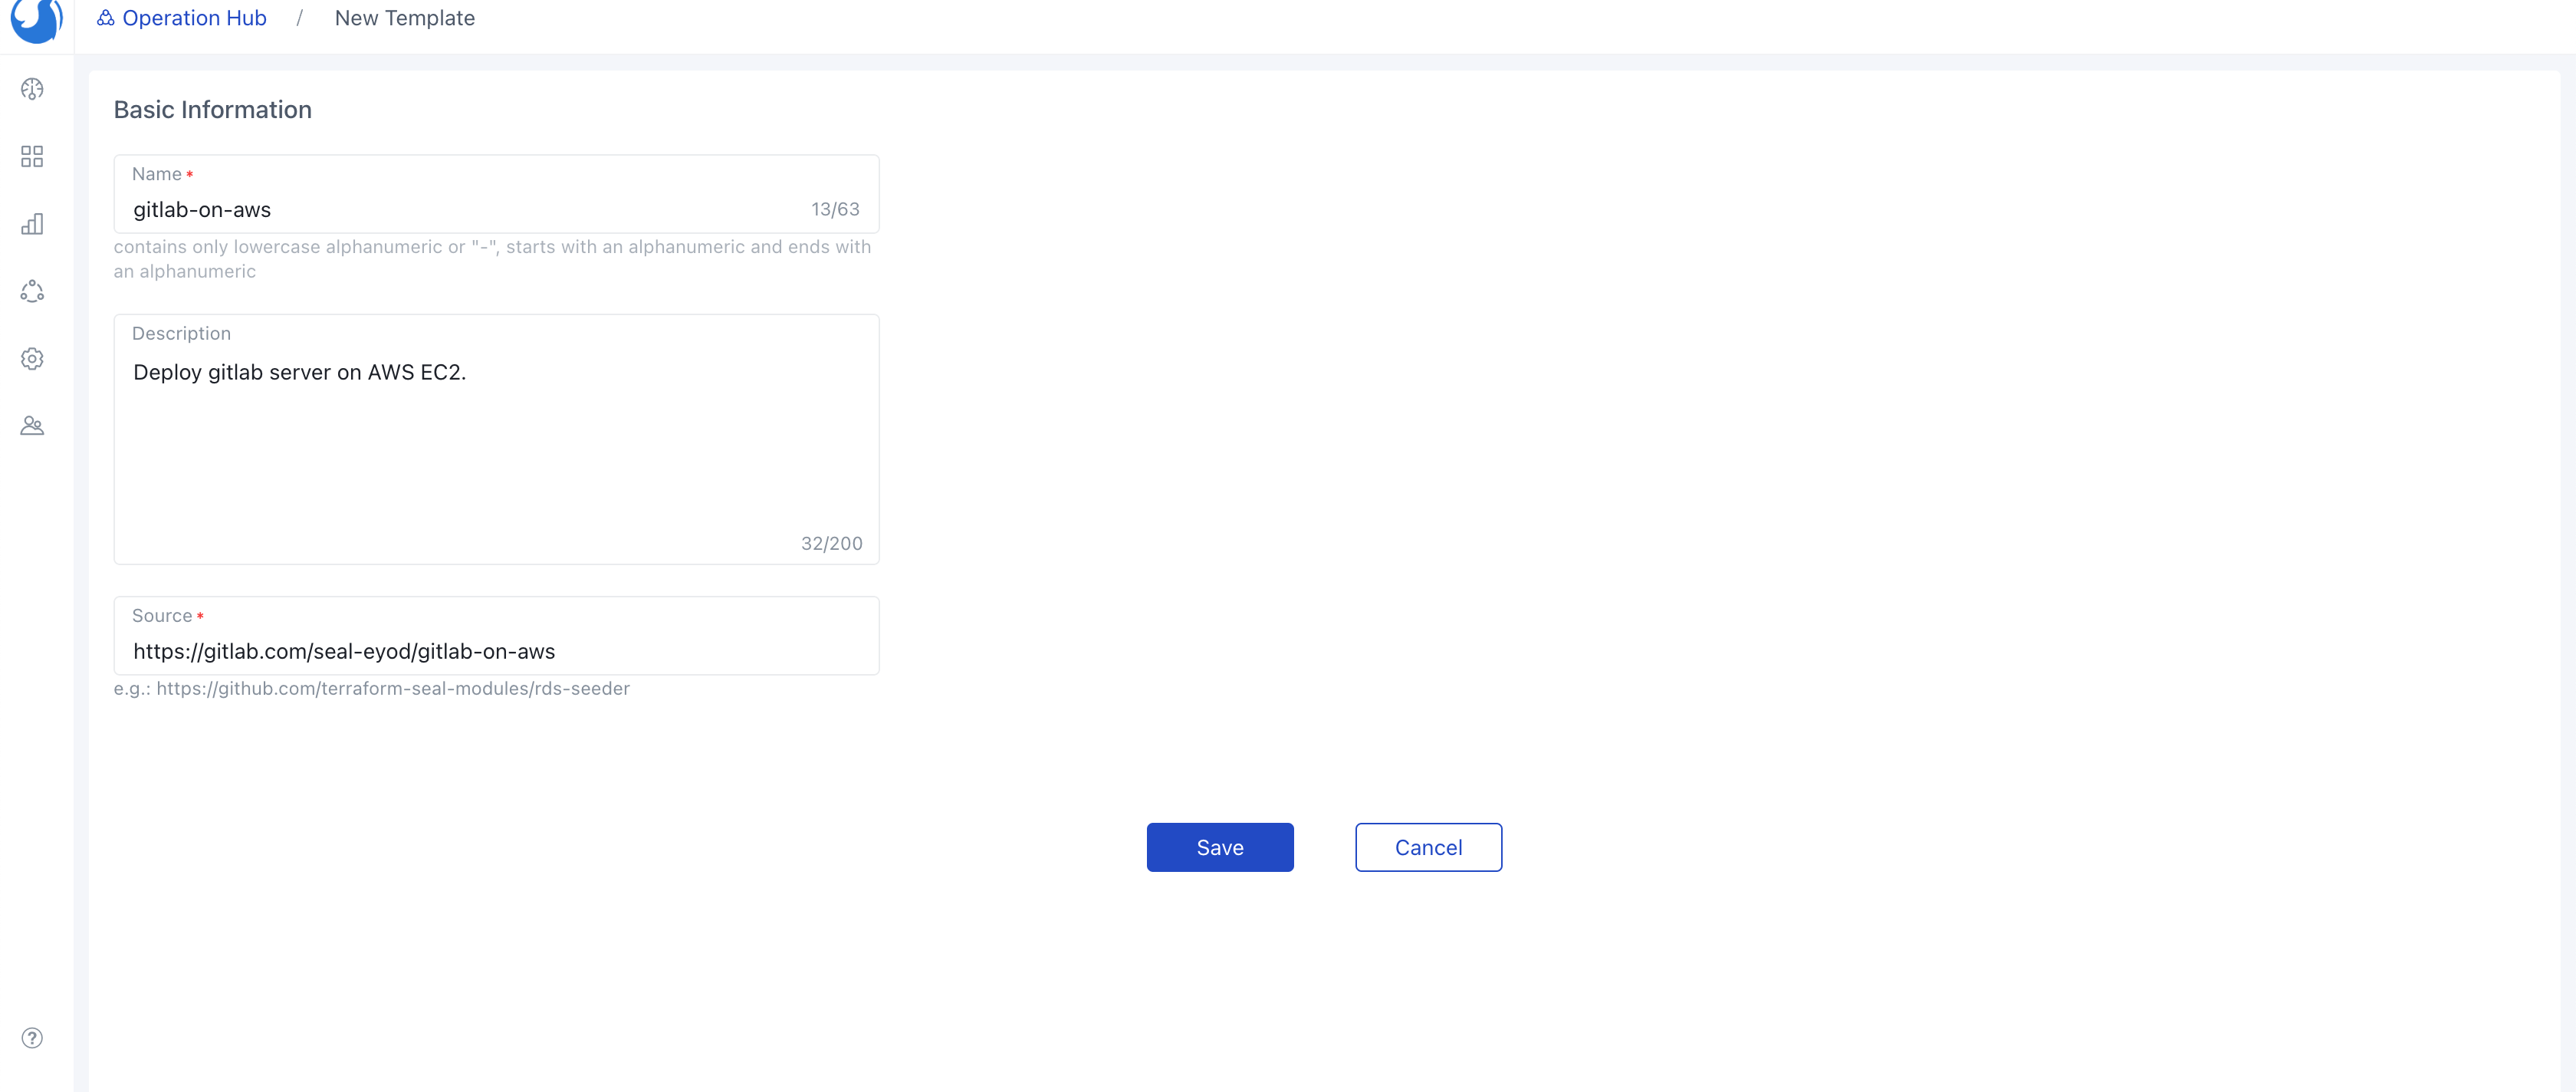
Navigate to the Template tab within the Operations Hub and craft a new template by selecting the one we've recently created.For reference, let's name this template gitlab-on-aws.
After Walrus syncs the template, you can see the template in Operations Hub.
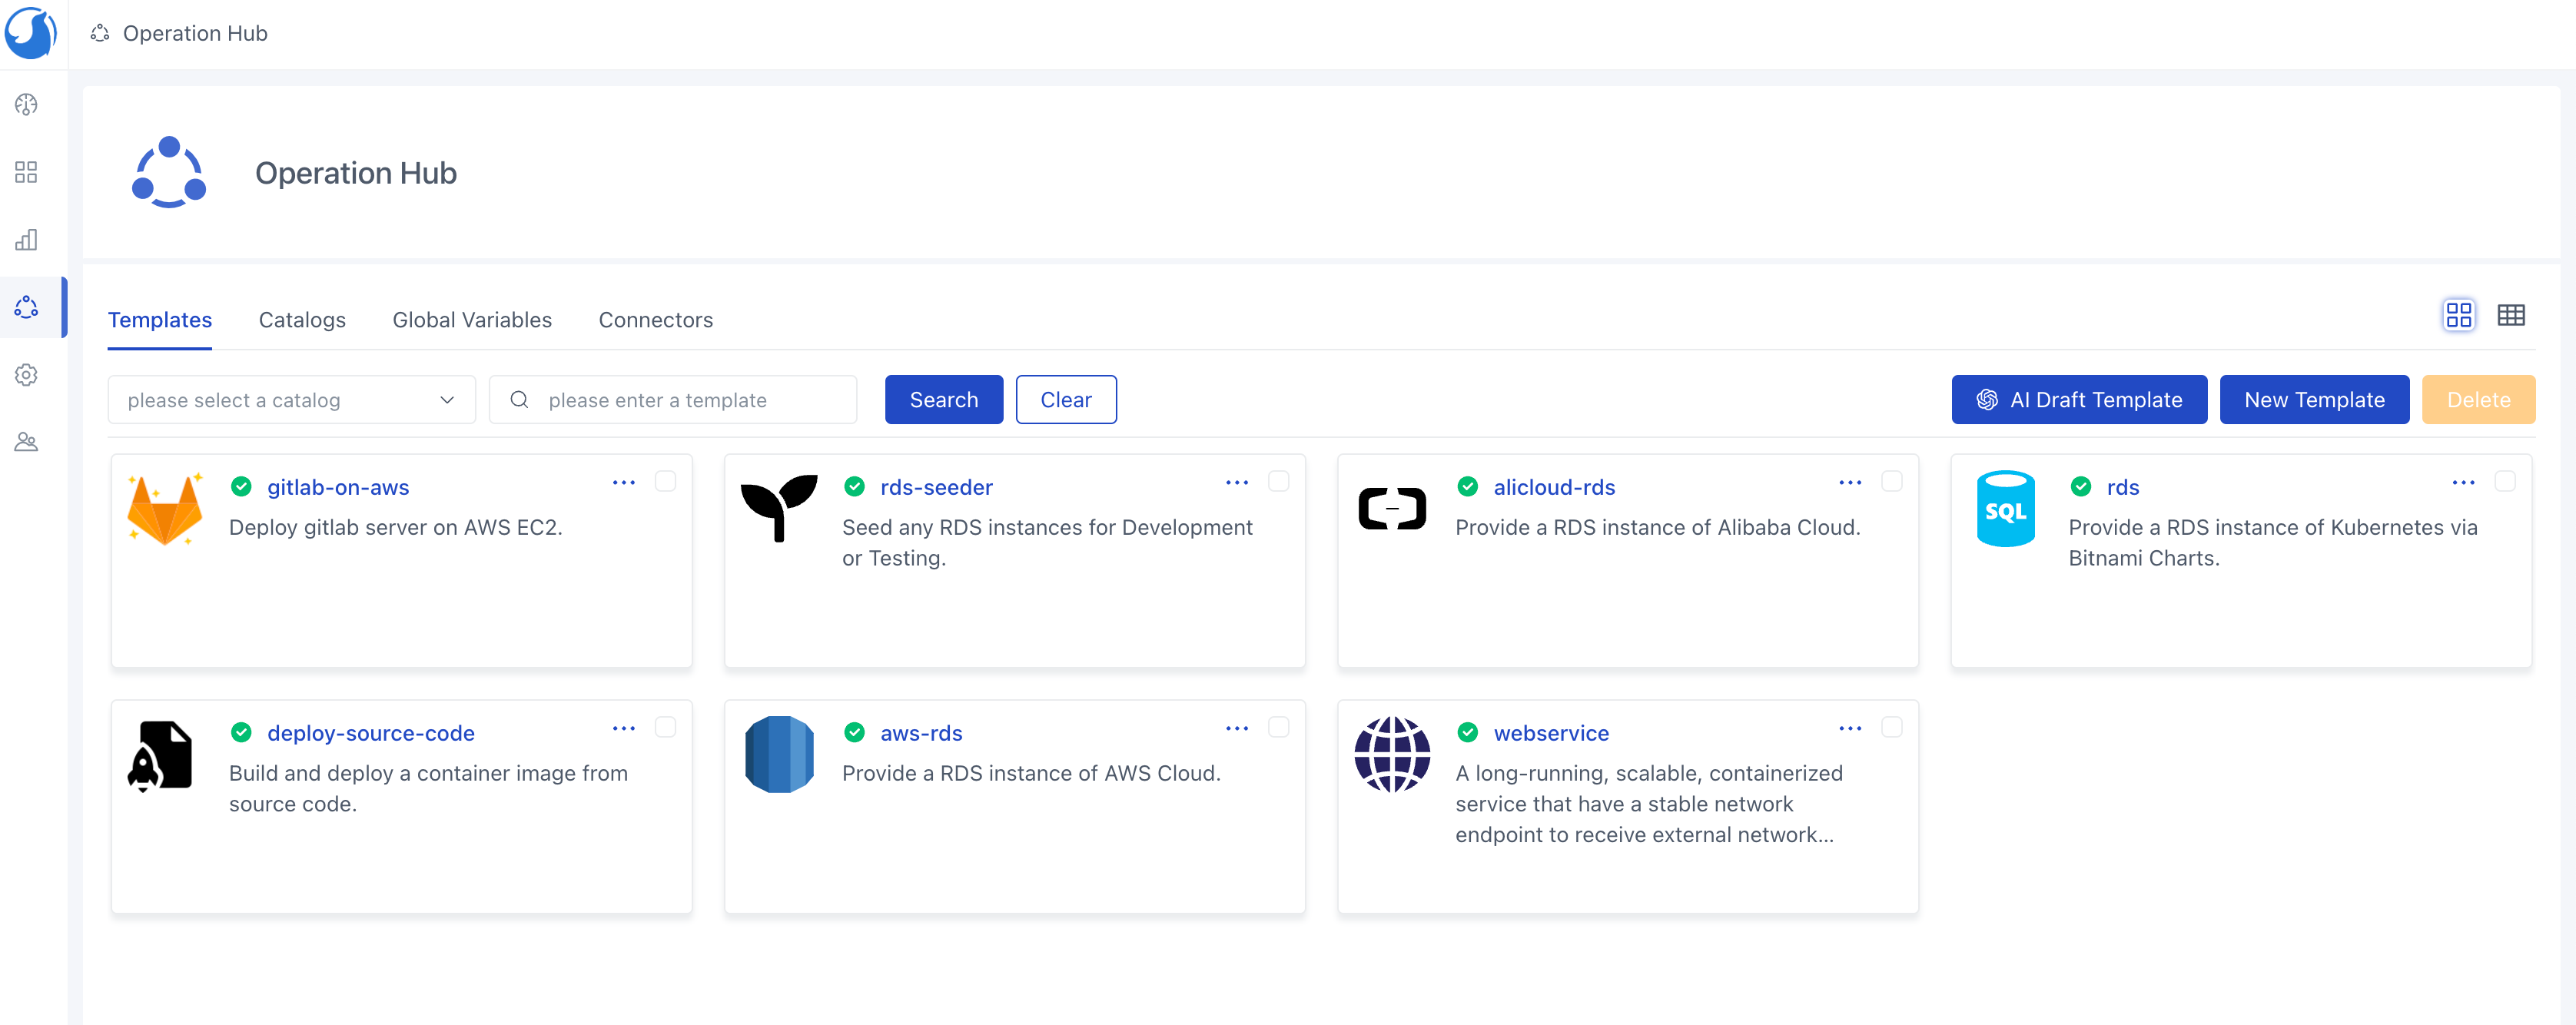
Once the import task is finished, you'll find the template proudly showcased in the list. Take note that the template boasts two versions: v0.0.1 and v0.0.2.
Deploy Gitlab Server on AWS
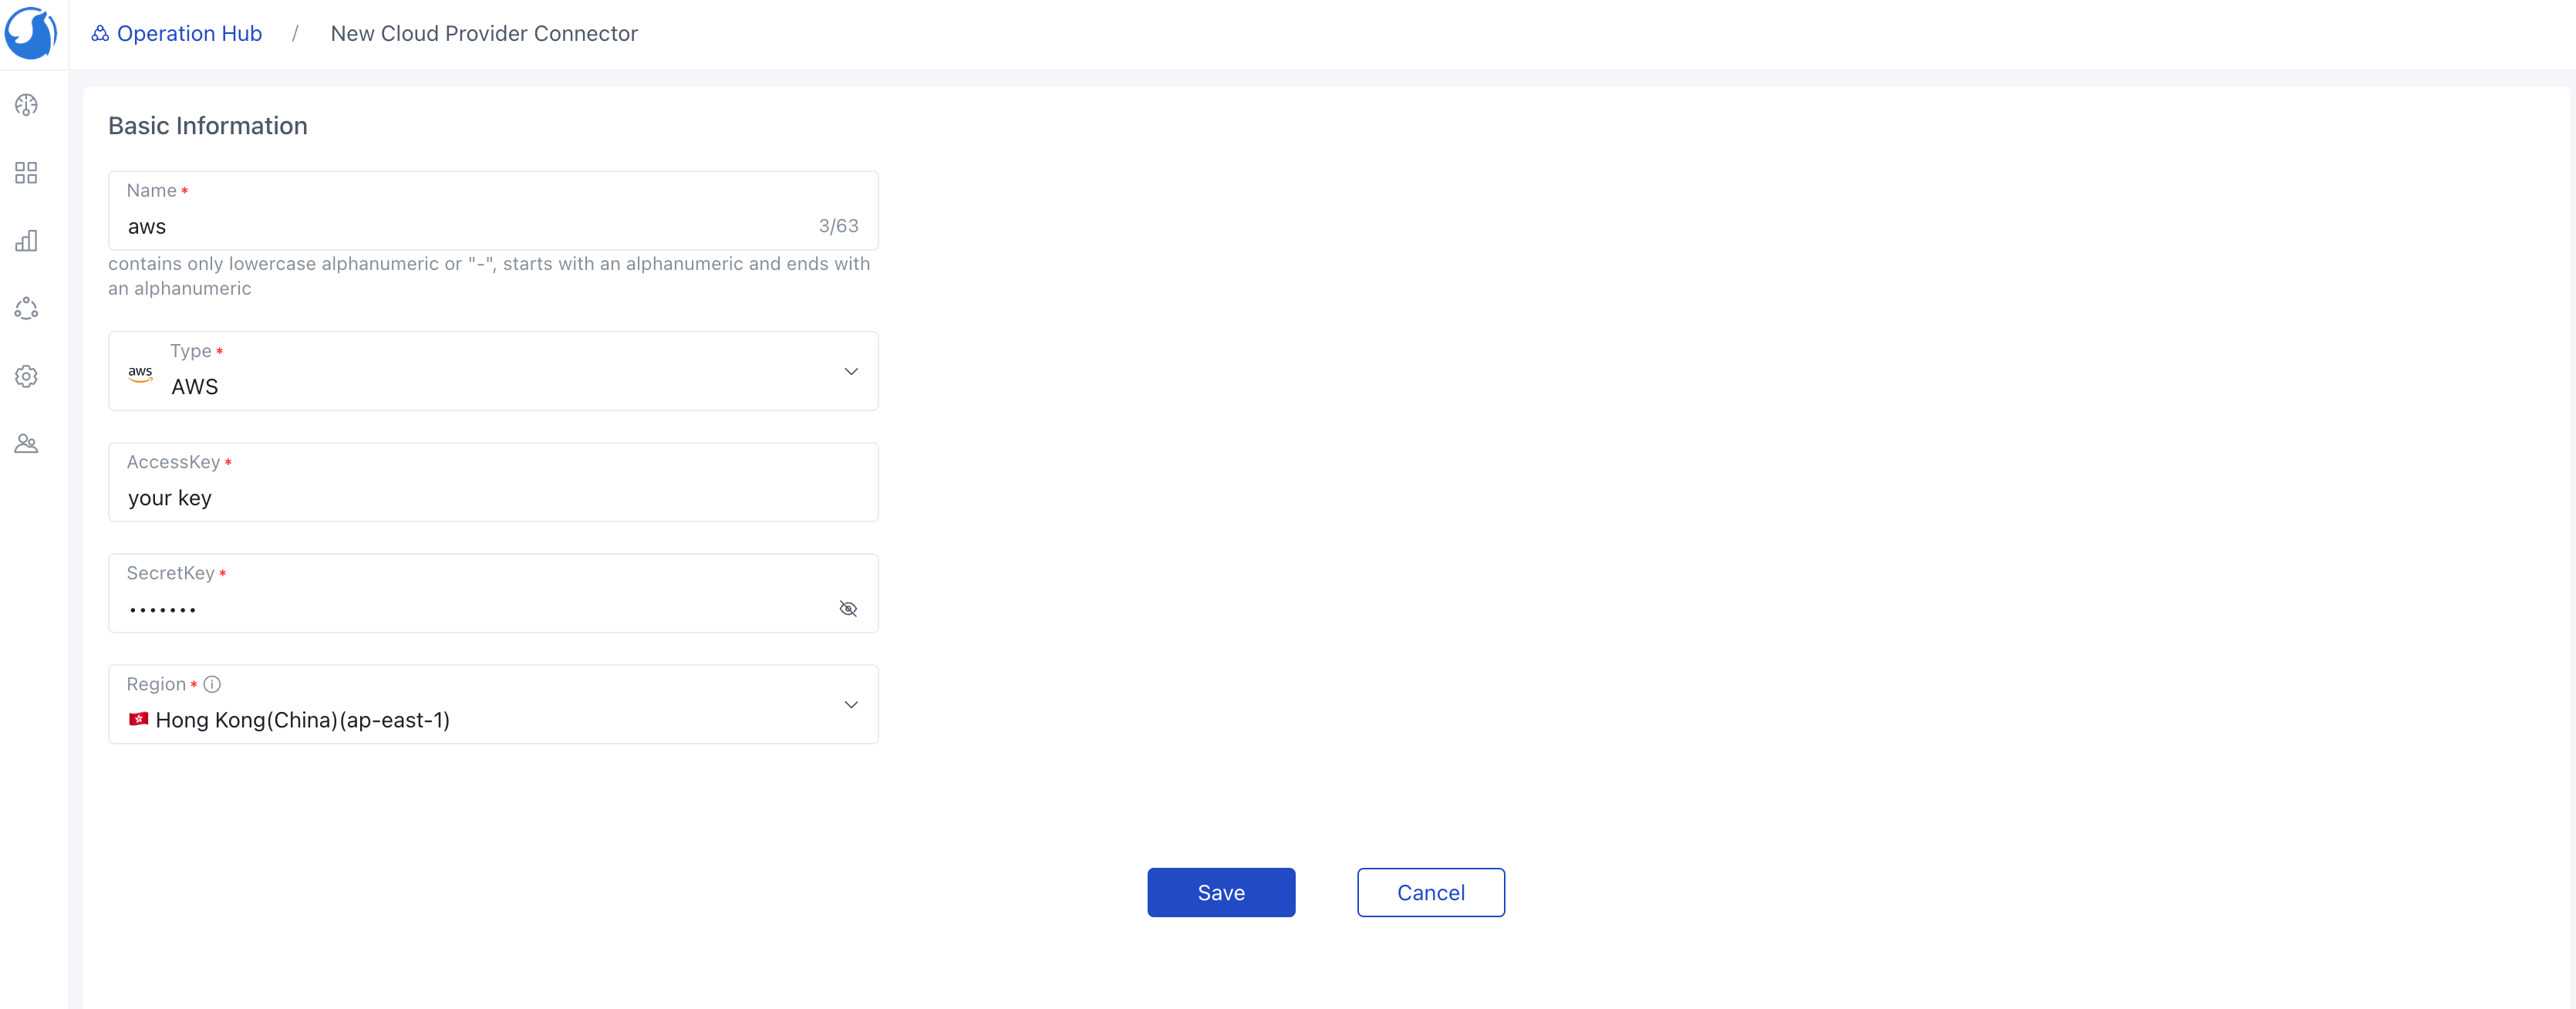
Add AWS Cloud Provider in the Connectors tab within the Operations Hub.
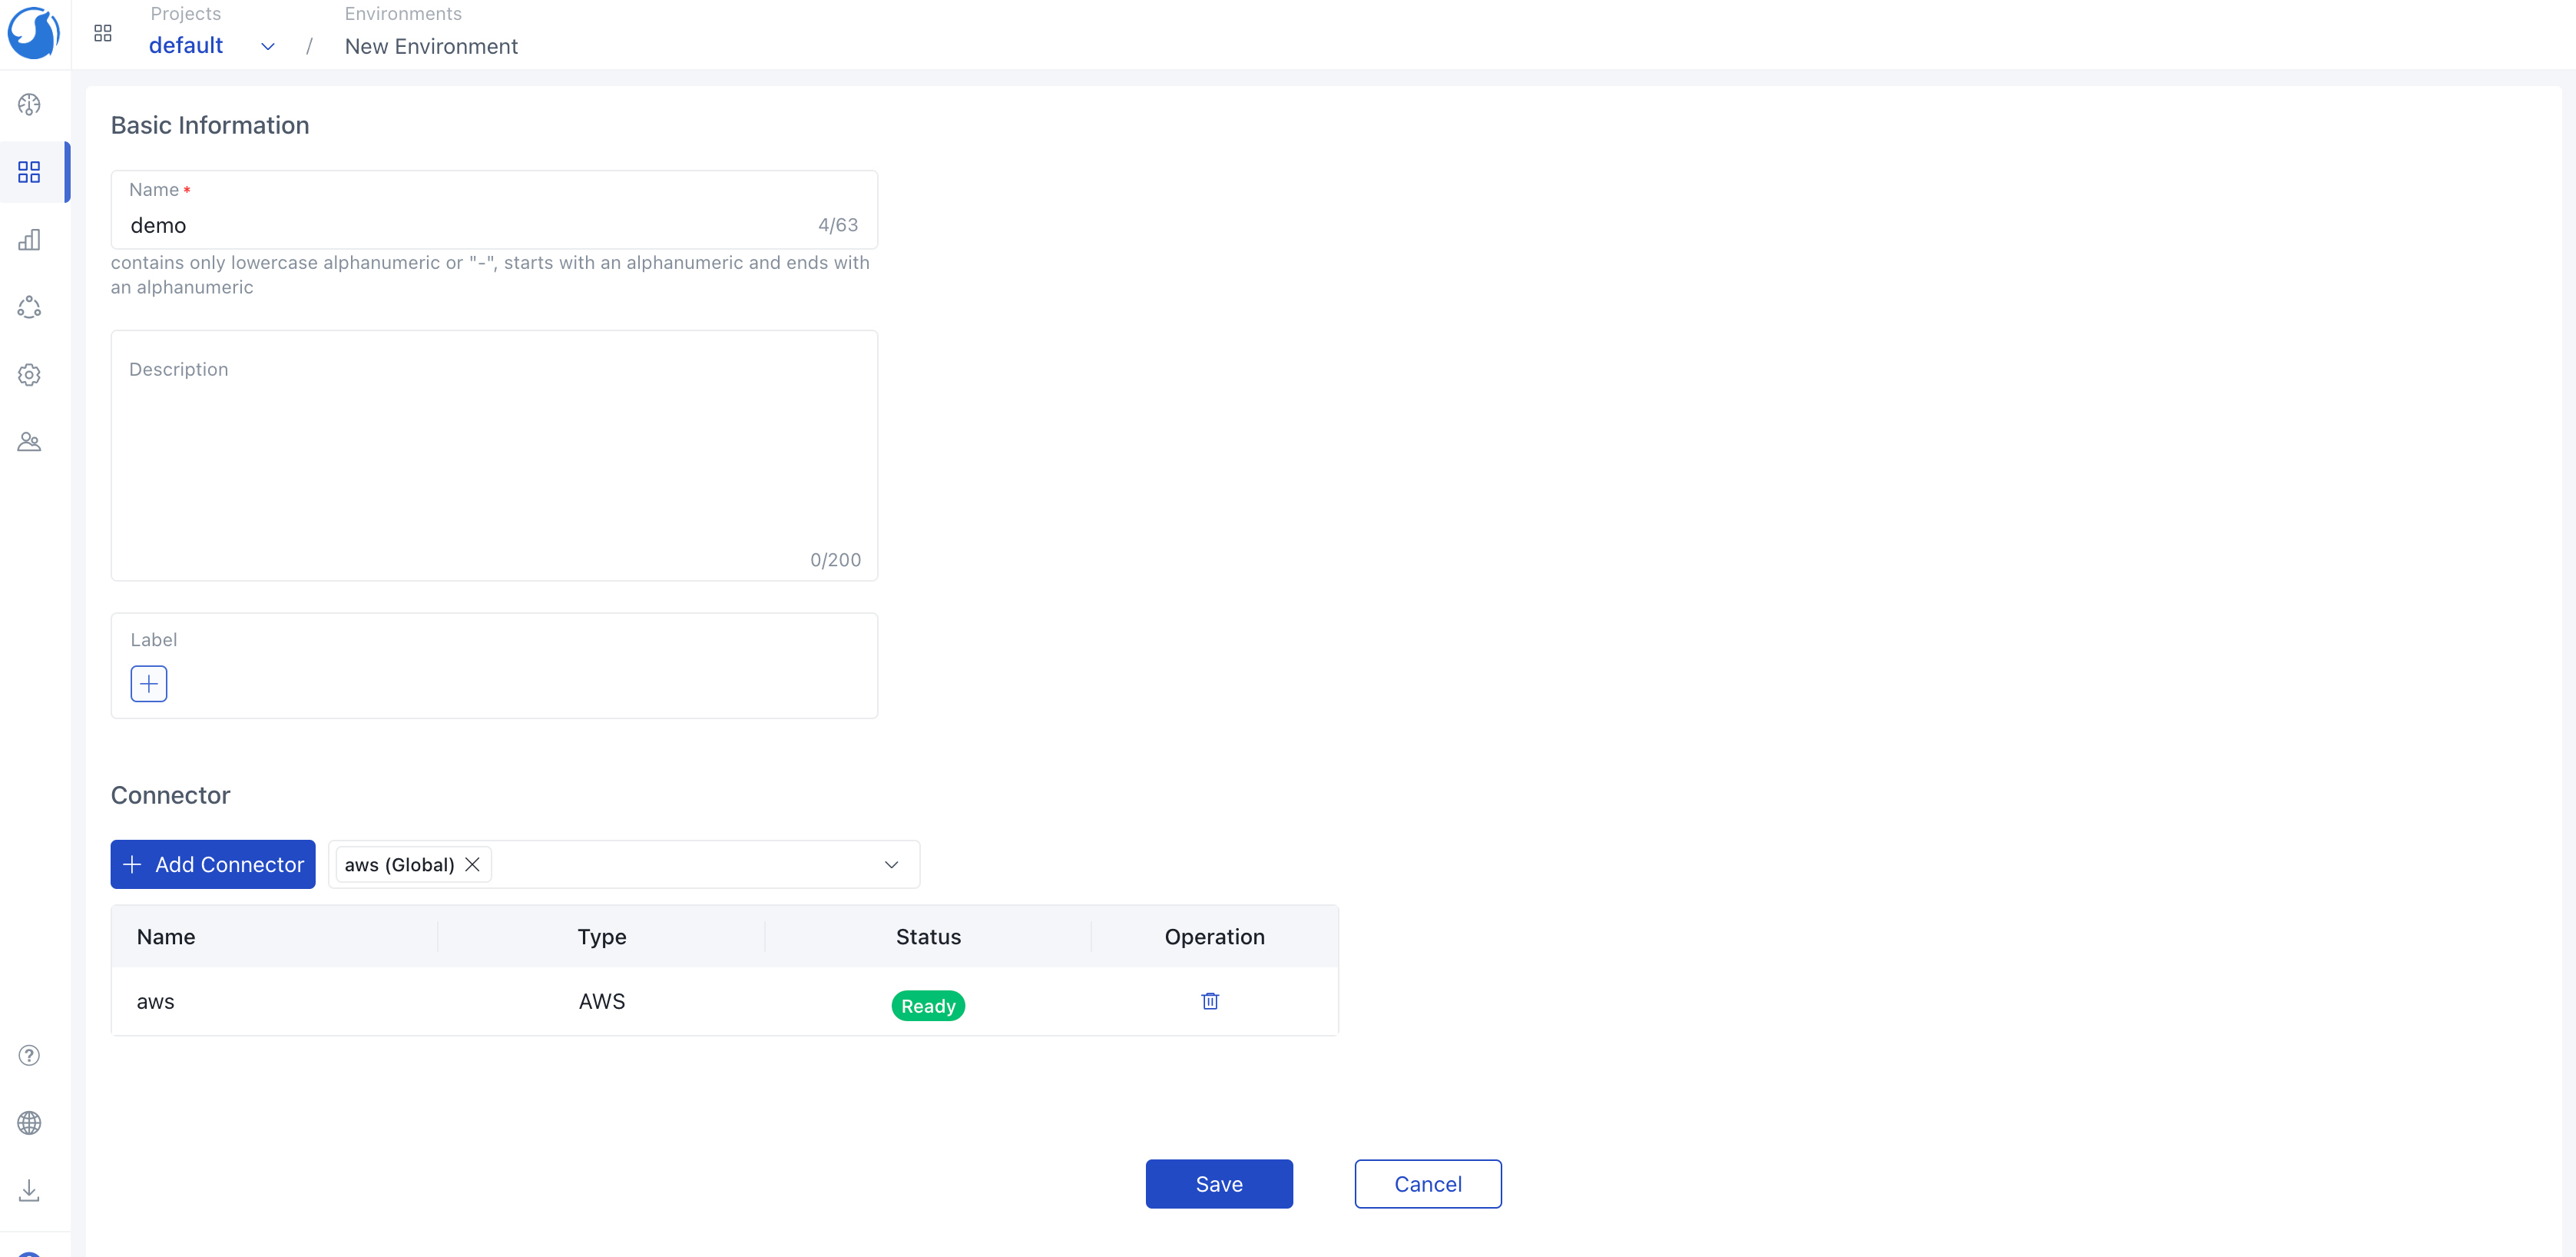
Add Connector to the Environment.
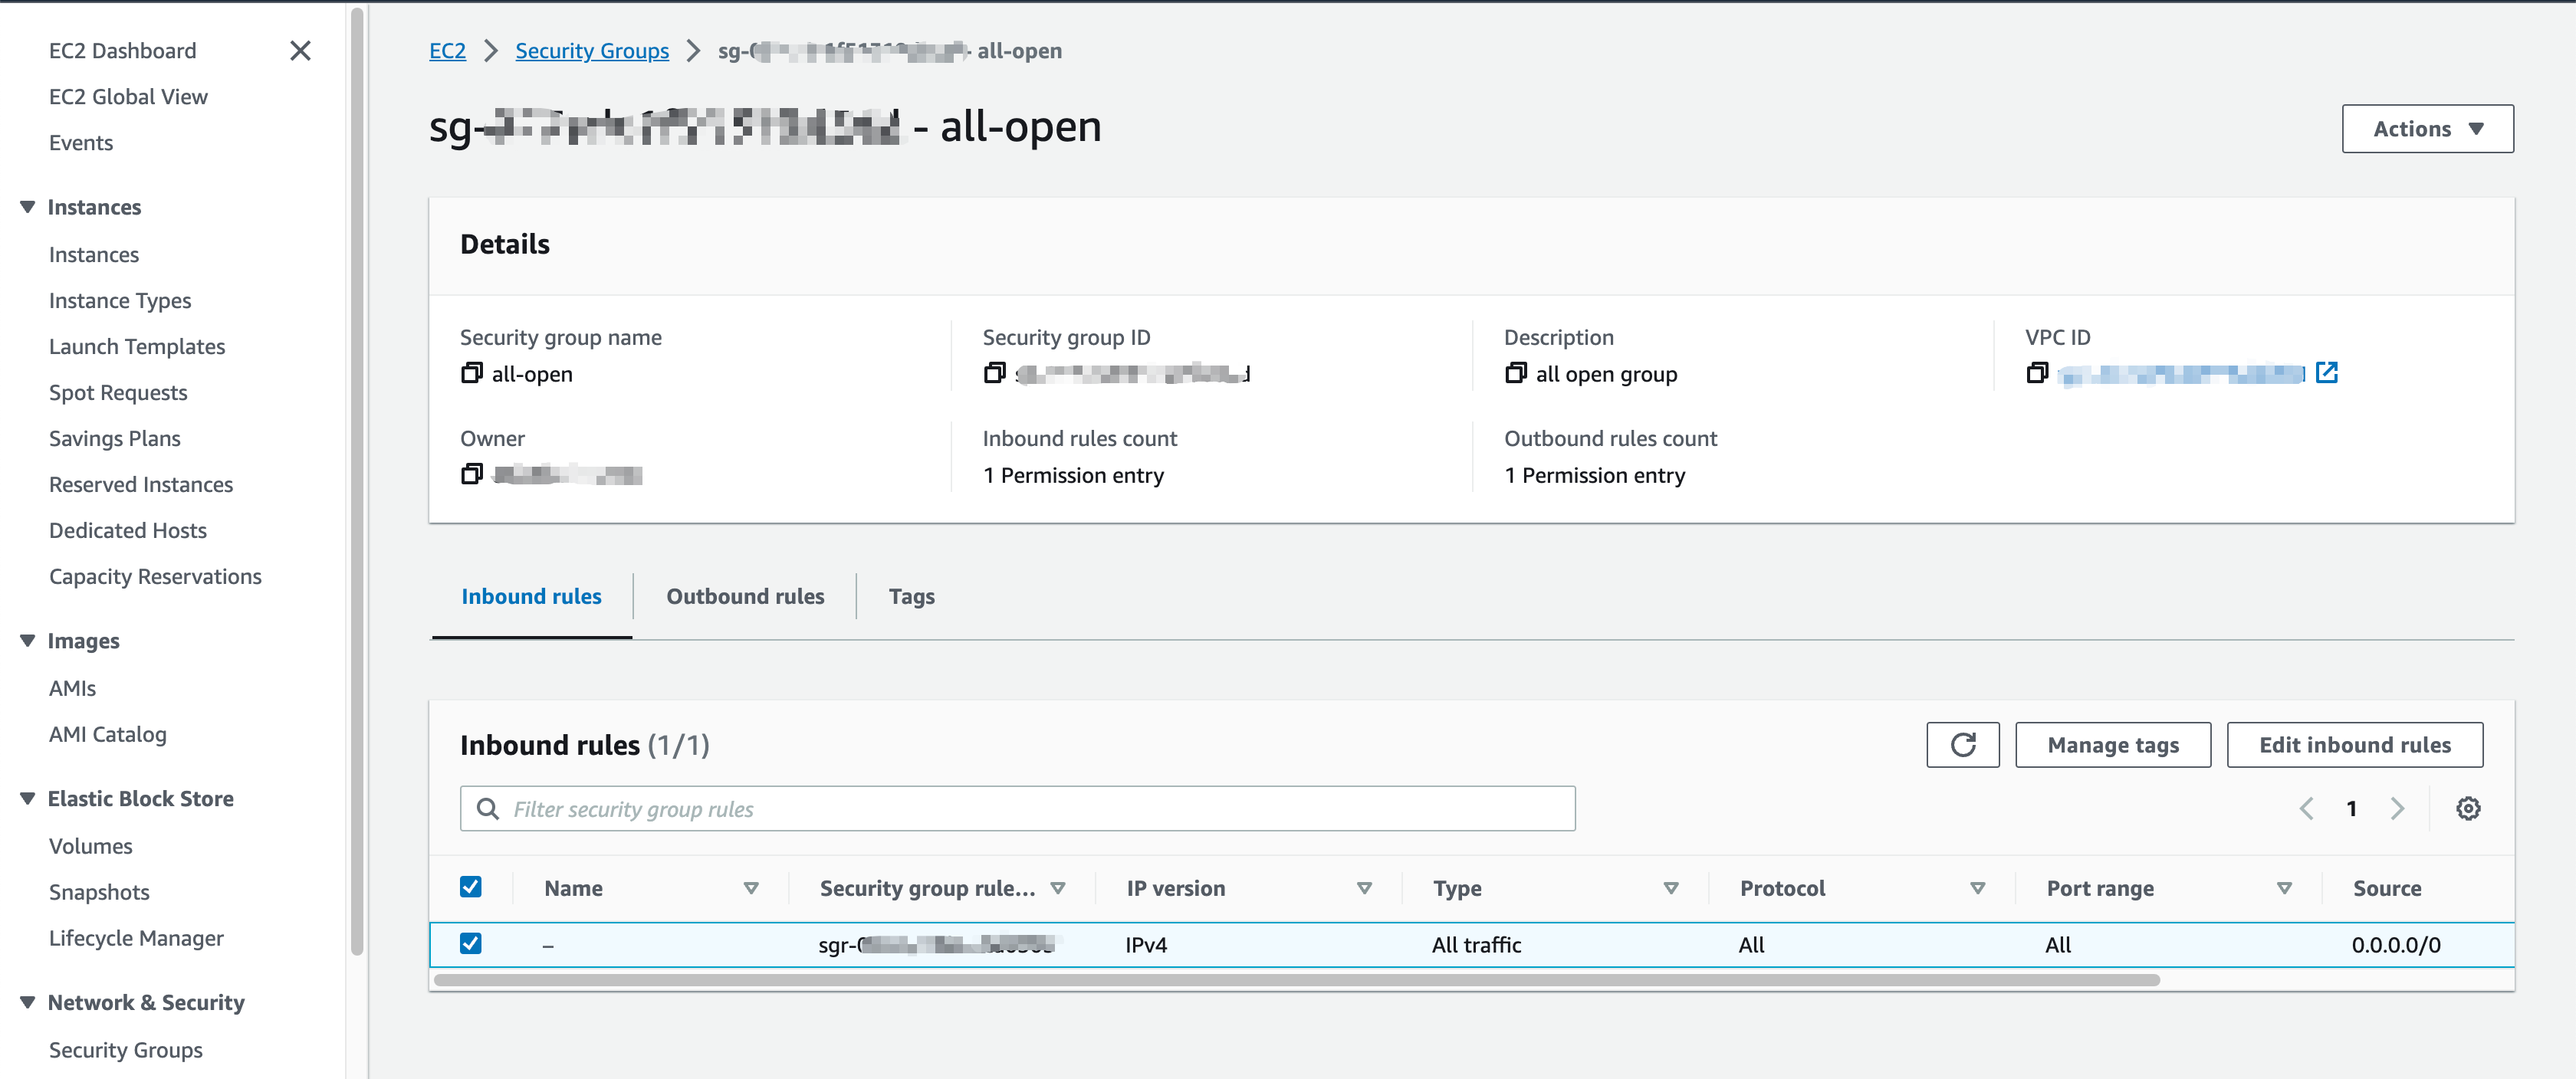
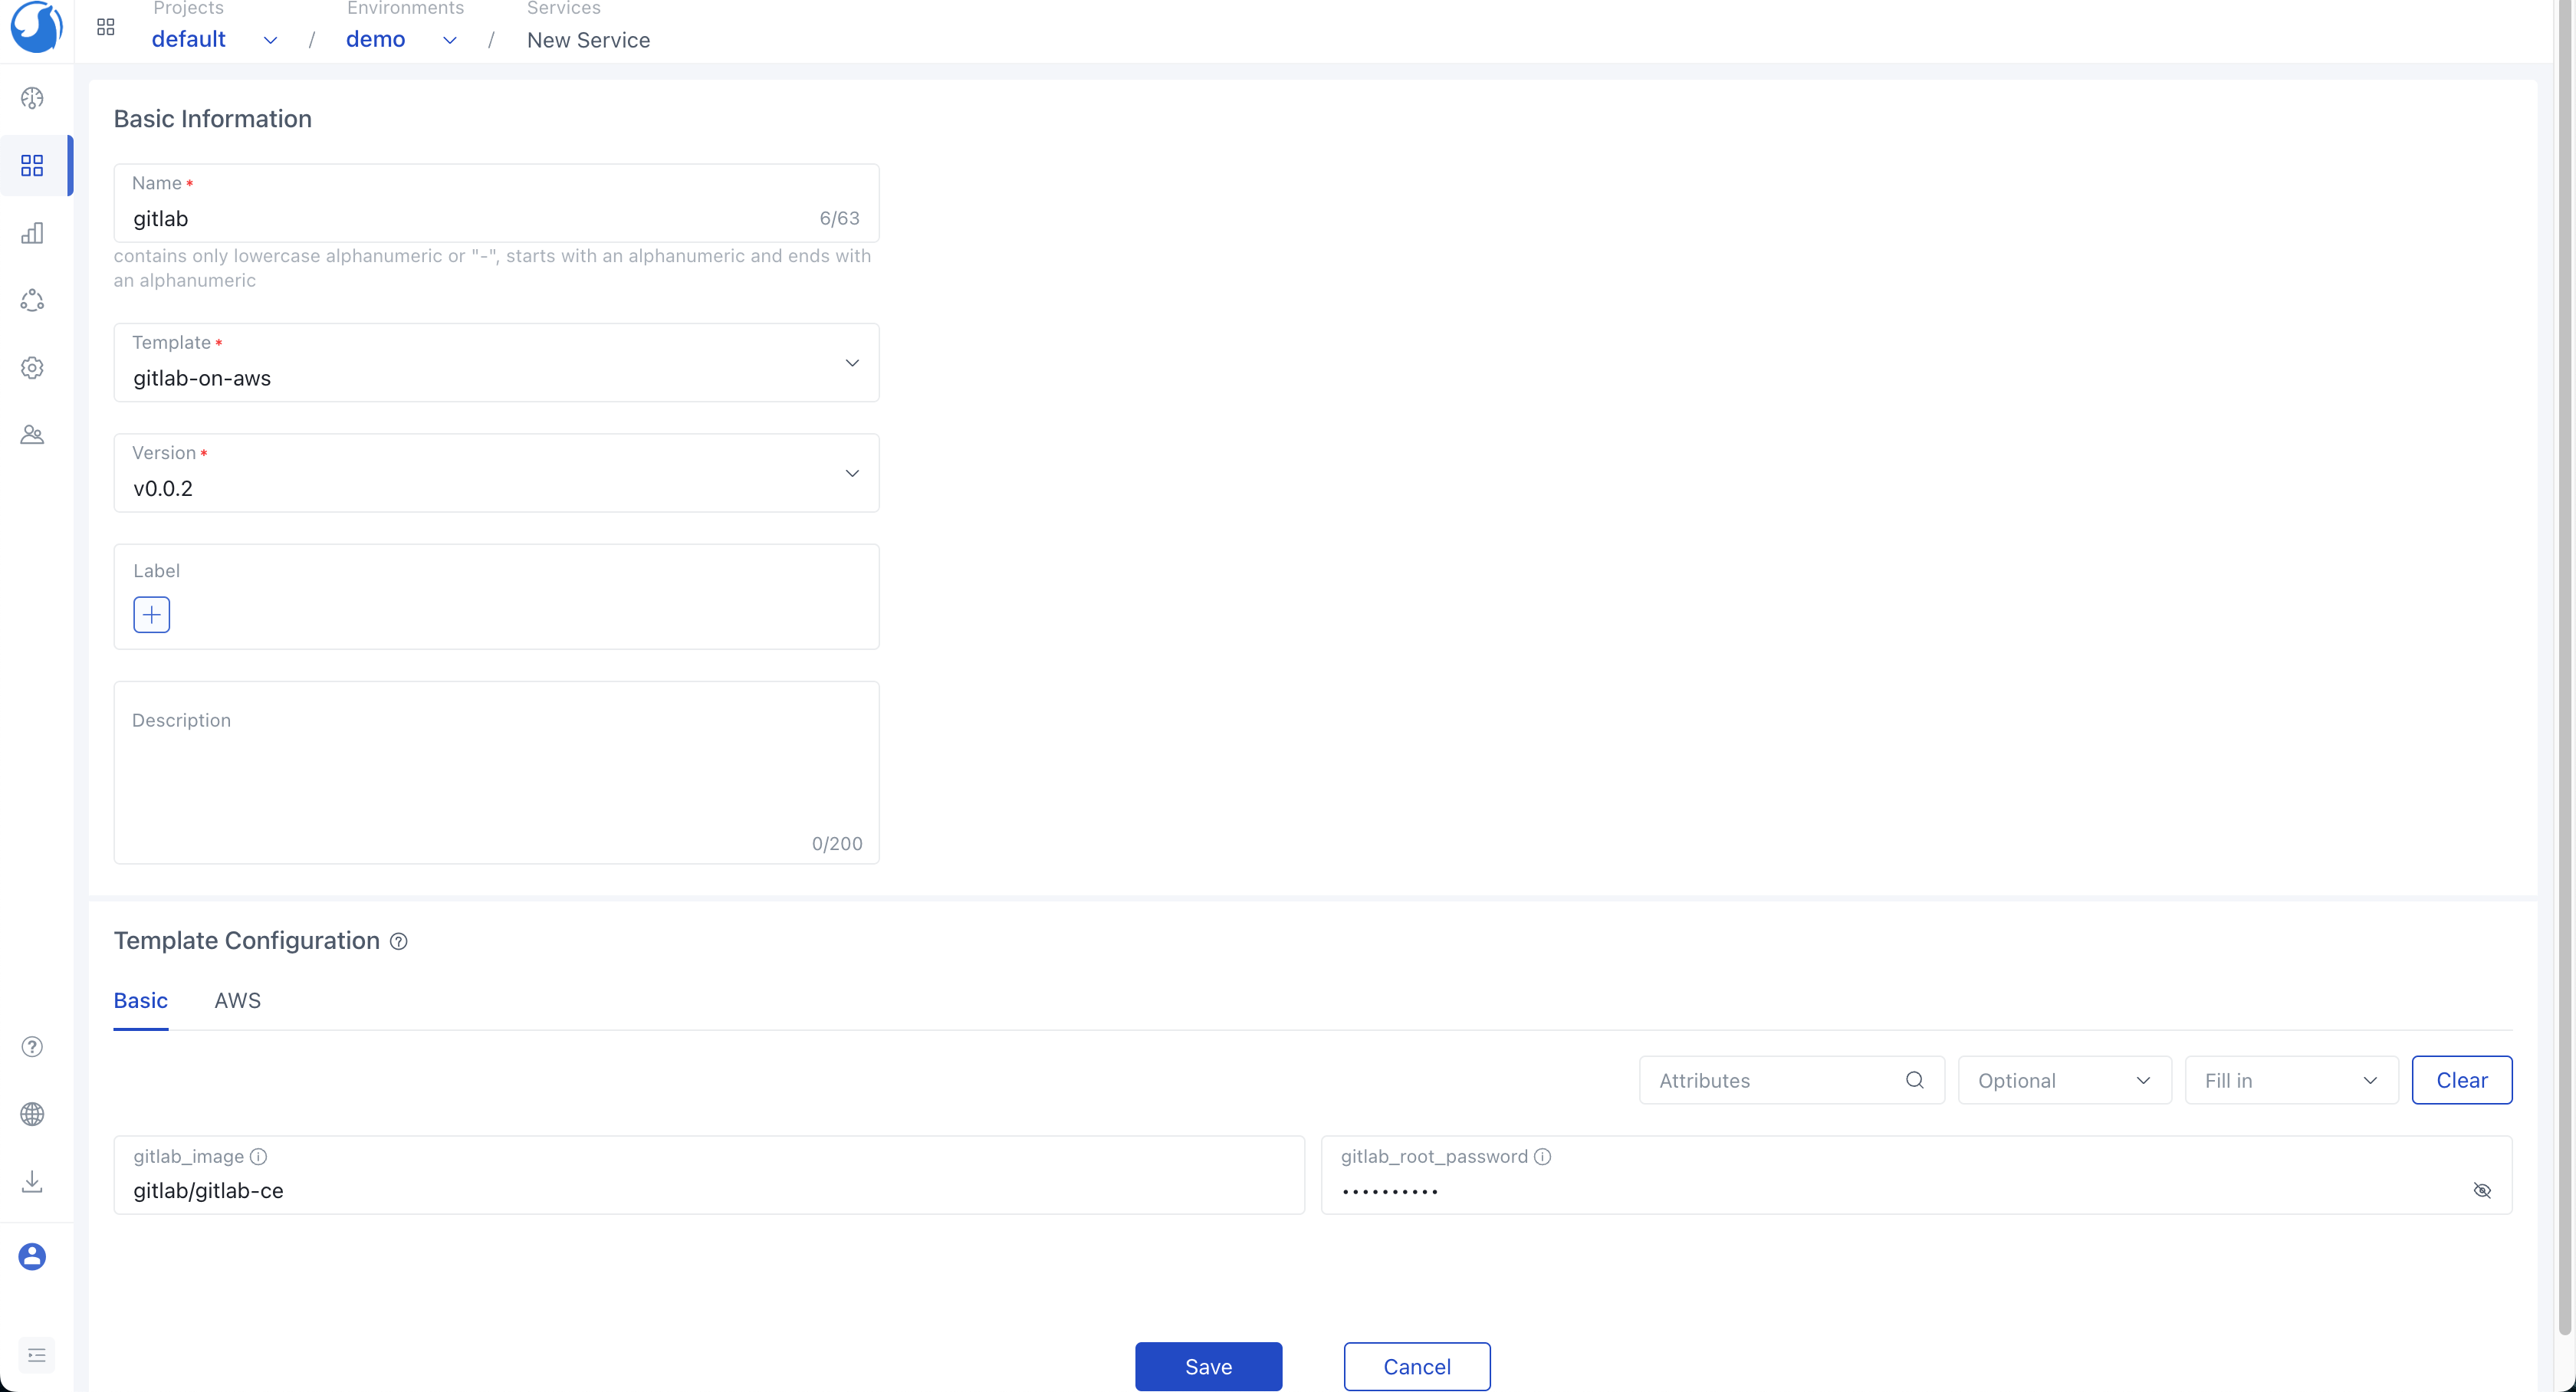
Generate a service utilizing the gitlab-on-aws template. The form groups and labels are dynamically generated based on the annotations specified in the template variables we've previously defined. Notably, there are two groups, and the input variables are outlined in the variables.tf file of the template.To ensure network traffic management, an EC2 instance requires a security group. We can create a security group named all-open to permit all network traffic. For enhanced security, you can customize the group's rules as needed.
After the security group is created in your AWS target region, you can save and apply the service.
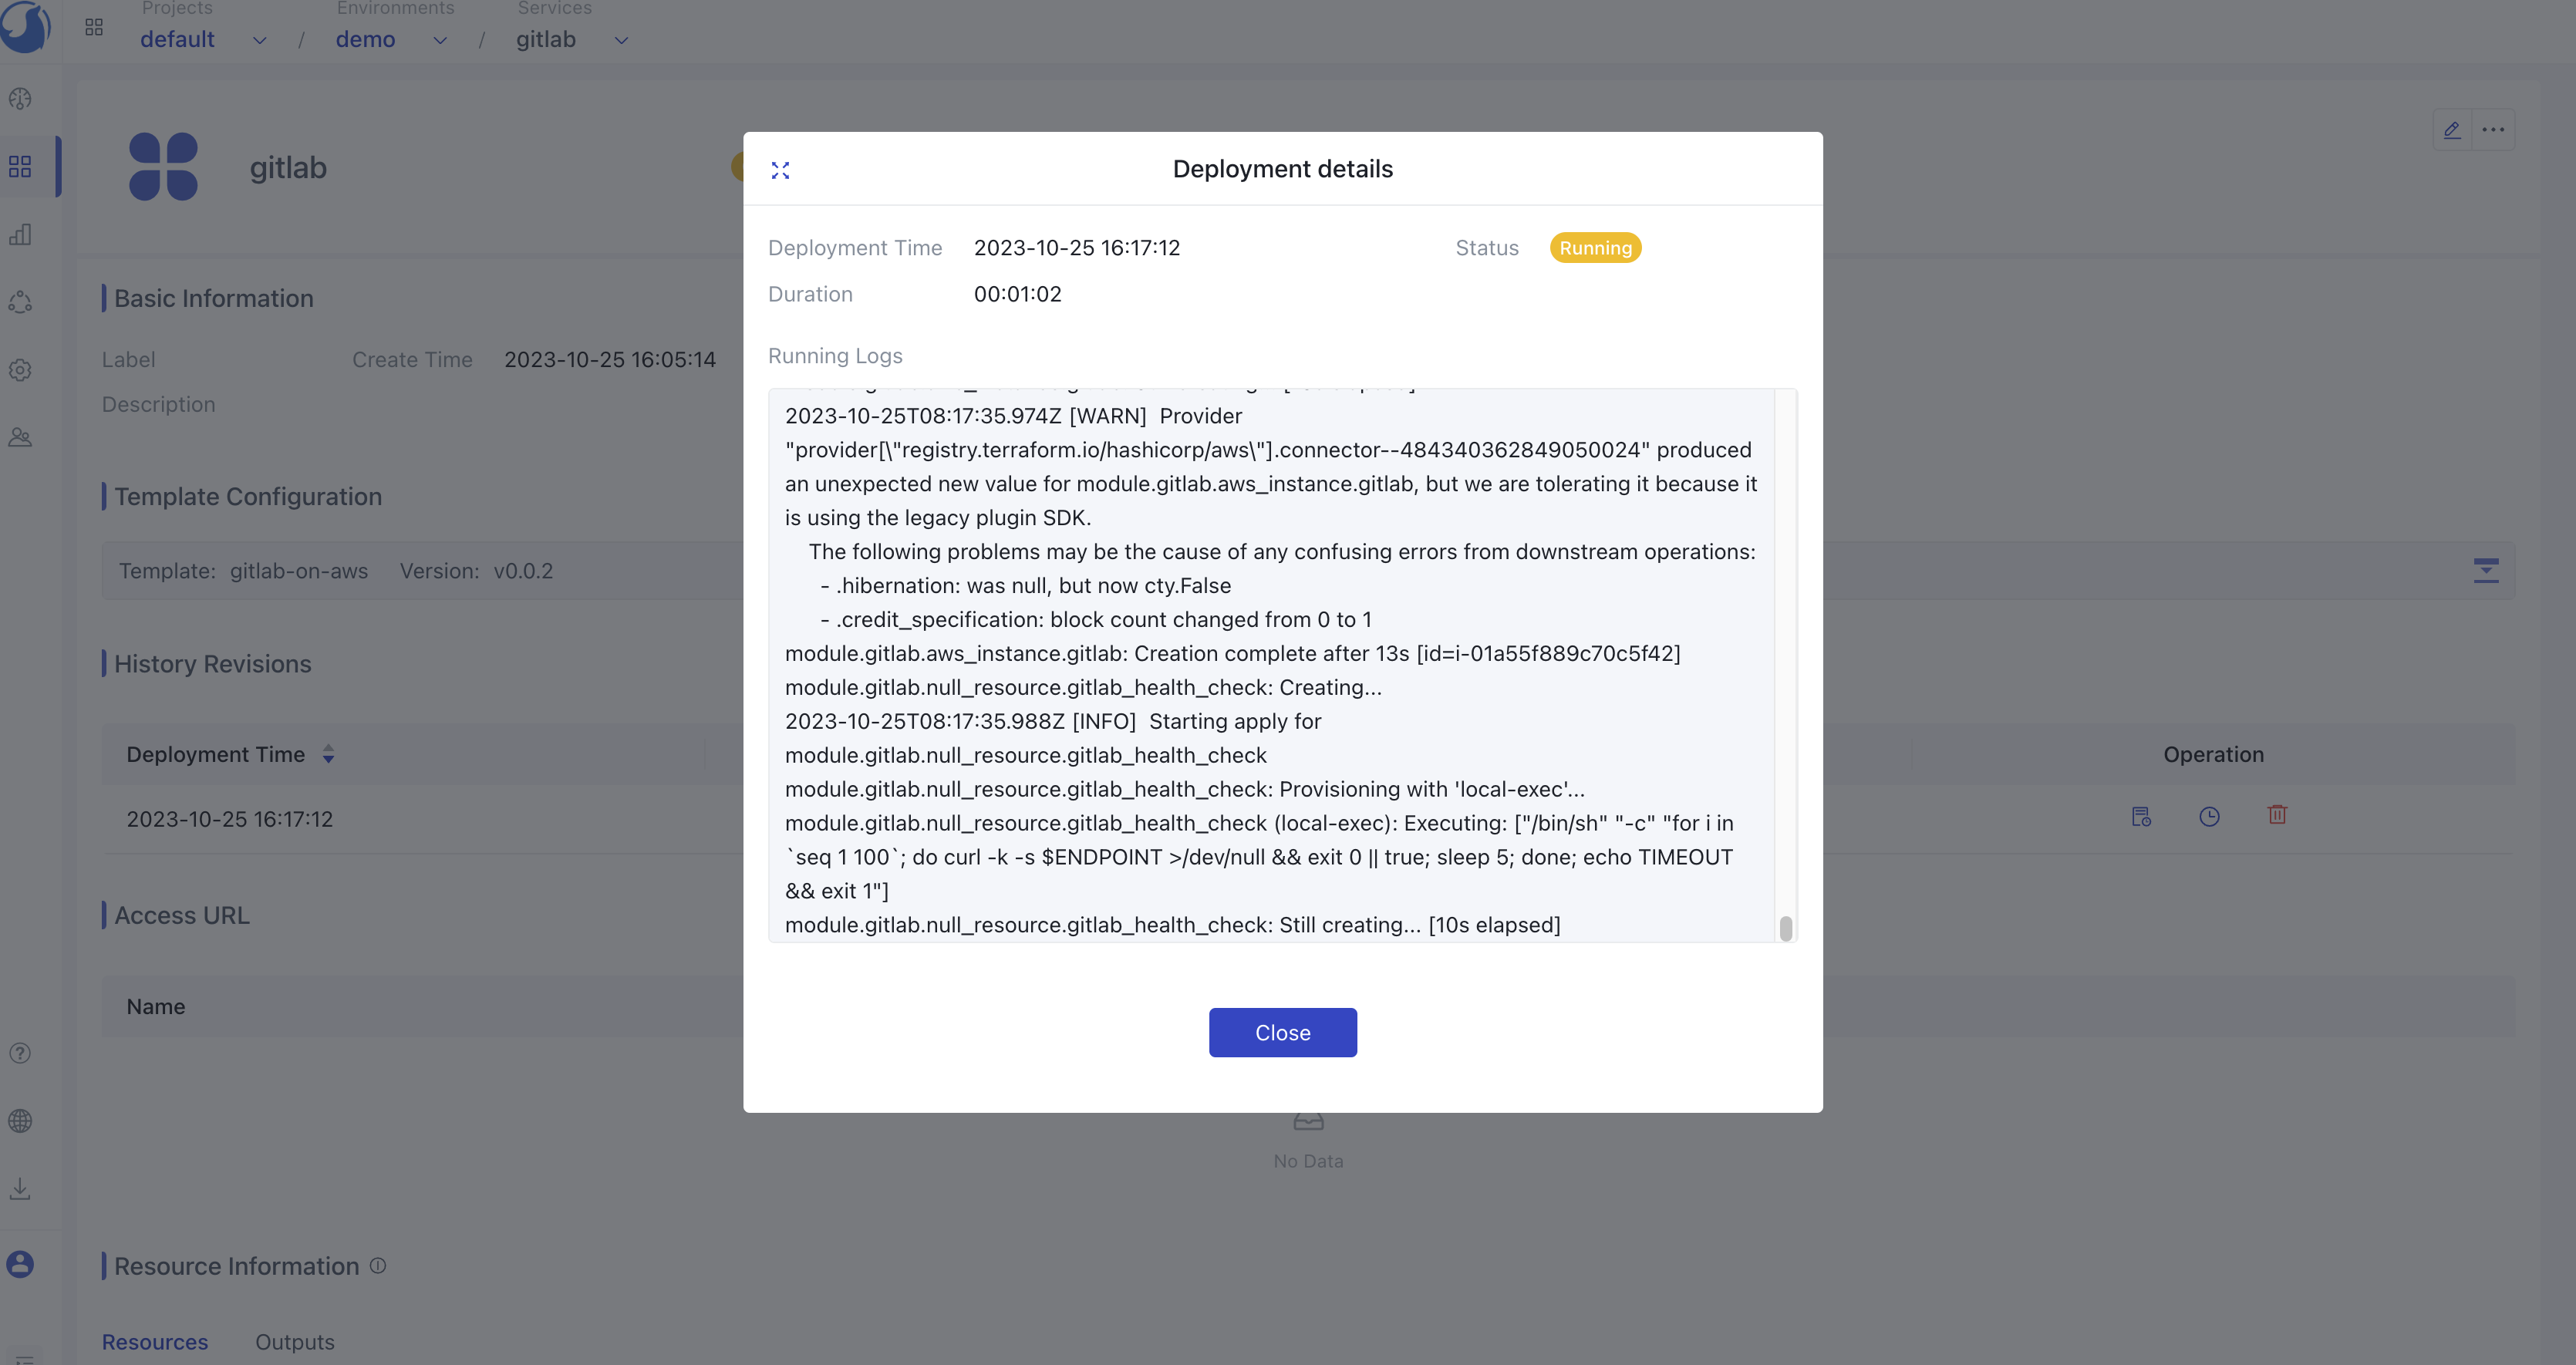
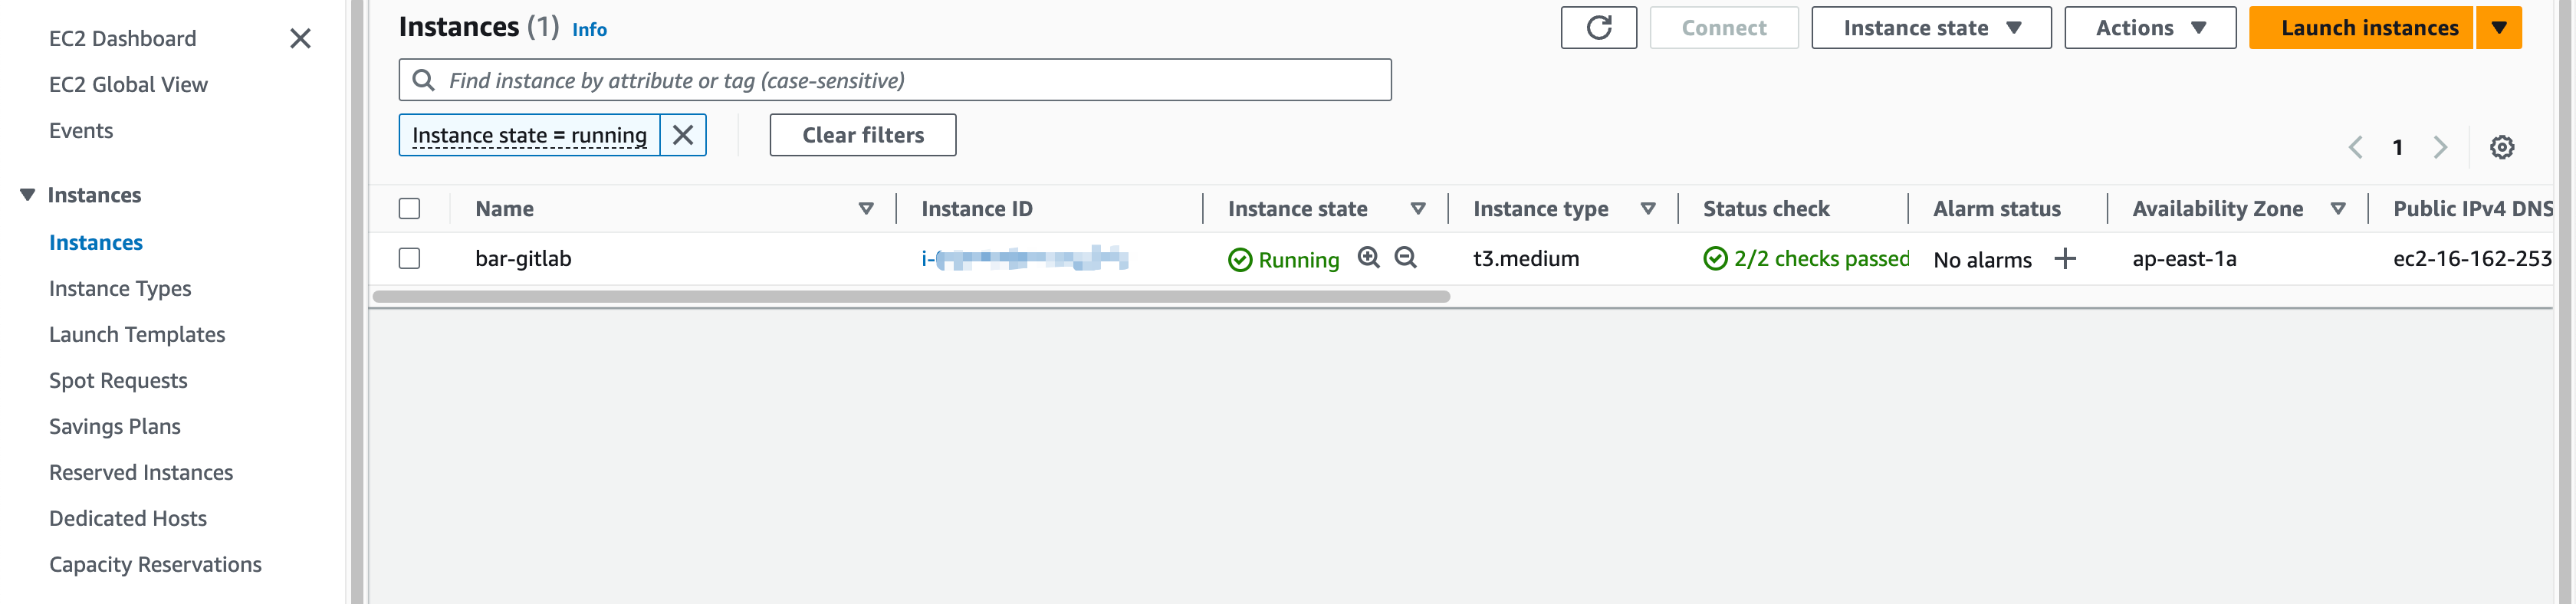
Once the deployment process is complete, the Gitlab instance is successfully provisioned on AWS.
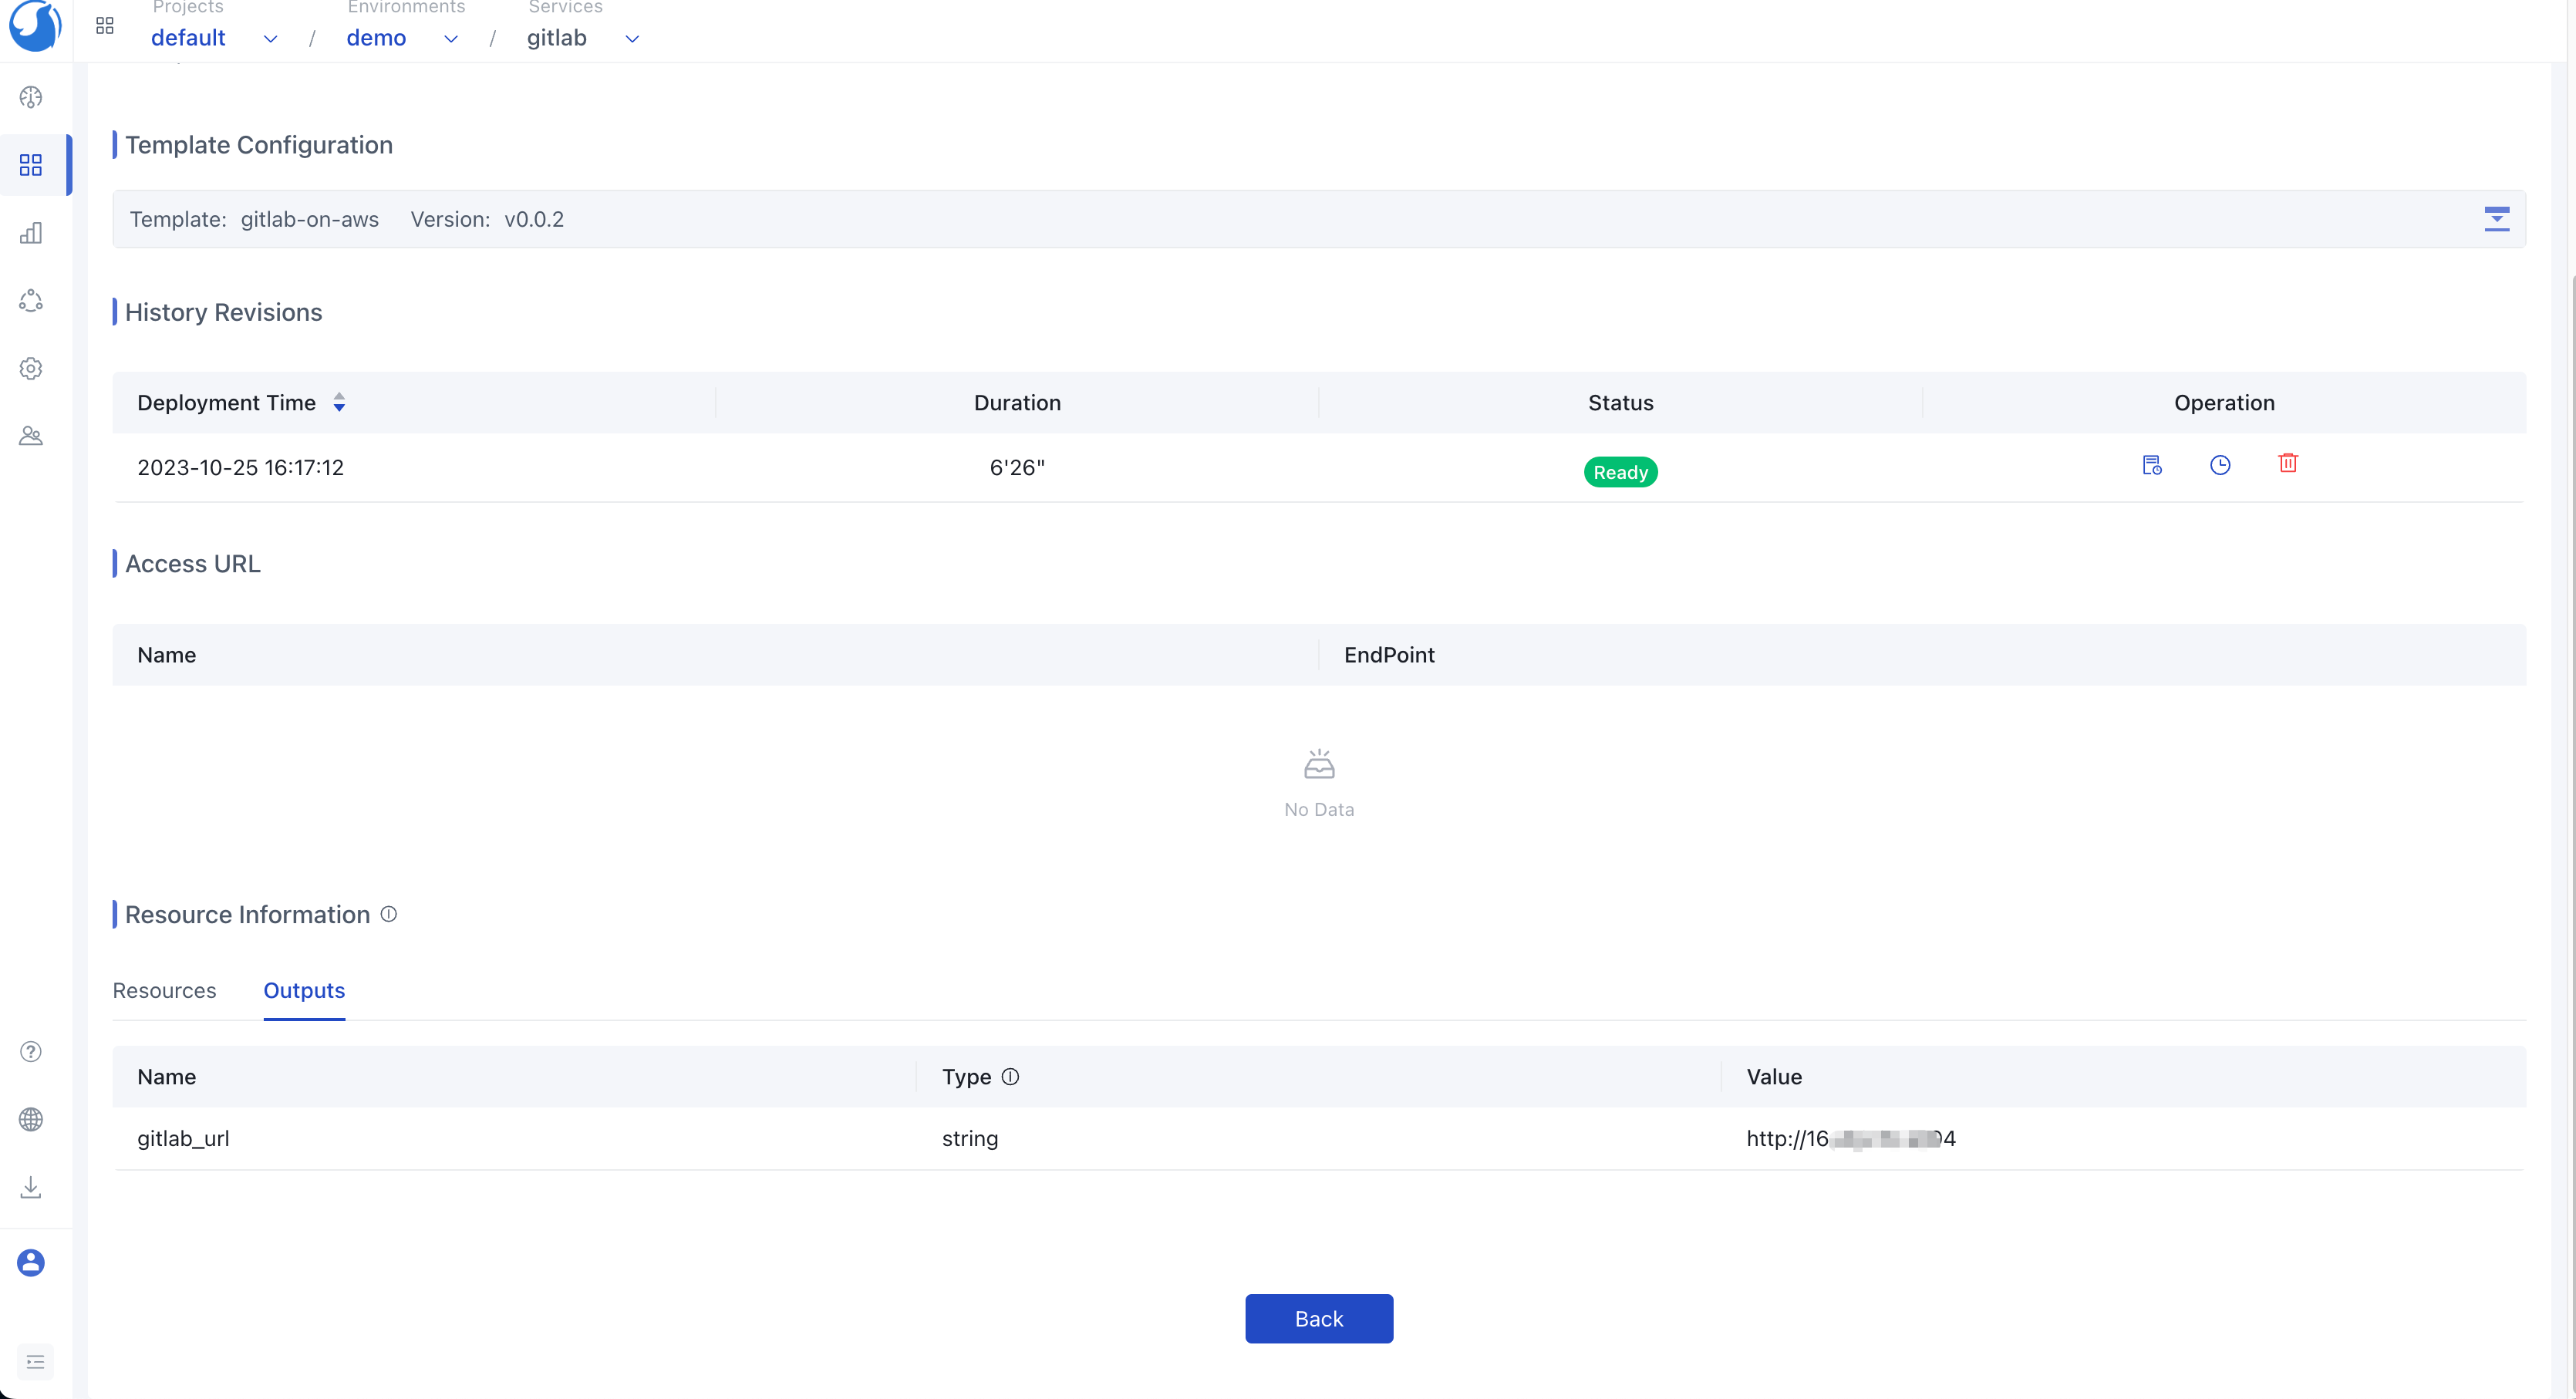
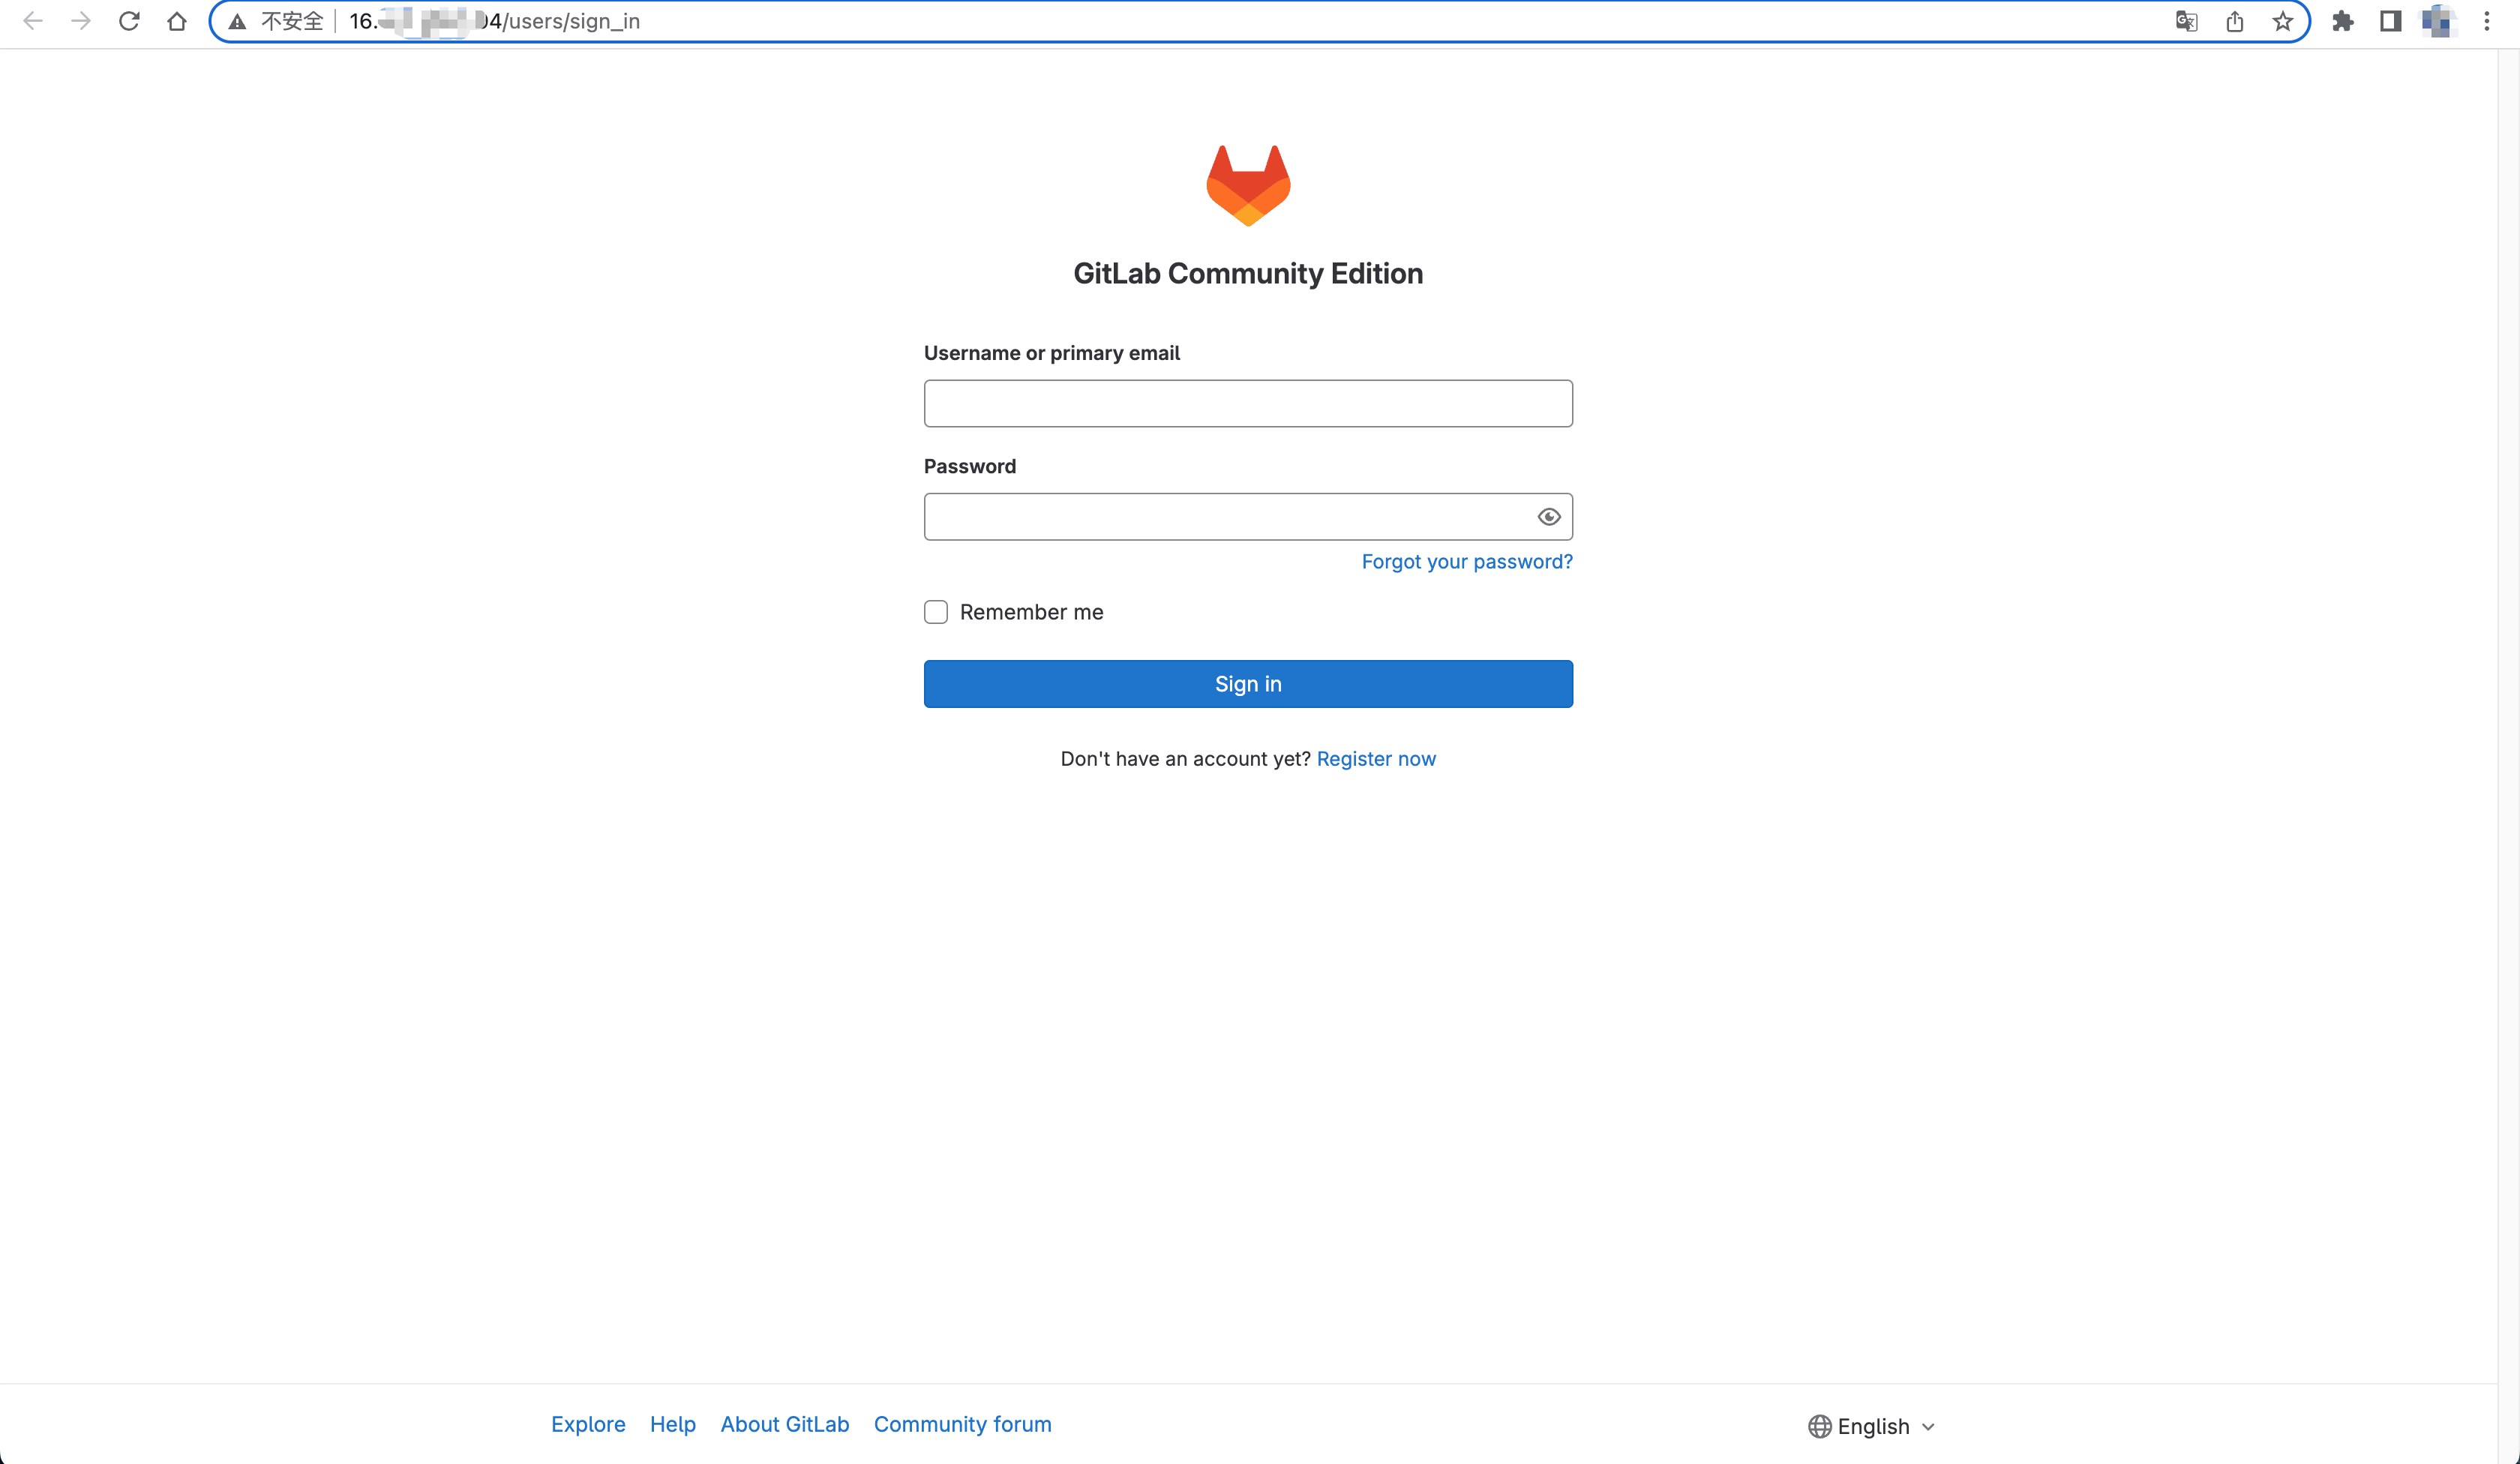
The GitLab URL will be shown in the outputs. Once you have the URL, you can access the GitLab server.
Conclusion
You've just witnessed the entire process of template creation in Walrus, a tool that significantly streamlines the deployment process. Furthermore, Walrus boasts compatibility with a plethora of mature templates from the Terraform community, allowing you to effortlessly adopt best practices with a single click.
We invite you to give Walrus a try and encourage you to seek support on our Discord. Your journey to smoother application management begins here!